Shopify is one of the most widely used commerce platforms in 2024. It offers many features and benefits that make selling online more seamless and efficient. But the question remains, “Can I set up a Shopify store by myself?” The answer is a resounding YES! We’ll tell you how to set up a Shopify store in 13 easy steps.
What is Shopify and How Does It Work?
Shopify is a full-on commerce platform that can manage every aspect of your online or brick-and-mortar business. You can start and grow your business through Shopify’s variety of tools. With Shopify, you can:
- Set up an online store
- Customize your online store
- Sell products on multiple channels, such as social media, online marketplaces, mobile, web, pop-up stores, or brick-and-mortar shops
- Monitor product inventory, payments, and shipping
Since Shopify runs as a cloud-based platform, online business owners don’t need to spend money on hardware or software updates. They don’t have to maintain web servers because they run on multiple cloud-based servers. Entrepreneurs can access their online stores from anywhere, as long as there’s an internet connection.
Why Choose Shopify? Top Shopify Features You’ll Enjoy
Depending on the pricing plan, Shopify offers many tools with benefits you’ll enjoy. These features ensure you run your business flawlessly. Here are some top Shopify features:
- Access to over a dozen free themes with unique functionalities and features. You can choose the customization level that fits your online store.
- Paid themes with more functionalities to ensure an efficient user experience
- Access to paid and free apps to extend your store’s functionality
- Shopify’s Plus Plan lets merchants increase the volume of products they want to sell with minimal third-party transaction fees
- Shopify collaborates with multiple partners worldwide that help users create, grow, customize, and advertise their store
- A reliable 24/7 Customer Support team
- Sell products in person using the Shopify POS app
- Available resources, like the Shopify blog, to help new users in running their store
How to Set Up a Shopify Store
Here’s a guide on how to set up a Shopify store from scratch:
1. Know your goals
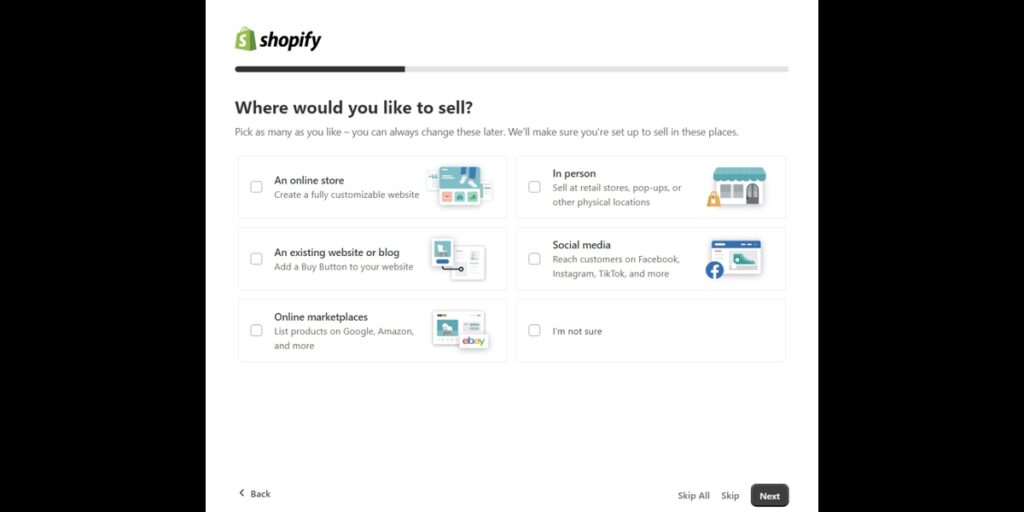
Knowing your goals is crucial to kickstart your business journey, as with any other venture. Understand your goals before setting up your online store or subscribing to a Shopify plan. How do you plan to sell your products? Are you selling your products online or in person? Do you plan to sell the products on multiple social media channels like Facebook? Identifying your goals will help you choose the most suitable plan after your trial period.
You may also find other Shopify users and ask for tips and advice. Additionally, you may want to connect with experts to know about laws and taxes concerning your business.
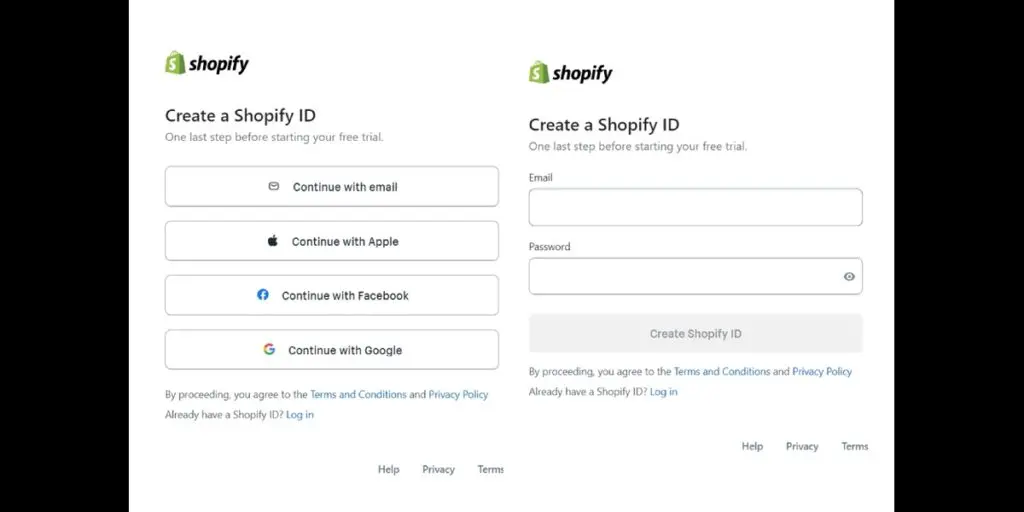
2. Create an account
If you’re creating a new eCommerce store, get a new domain that describes your store. Purchase a domain from Shopify and set this domain as your primary one.
Create a Shopify account and enter vital business details, such as:
- Store name
- Legal business name and address
- Store time zone
- Default store currency
- Default weight unit
- Email address
- Password for your online store
How to enter online store name and legal business name:
- From Shopify admin, select Settings
- Click Store details
- Go to Profile section, select Edit
- Enter online store name and legal business name
- Click Save
How to change business address:
- From Shopify admin, select Settings
- Click Store details
- Go to Billing information section, select Edit
- Enter legal and business address
- Click Save
How to set or change your store’s time zone:
- From Shopify admin, select Settings
- Click Store details
- Go to Time zone and units of measurement section. Choose Time zone list, select your preferred time zone.
- Click Save
How to select a store currency:
- From Shopify admin, select Settings
- Click Store details
- Go to Store currency and click the drop-down menu. Select your preferred monetary unit.
How to set up your home page metadata:
A meta description is vital for search engine rankings. It can entice online buyers to click your eCommerce URL, mainly if you write a complete and concise copy. Here’s how:
- From Shopify admin, go to Online Store
- Go to Preferences
- Go to Title and Meta description section, enter your home page’s meta in both the Homepage title and Homepage meta description
Pro Tip:
Keep your metadata about 140 characters only, as search engines will only display limited characters.
How to format order IDs:
A default order ID is #1001. Although the numbers are automatically generated, you can customize them by adding a prefix or suffix. Here’s how:
- From Shopify admin, select Settings
- Click Store details
- Go to Order ID format section. Select Prefix field, enter any letter, number, or symbols.
- Click Save.
How to add “About us” and “Contact us” details:
- From Shopify admin, click Pages under Online Store
- Select Add page to get to the new webpage editor
- Enter a Title and Content
- Go to the Visibility field, and choose if you want your webpage to be published or not. By default, your webpage will be published. Select Hidden if you want it hidden from your online store.
- Click Set visibility date to control when you want your webpage published.
- Click Save
3. Customize your website’s look
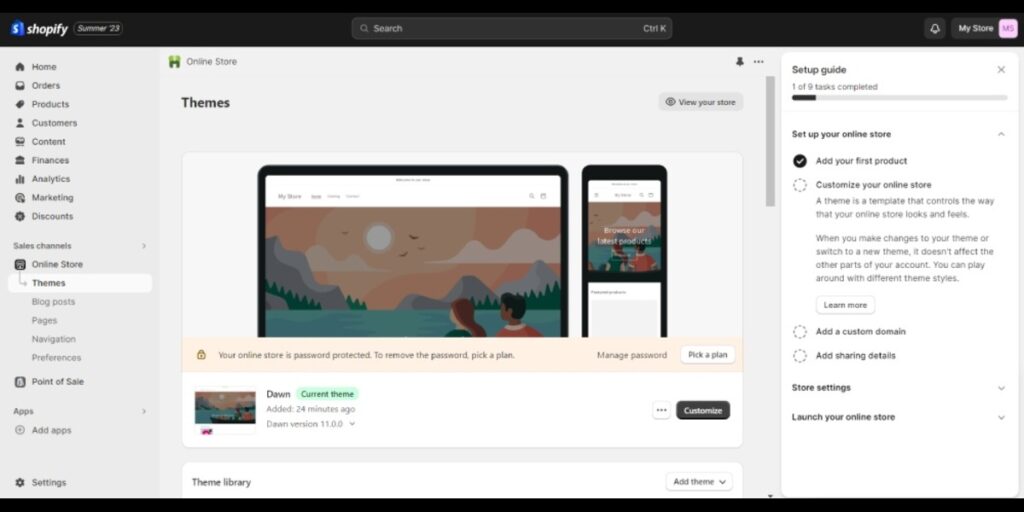
Make your eCommerce store visually appealing by choosing a free or paid theme. A default theme will appear once you create a new Shopify account. But you can change this by getting a free or paid theme.
How to set up a Shopify store using a free theme:
- From Shopify admin, go to Themes under Online Store
- Click Explore free themes from the Free themes section at the bottom of the page
- Click the Add button
How to set up a Shopify store using a paid theme:
- Choose a theme from the Shopify Theme Store
- Click Try theme to see the preview
- Select Buy theme if you want to purchase it
- Click Customize theme if you want to edit it
4. Add new products
Once you’ve set up the basics, you can add the products you want to sell. Take note that product titles and descriptions are vital in conversions. Keep these tips in mind:
- Keep titles and descriptions brief
- Include some keywords on your title for SEO
- Make sure the product title clearly describes what the product is
- Mention your product’s features
- Highlight product benefits in your descriptions
- Determine who your target audience is. This way, you’ll know how to write your copy.
- Make your text easily scannable by adding bullet points.
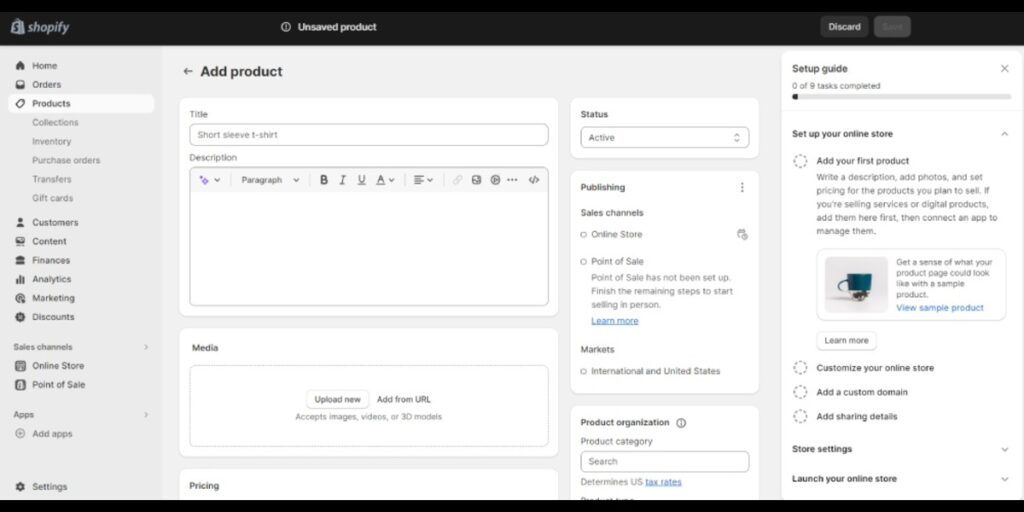
How to add products on Shopify:
- From Shopify admin, go to Products. Click Products page
- From Products page, select Add product
- Enter product details, such as title, description, images, prices, weight, shipping details, etc.
- Click Save
5. Upload product images and other media
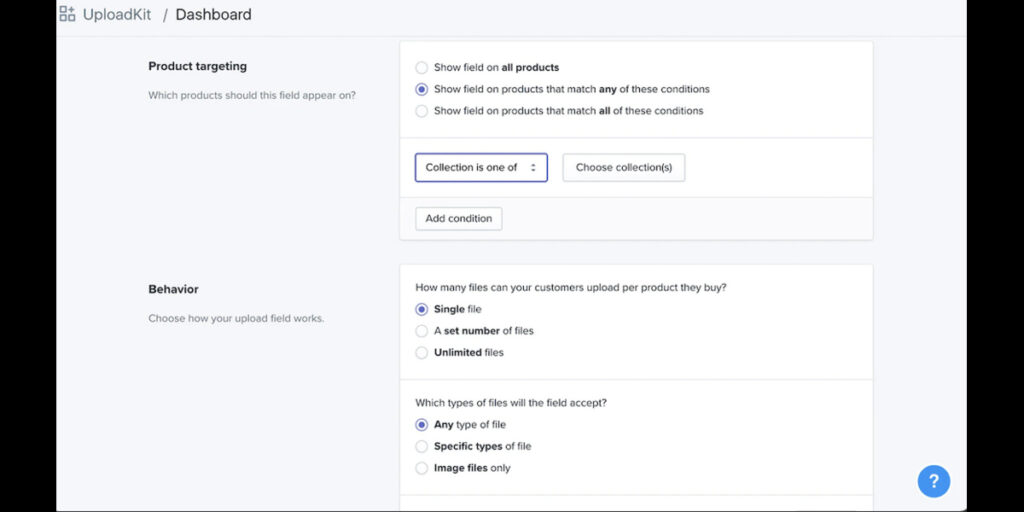
Uploading product images is crucial in learning how to set up a Shopify store. Adding other media, such as video clips of GIFs of the product, also adds to the excellent user experience. Product images are a way to persuade online buyers to add your products to their cart. However, uploading just any image won’t work.
Use high-quality photos to make your eCommerce store more professional. Also, ensure all images have the same ratio to maintain consistency on all product pages.
How to upload images in the theme editor:
- From Shopify admin, select Online Store. Go to Themes.
- Select Customize beside your chosen theme
- Click the drop-down menu to choose the template you want to edit
- From the theme editor sidebar, select the block or section where you want to add an image
- Click Select Image, then upload from your computer or choose a free stock image from Burst by clicking Explore free images
- Select an image to see a preview on your chosen theme. Click Select.
- Click Save
Note: Shopify images must not exceed 25 megapixels and 20 megabytes.
How to add media to your products:
- From Shopify admin, choose Products
- Select the product you want to edit
- Go to Media section and add an image, 3D photo, or video by clicking Add, dragging or dropping the file to the Media section, or clicking Add from URL. Enter the media URL from the video platform and click Add file.
6. Organize your products through Collections
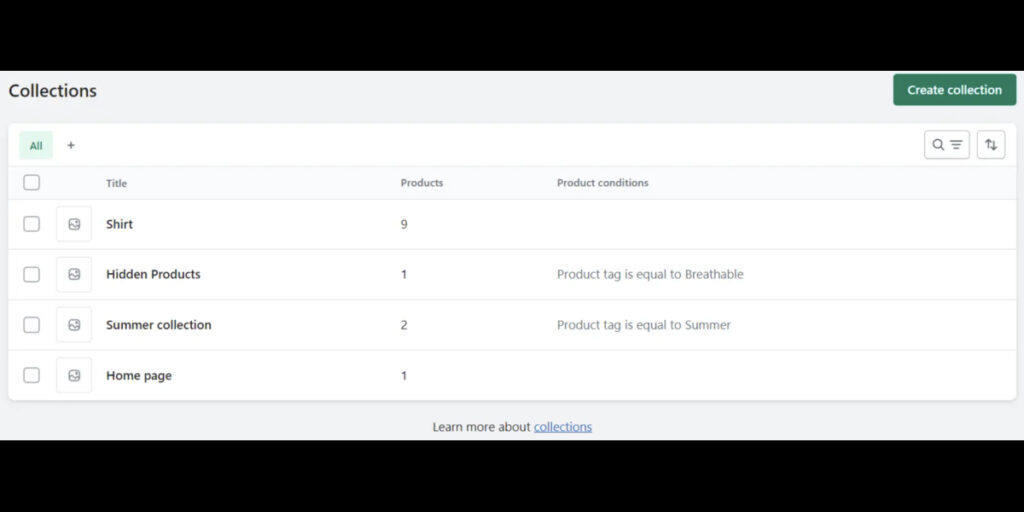
Creating an organized product page helps you get more customers by improving user browsing. You can organize your products through Shopify’s Collections feature.
How to organize products via Collections:
- From Collections page, select Create collection.
- Type the collection’s Title and Description
- Under Sales channels, choose from active sales channels so these collections will be available on your chosen channels.
- Select manual or automatic option when adding products to the collection. Take note that you won’t be able to change this option later.
- If you choose Autommated, add the selection criteria under Conditions.
- If you choose Manual, add products and click Save.
7. Add menu and links
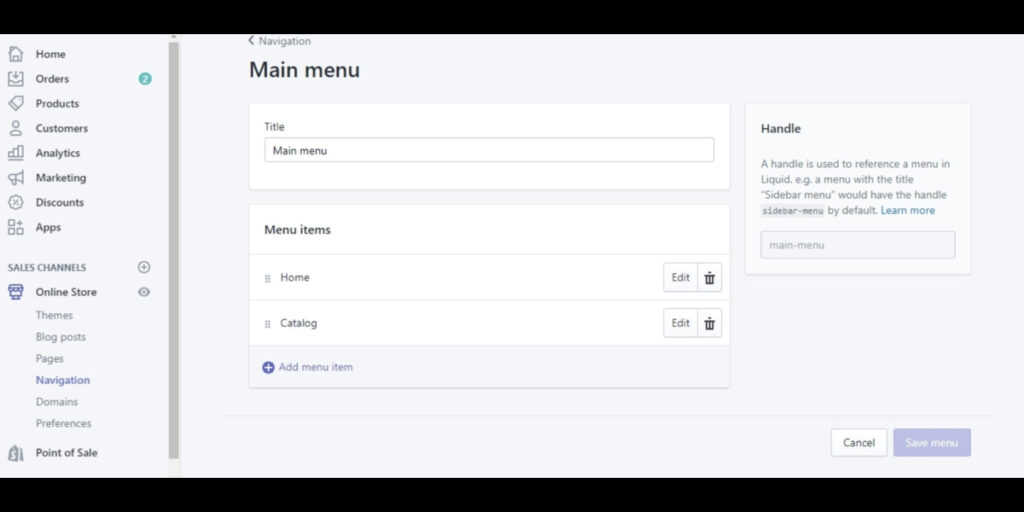
To ensure website visitors will explore your website more, add a menu and links that lead to different pages on your store.
How to add your store’s menu and links:
- From Shopify admin, click Navigation under Online Store
- Click the menu’s name you want to edit
- Click Add menu item
- Two fields will appear. Type the name of the link you want to add in the Name field
- Select link types on the Link field, such as Home page, Collections, Products, Pages, Blogs, Search, Policies, etc.
- Click Save menu
8. Set up your payment method
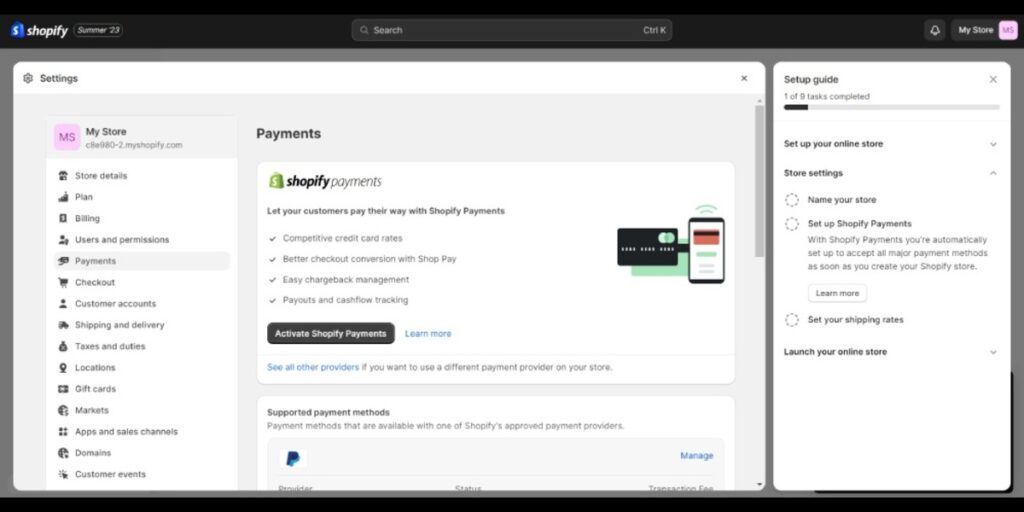
Although Shopify offers multiple payment methods, experts highly recommend Shopify Payments. Before setting this up, check if:
- Shopify Payments is available in your country or region.
- You’ve secured a two-set authentication for your account.
How to set up the Shopify payment method:
- From Shopify admin, click Payments under Settings
- Activate Shopify Payments by clicking Complete account setup in the Shopify Payments if you haven’t set up a payment system. Or click Activate Shopify Payments under the Shopify Payments box. Select Activate Shopify Payments to remove other payment options from your account.
- Enter your store’s details and banking information, and click Save.
- Click Complete account setup.
9. Set up shipping rates and details
It’s crucial to set up shipping methods and rates before launching. Shipping is one of the top reasons for cart abandonment. And you want to ensure you value transparency regarding additional fees. You can set up flat or calculated shipping rates.
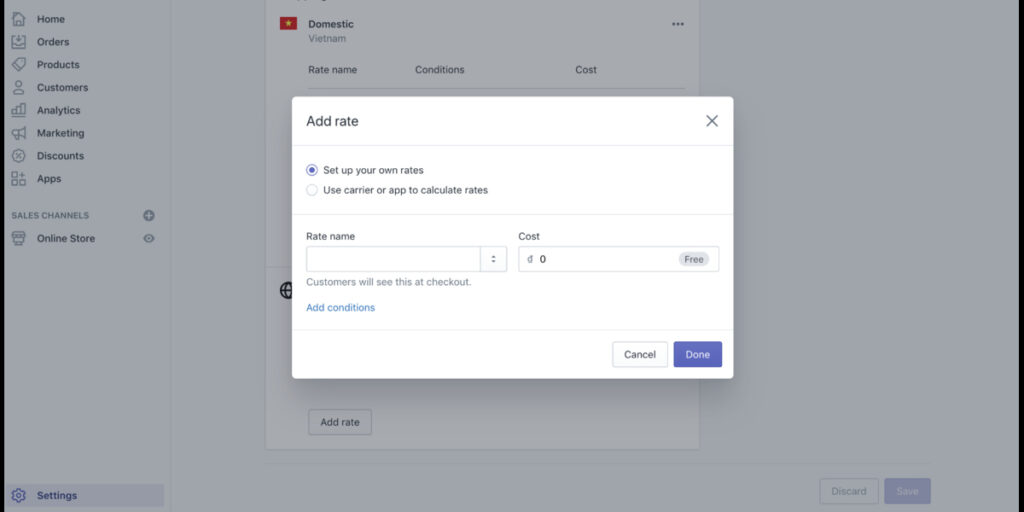
How to set up Shopify flat shipping rates:
- From Shopify admin, go to Shipping and delivery under Settings
- Choose the shipping profile in the Shipping section
- Click Add rate
- Select the transit time and custom flat rate. You can add weight-based or price-based options.
- Click Done
- Click Save
How to set up Shopify calculated shipping rates:
- From Shopify admin, go to Shipping and delivery under Settings
- Choose the shipping profile in the Shipping section
- Click Add rate
- Click Use carrier or app to calculate rates
- Choose the shopping service from the drop-down menu
- Select the shipping methods in the Services section
- You can opt to offer new services in the Future Services section or add handling fees in the Handling Fee section
- Click Done
- Click Save
10. Add store policies
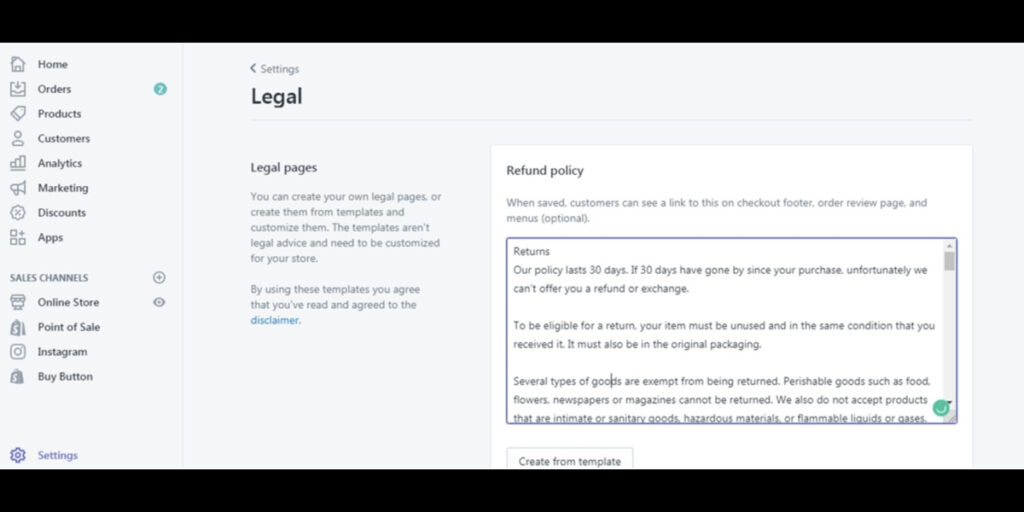
Setting up a Shopify store must include the policy on returns, refunds, exchanges, privacy, security, and terms of service. Knowing how to set up a Shopify store’s aesthetic aspect isn’t enough. You must ensure your website shows credibility by providing users with store policies to protect them.
How to add store policies:
- From Shopify admin, select Policies under Settings
- Enter store policies or click Create from template to choose the default template. Add style, format policies, add links and images in the rich text editor.
- Review store policies, and edit.
- Click Save
11. Set up your taxes
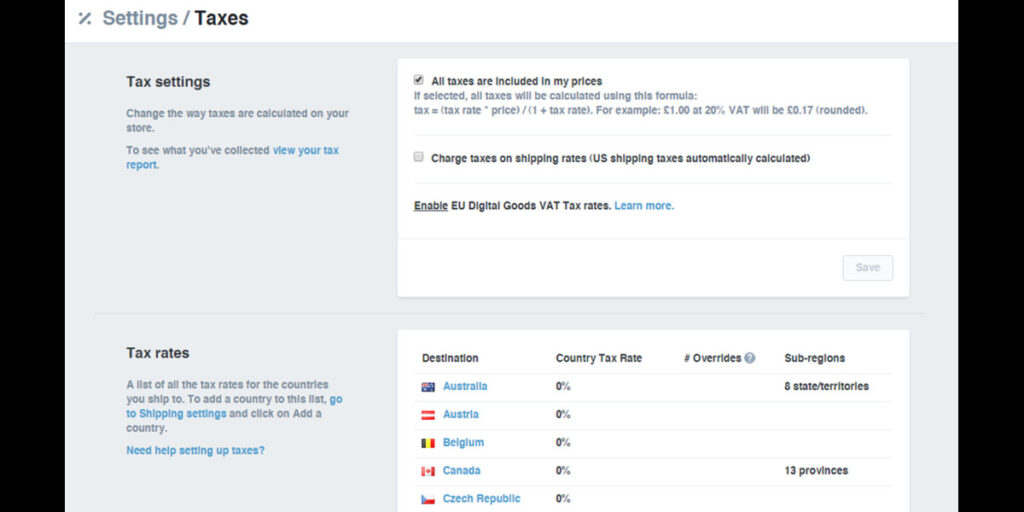
Before setting up your taxes, register your business to get your tax number. Then follow these steps:
- From Shopify admin, go to Taxes and duties under Settings
- Select your country or region in the Manage sales tax collection section
- Click Collect sales tax
- Enter your tax number. You can leave this field blank while waiting for your tax number
- Click Collect tax
12. Place a test order
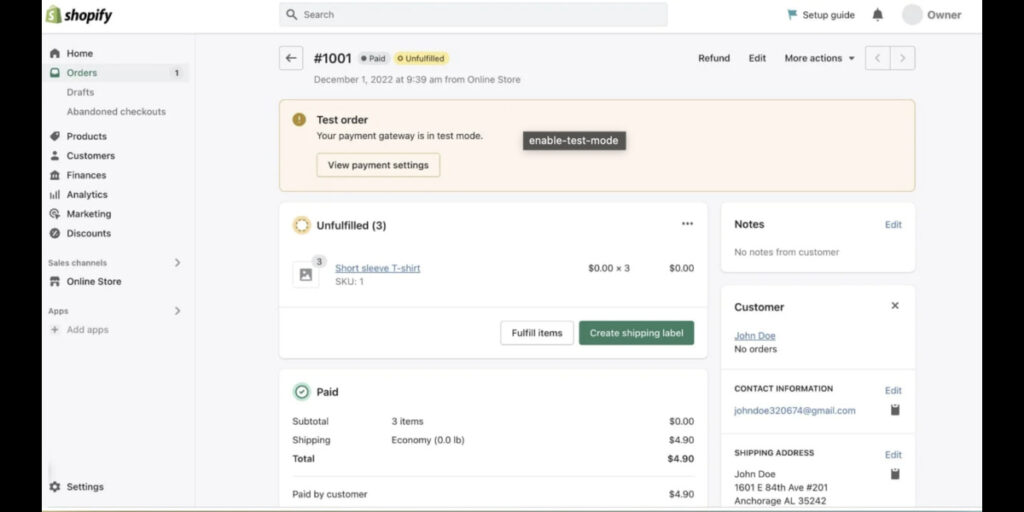
The last step in creating a Shopify store is placing a test order to ensure the checkout process, order processing, shipping, inventory, and taxes are working correctly. Enable the test mode first by following these steps:
- From Shopify admin, go to Payments under Settings
- Click Edit in the Shopify Payments section
- Check Use test mode
- Click Save
Note: You can place a simulated test order or a real one.
13. Remove your online store’s password
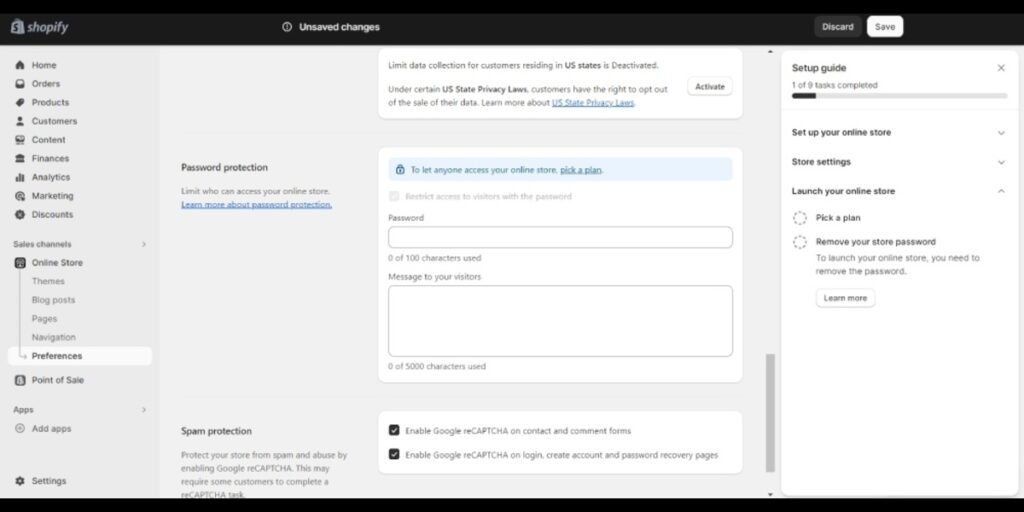
Before launching, remove your online store’s password so your website is open to the public. You can remove your Shopify online store password in two ways.
How to remove your online store password from the Themes page:
- From Shopify admin, go to Themes under Online Store
- Click Remove password if you see a banner saying, “Your online store is password protected. Otherwise, it means your online store isn’t password protected.
How to remove your online store password from the Preferences page:
- From Shopify admin, go to Preferences under Online Store
- Uncheck Restrict access to visitors with the password option in the Password protection section
- Click Save
Frequently Asked Questions (FAQs)
Do I need to be a designer or developer to use the Shopify platform?
No. Shopify’s interface is easy, and you can use ready-made templates and customize the look and feel of your online store.
How much does it cost to start a Shopify store?
You can try Shopify for three days for free with no credit card required. Once the trial expires, you can select the most suitable pricing plan for your online business.
Can I use my existing domain with Shopify?
Yes. You can use an existing domain name by connecting to your Shopify website from the Shopify admin.
Is it easy to sell on Shopify?
It’s easy to sell your products on Shopify if you create a user-friendly website, write compelling product descriptions, use high-quality product images, and blast promotional efforts.
About the author

Table of Contents
- What is Shopify and How Does It Work?
- Why Choose Shopify? Top Shopify Features You’ll Enjoy
- How to Set Up a Shopify Store
- 1. Know your goals
- 2. Create an account
- 3. Customize your website’s look
- 4. Add new products
- 5. Upload product images and other media
- 6. Organize your products through Collections
- 7. Add menu and links
- 8. Set up your payment method
- 9. Set up shipping rates and details
- 10. Add store policies
- 11. Set up your taxes
- 12. Place a test order
- 13. Remove your online store’s password
- Frequently Asked Questions (FAQs)
- Do I need to be a designer or developer to use the Shopify platform?
- How much does it cost to start a Shopify store?
- Can I use my existing domain with Shopify?
- Is it easy to sell on Shopify?