TL;DR: For landing pages to get positive results, they should include one clear goal, use strong headlines, and guide visitors effectively. Here are the steps you need to take to achieve them all.
For those who don’t understand the power of a landing page, it’s as simple as this: it is the bridge that connects traffic to actual revenue. Landing pages can capture leads, promote campaigns, and measure ROI. This is why many businesses invest in custom landing page design services to craft designs that offer maximum impact. Here’s a step-by-step guide to help you:
Step 1: Define the One Goal You Want Your Landing Page to Achieve
One of the biggest mistakes you can commit when creating landing pages is trying to convert as many visitors as you can in too many ways all at once. When you ask your users to sign up, book a demo, download a guide, and buy all at the same time, you’re creating confusion.
To avoid this, you need to identify a single conversion goal. This can be a sign-up, a demo booking, a purchase, or a download. Align your designs and copy with that objective. Make sure your headlines, visuals, and CTAs (calls to action) point toward the same action to create a clear path for your viewers.
In addition, avoid adding extra distractions such as navigation links, unrelated offers, or competing CTAs. A good way to test this is to ask: Does this element help the visitor take the action I want? If the answer is no, it has no space on your landing page.
That said, this is primarily why many brands use custom landing page or web design services. These platforms understand that every detail in your page should support your main goal, keeping them simple and conversion-driven.
Get Unlimited Landing Page Designs
Outsource all your design needs to the pros

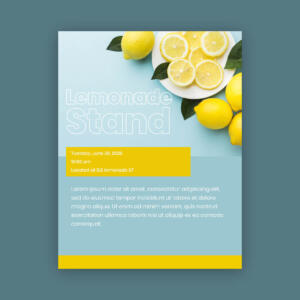


Step 2: Write a Headline That Instantly Grabs Attention
Website visitors have only seconds to decide whether to stay or leave. A strong headline has the capability to make them stay longer, as it is the first thing that greets them. Focus on clarity and value when writing it, effectively communicating the main benefit of your offer.
Below are a few best practices:
- Problem>Solution: Show you understand their pain points and provide relief.
- Outcome-focused promise: Highlight the result users will achieve.
- Data-driven claims: Use numbers or proof to build credibility.
Custom landing page design services typically blend compelling messages with visual hierarchy to ensure that your headline stands out. Additionally, they craft designs that naturally direct attention to your CTA. This alignment of copy and design is the recipe for truly conversion-focused headlines.
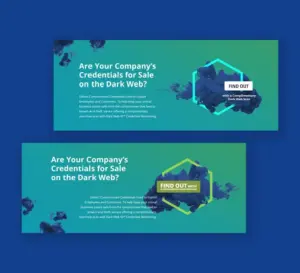
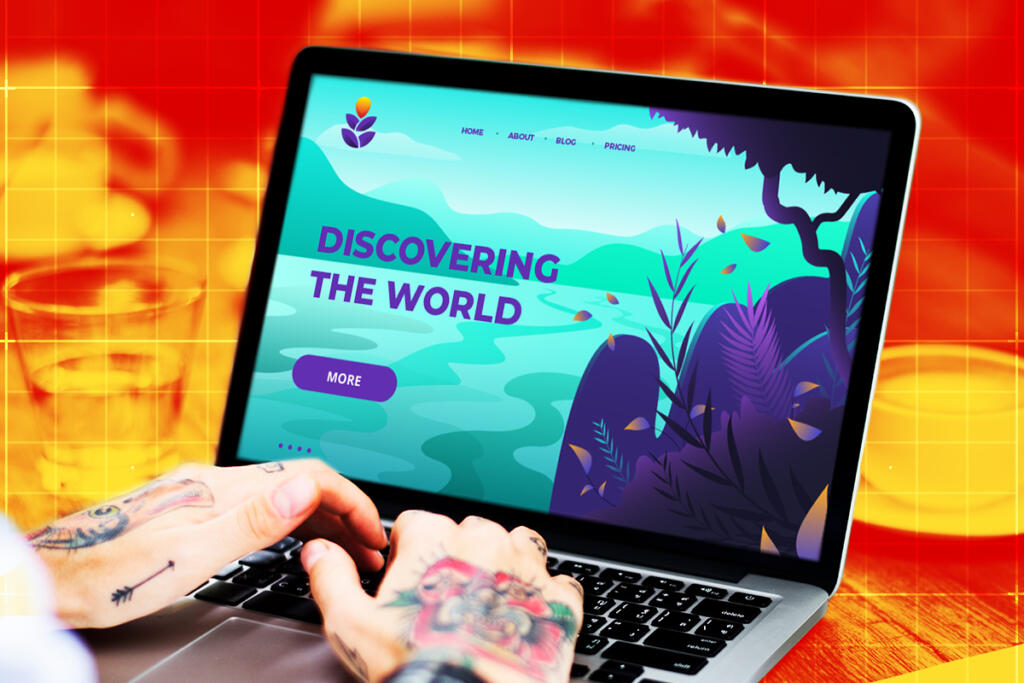
Step 3: Design a Clear and Compelling Visual Hierarchy
As mentioned above, a compelling visual hierarchy is essential to guide your viewers’ eyes toward your CTA. Follow these techniques:
- F-pattern and Z-pattern scanning: Place your headlines, hero images, and CTAs where visitors would naturally look.
- Strategic placement: Position your headline at the top, then place a strong hero image, and keep your CTAs visible without scrolling.
- Whitespace: Use negative space to reduce clutter and improve readability.
- Typography hierarchy: make your headlines bold, subheads supportive, and body text easy to skim.
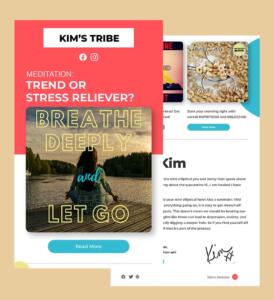
Step 4: Use High-Impact Designs to Reinforce Your Message
It’s a fact: humans process images faster than text, that’s why the right visuals can immediately build trust and credibility for your brand. You can consider using the following:
- Product images vs. lifestyle imagery: Show your product in action or focus on the lifestyle it enables.
- Screenshots for SaaS: Show features clearly to avoid confusion.
- Explainer graphics: Always go for easy-to-digest visuals.
- Trust-building visuals: Logos, testimonials, or certifications to reassure your viewers.
Step 5: Write a Call-to-Action That’s Impossible to Ignore
One excellent conversion trigger is your CTA. It is the exact moment your visitors choose to act. This is why you need to make them impossible to ignore by using action-oriented language such as “Get the Guide” or “Start Your Free Trial.” Use a button with a contrasting color so the CTA stands out even more.
Also, placement is as important: keep your CTA above the fold and repeat it strategically throughout the page, catching your viewers at different decision points. As an advanced touch, add microcopy like “No credit card needed.” This reduces friction while reassuring hesitant visitors.
Step 6: Build Trust with Social Proof
Before committing, visitors will need reassurance, thus, trust signals are essential in your landing page design. They turn hesitation into action, where even the best design and copy can fail. Include the following:
- Testimonials: Real voices from happy customers.
- Client logos: Recognizable brands that validate your credibility.
- Case study highlights: Proof of measurable outcomes.
- Ratings and reviews: Social proof that builds confidence.
- Security badges and guarantees: Reduce risk and reassure visitors.
Note that strategic placement plays a significant role in this. This is why custom landing page design services often position trust signals near the CTAs or conversion points. This allows users to see them exactly when they’re deciding.
Step 7: Optimize for Speed
Some issues may seem small, but they can still hurt conversions, so be careful of what you ignore. Slow load times, clunky forms, or poor mobile layouts may seem insignificant, but they can drive away visitors. Your landing page should be easy to use. Include the following when you optimize your page:
- Mobile optimization: Your page should adapt to smaller screens.
- Fast load times: Compress images to keep users engaged.
- Simple forms: Fewer fields mean higher completion rates.
- Distraction-free layouts: Clear navigation and less clutter to keep the focus on the CTAs.
Step 8: Test and Improve
You need to test your landing page’s performance, not just once, but continuously. This is the only way to know whether your efforts are bearing fruit, which parts to improve, and which to remove. Try the following:
- A/B testing headlines: Compare variations to see which attracts attention better.
- Testing CTA placements: Experiment with positioning to see which works best.
- Adjusting visuals and messaging: Swap images or reframe copy to see which boosts engagement.
- Monitoring analytics and heatmaps: Track where users click, scroll, or drop off.
Final Thoughts
Like all things in business, a successful landing page doesn’t happen by accident. It is a combination of strategy, psychology, and great design, all aimed at guiding a web visitor toward a single action. While the steps listed above can help you create the best landing page for your business, it’s always a good thing to get help from experts.
Penji is a design-as-a-service platform that offers unlimited graphic design services for fixed monthly rates. You can submit as many custom landing page design services as you need in a month. Unlimited revisions are included. among many other benefits. Watch our demo video here to see how Penji can create the best landing page designs. Click here to send your first design request today.
FAQs
A homepage is where you introduce your brand, while a landing page is where you place a specific goal: to have visitors sign up, purchase, download, and more.
Design impacts user behavior. When you use strategic layouts, visuals, and CTAs, you’re guiding your viewers toward your desired action.
Yes. But there are no guarantees with the results. A landing page design requires expertise and experience, which you can find in design-as-a-service platforms or unlimited graphic design services.
About the author

Celeste Zosimo
Celeste is a former traditional animator and now an SEO content writer specializing in graphic design and marketing topics. When she's not writing or ranking her articles, she's being bossed around by her cat and two dogs.
Table of Contents
- Step 1: Define the One Goal You Want Your Landing Page to Achieve
- Step 2: Write a Headline That Instantly Grabs Attention
- Step 3: Design a Clear and Compelling Visual Hierarchy
- Step 4: Use High-Impact Designs to Reinforce Your Message
- Step 5: Write a Call-to-Action That’s Impossible to Ignore
- Step 6: Build Trust with Social Proof
- Step 7: Optimize for Speed
- Step 8: Test and Improve
- Final Thoughts
- FAQs