It takes a few minutes to set up an online store nowadays. As a new seller, you have various options, such as Amazon, eBay, Facebook Marketplace, and more! However, your online store needs a website to expand its online presence. One of the best places to launch your online store is Shopify! How can you get started on Shopify to sell your products on the eCommerce platform? Here’s our guide on how to sell on Shopify!
1. Prepare Requirements to Set Up Shop
You want a seamless sign-up to launch process with Shopify. That starts with preparing your business name, product images, copy, business, and tax-related files (for select territories only). Plus, make sure that you have social media pages ready for your online store.
Shopify has all the tools to help you register your business name without leaving the site.
However, you need other software apps to create your copy or enhance your product images to persuade your target audience to buy from your online store. For example, you can edit your photos on graphic design software apps. Meanwhile, you can create product descriptions and other necessary copies from scratch or use AI tools to generate text!
Plus, if you own an online store in the US, UK, Canada, Australia, and other tax-required territories, you need to input your tax number. From there, you can set taxes on products.
Once you have these completed, it’s time to sign up on Shopify!
2. Sign Up on Shopify
Currently, new online site owners can register with a free trial, so click on the Free Trial button on the homepage. Then, supply the following details:
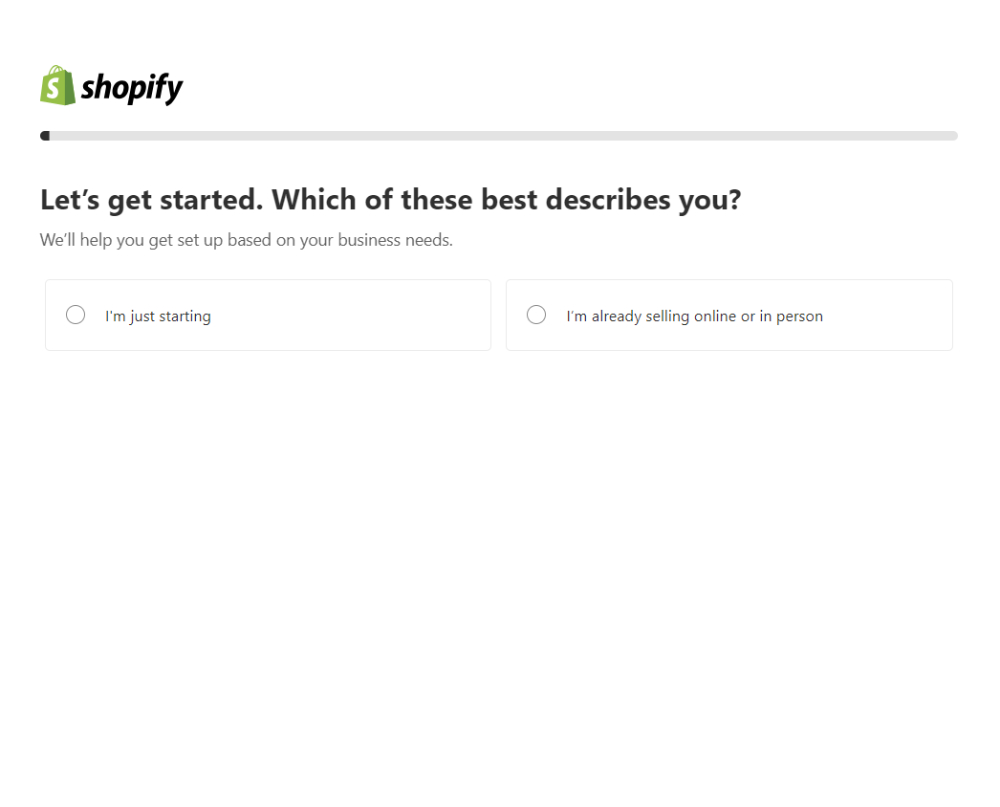
1. Online Store Description
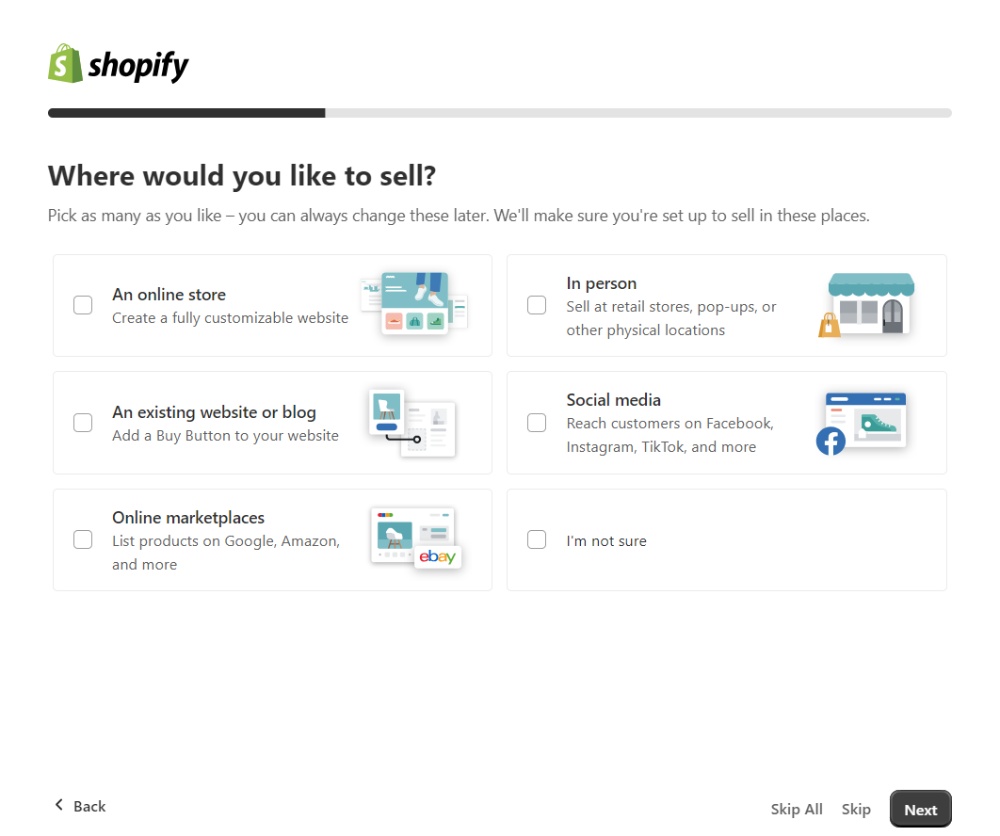
2. Where Would You Like to Sell?
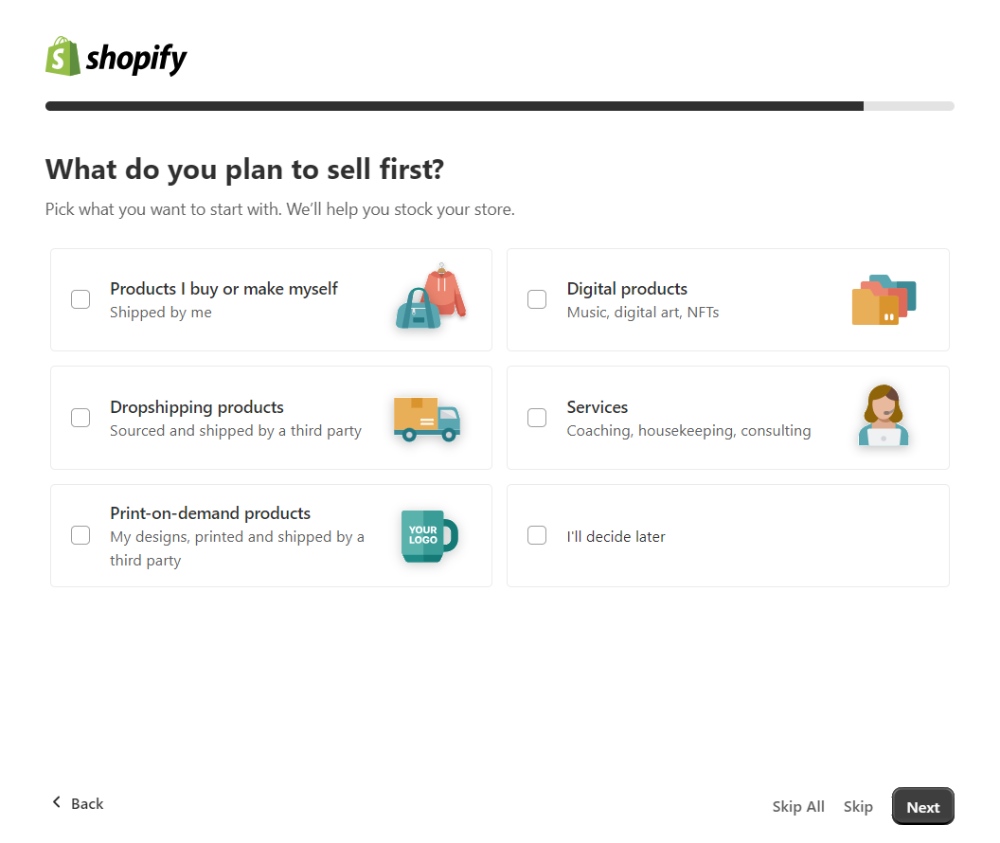
3. What Do You Plan to Sell?

4. Choose Where You’ll Sell Items
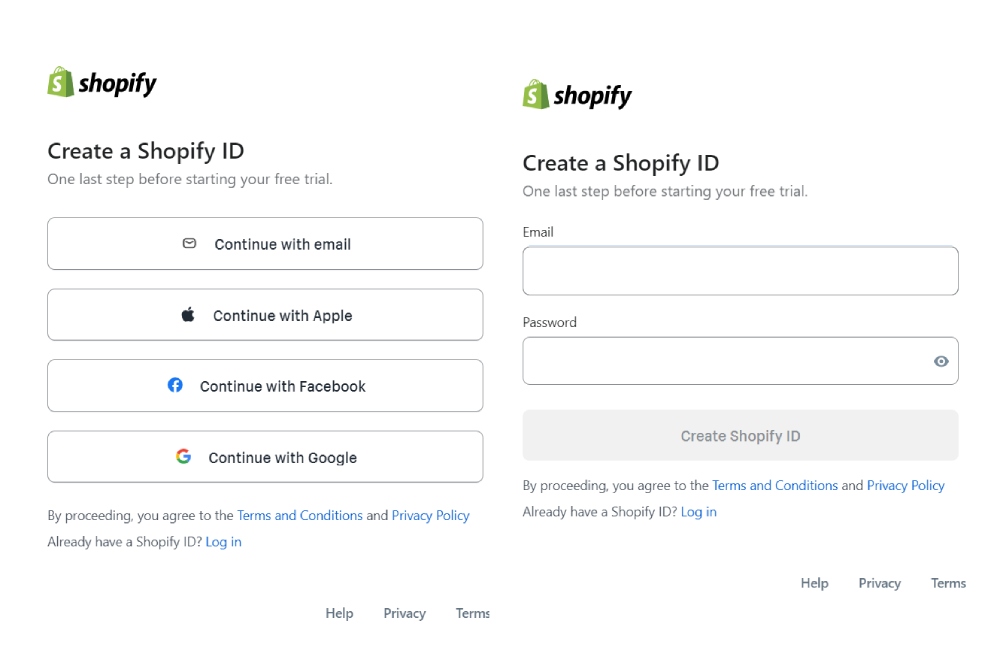
5. Select the option of how to create a Shopify ID. Then, enter your email address.
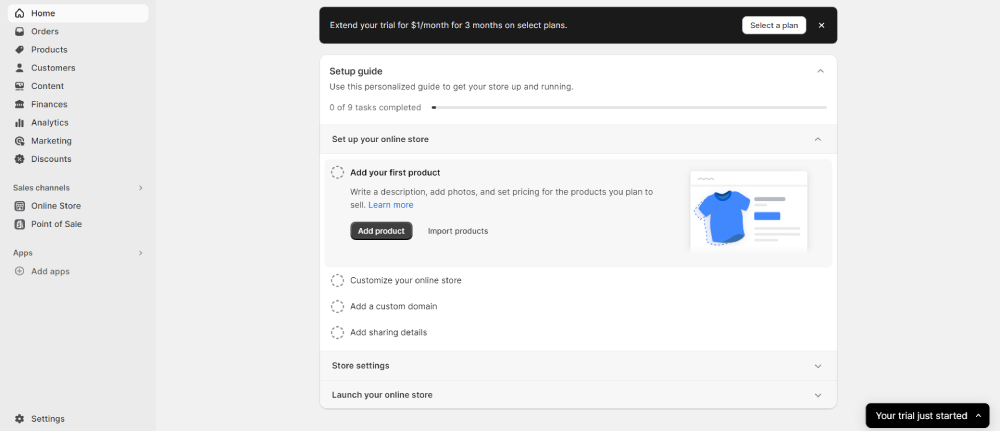
6. From there, you’ll see your Admin panel.
3. Add Products
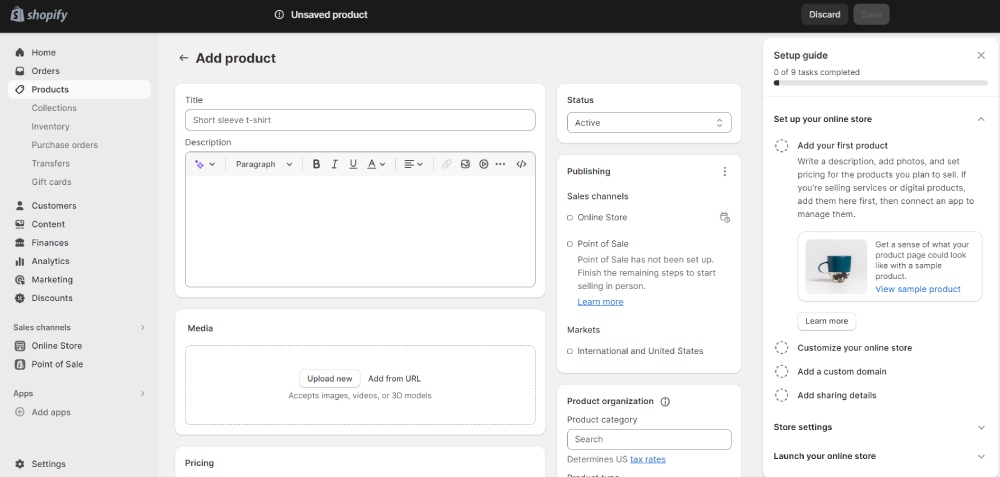
You have various customization options once you open your Shopify account. You can start by posting your products! This part can take a long time. However, if you’ve already prepared everything, you should be good to go! At this stage, you need to fill out details like:
- Title
- Description
- Status
- Pricing
- Inventory
- Shipping
- Variants
- Sales channels
- Product category, type, vendor, collections, tags
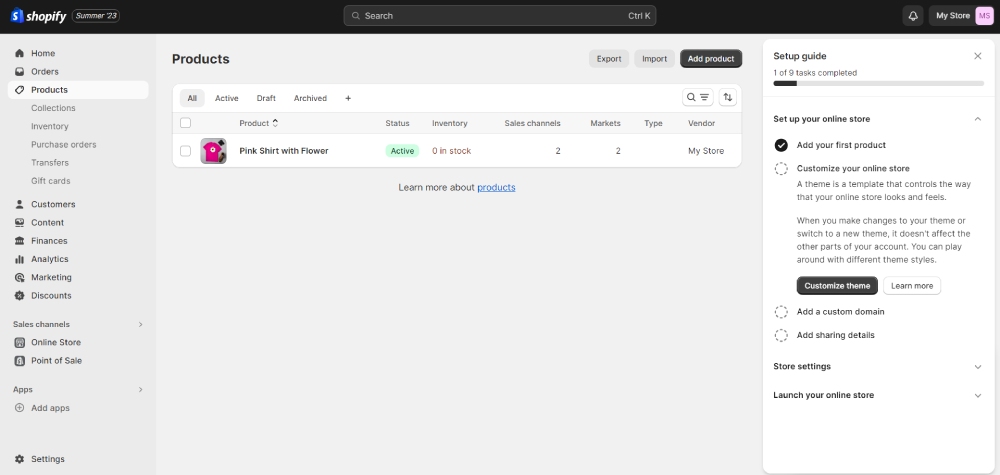
Once you finish this, you can see your products under the “Products” section.
4. Design and Customize Your Site
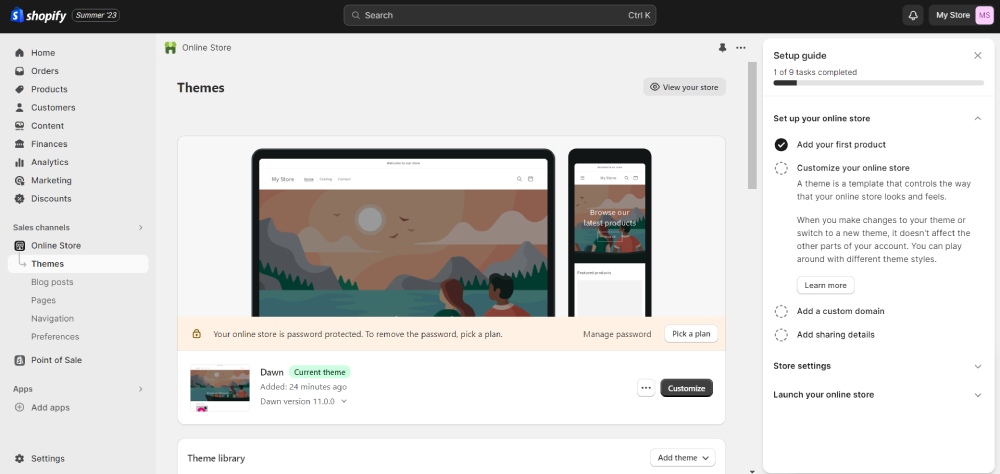
If you’re still in the setup stage, this should be the next step. However, if you don’t have the setup guide handy, don’t worry. Here’s how you can customize your site. Under “Online Store,” click Themes, and you can edit your store there!
Scroll down to choose other themes or click the Customize button if you want to stick with the default theme: Dawn.
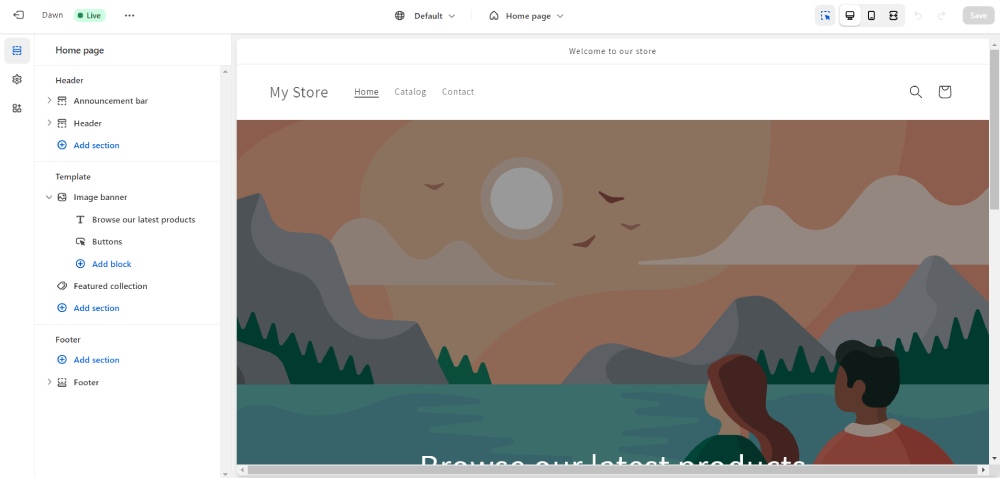
If you’re editing your store, here’s what the editor looks like. You can edit your background, header, footer, and so much more!
5. Add a Custom Domain
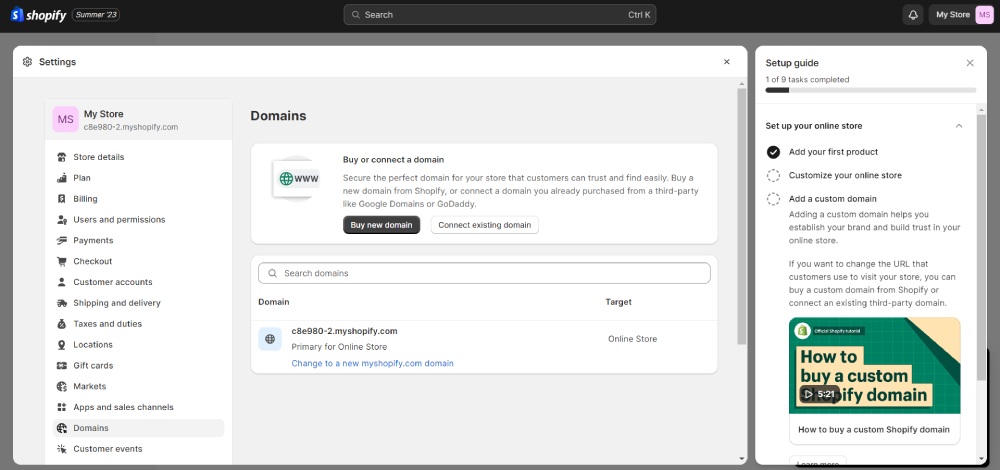
Your Shopify store needs a custom domain!
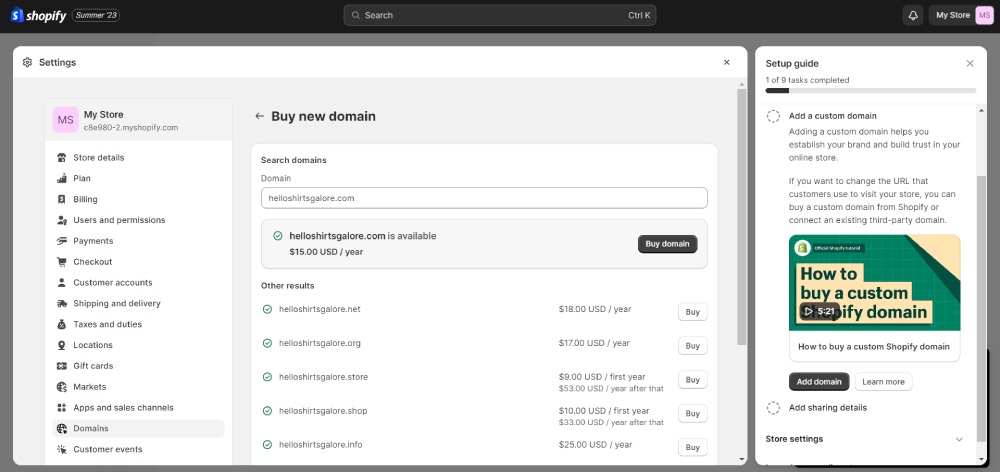
At this stage, you can buy or connect an existing domain. When you buy a domain, enter the domain you want for your store.
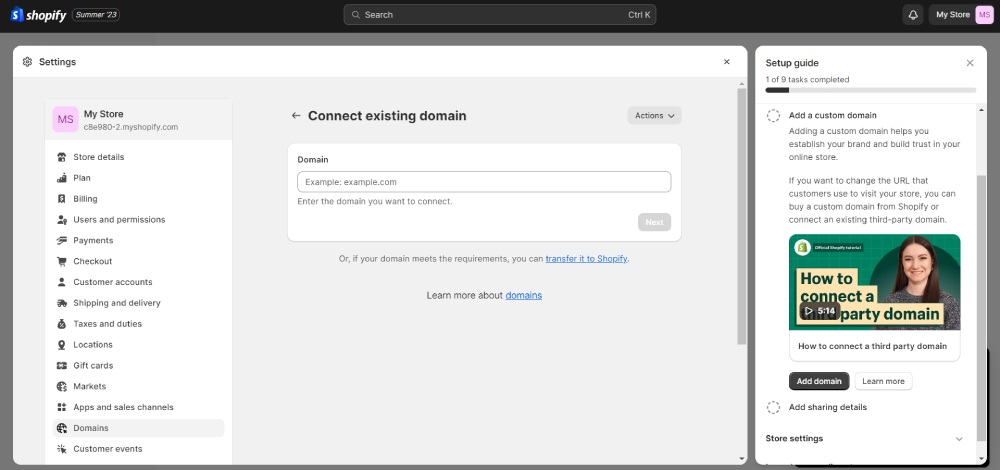
Or, if you have an existing site, you can click “Connect an Existing Domain” instead.
From there, make sure to set a primary domain by searching domains on the Domains page.
6. Customize Store Settings and Payment
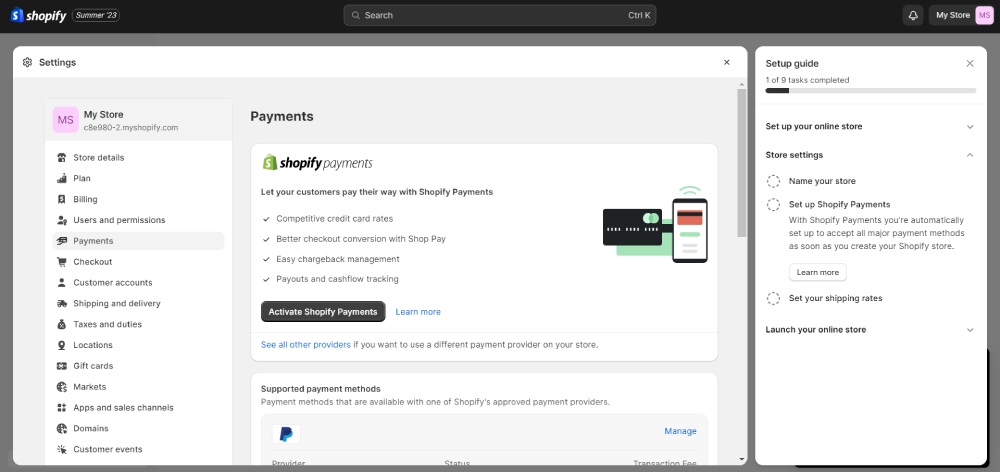
Make sure to give your Shopify store a name before launching it.
You can change the store name in the “Store Details” section. After that, you can set up your Shopify Payments.
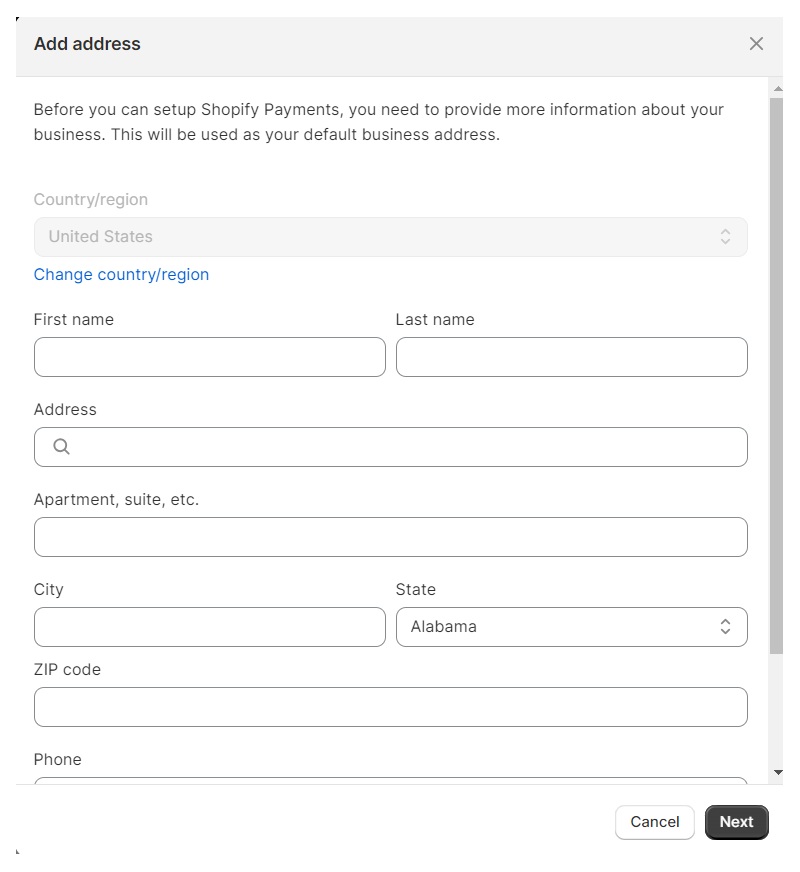
Make sure to fill out the billing address.
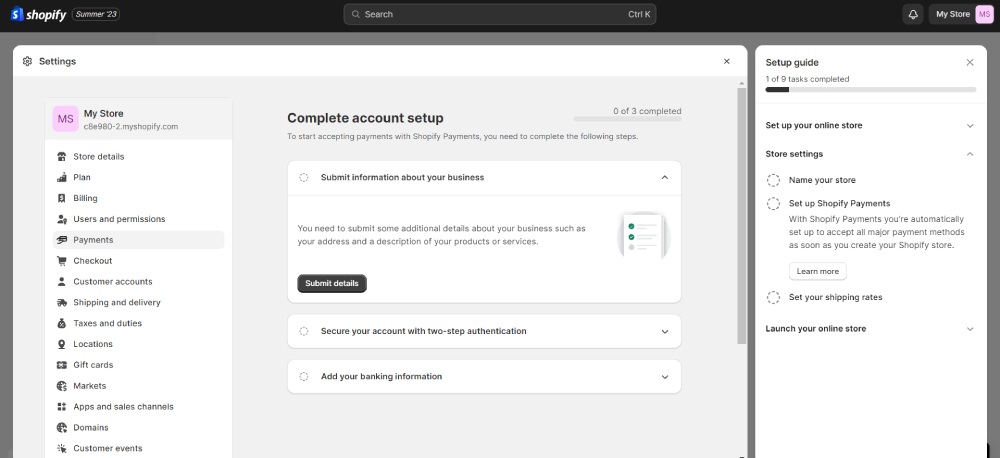
From there, you can complete your Shopify Payments by submitting information about your business, securing your account, and adding banking information.
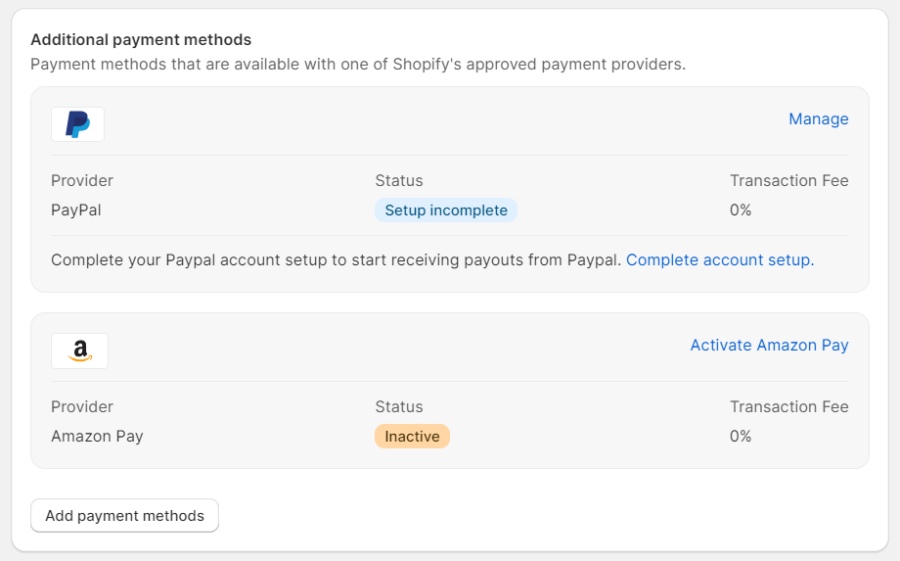
You can also add other payments like PayPal and Amazon Pay. However, if you don’t have an account for those other payment options, select “Add Payment Methods.”
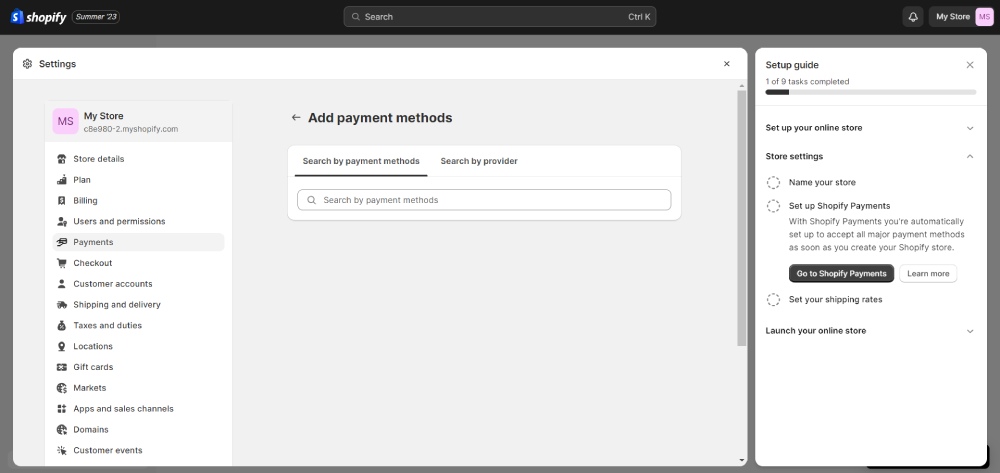
You can search for payment methods by type or provider.
7. Set Checkout Method
Once done with setting your payment options, make sure to have a checkout method. The checkout method requires you to select a way of contacting your customer. Then, get their details, such as name and address line. After that, customize the following options:
- Marketing options
- Tipping
- Address collection preferences
- Order processing
- Order status page
- Checkout language
- Checkout rules
8. Launch Your Site
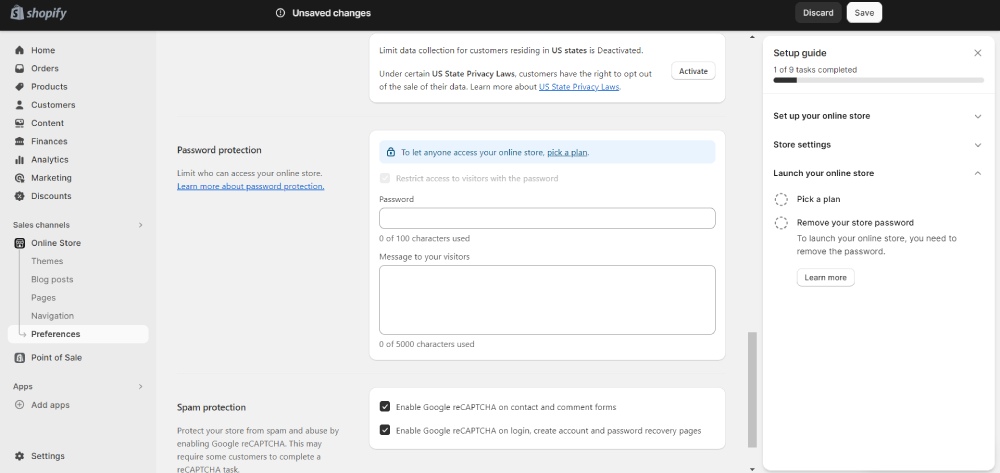
Ready to sell your site on Shopify? You can publish your site by going to Preferences. From there, scroll down to “Password Protection.” Untick the “Restrict Access Visitors to Password.” Then, click Save!
Launching your site isn’t available on the free trial. But when you choose a plan, your site should be live, and you can finally sell products on Shopify!
Five Tips on How to Sell on Shopify
- Add a social sharing image – This is part of the setup guide. Customizing your social sharing image will bring branding benefits. More people may remember your brand. Plus, consider it as a customized link when someone shares your store’s link on any social media page!
- Optimize your pages with SEO – Shopify enables eCommerce owners to optimize their pages with SEO in the preferences tab. Besides that, you can also optimize your product pages by writing persuasive copy and adding keywords that could attract visitors to your site.
- Post high-quality and updated photos of your products – You want to entice and convince your visitors to become your customers. High-quality photos can catch their eye and will help them decide if your product is worth buying. Moreover, make sure to update your images regularly! This way, customers know any changes about your products visually.
- Customize web design with promotions – The best days to promote your sites are on holidays! However, if you have ongoing promotions and discounts, update your site! You can use a Shopify banner or notification header. This way, your visitors and customers are updated on your promos on your site or social media channels.
- Use Shopify Forms and Email to connect with customers – Don’t miss out on leads! Activate Shopify Forms and use Shopify Email for email marketing campaigns. This way, you can send promotions and exclusive discounts. Additionally, send compelling email designs so subscribers can forward them to their contact list.
About the author

Katrina Pascual
Katrina is a content writer specializing in graphic design, marketing, social media, and technology. In her spare time, she writes monthly personal blogs to practice her craft.