
Adobe Illustrator is one of the most reliable and powerful graphic design platforms online. The software offers many drawing tools, even for neophyte graphic designers. Let’s explore the most powerful drawing tool in Adobe Illustrator—the Pen tool. If you want a simple guide on how to draw in Adobe Illustrator using the pen tool, read on.
What is the Pen Tool in Adobe Illustrator?

The pen tool offers many drawing purposes. It can create foundational paths for your vector graphics through simple lines and curves. But what are vector graphics?
Vector graphics are digital images created using mathematical formulas. They consist of lines, shapes, and curves defined by precise coordinates, making them infinitely scalable without losing quality. Commonly used for logos, icons, and illustrations, vector graphics are resolution-independent and ideal for crisp, high-quality prints and displays.
Compared to a regular pen in Adobe Illustrator, where you can draw wherever you drag it, the pen tool only draws vector paths. A path is characterized by a start and endpoint. It can consist of straight lines, curves, or angles. On top of that, the Pen tool also lets you trace outlines, create logos, make clipping masks, and more.
How to Draw in Adobe Illustrator Using the Pen Tool
Using the Pen tool in Adobe Illustrator might sometimes seem intimidating, like tracing outlines. However, you’ll get the hang of it once you practice the Pen tool daily. Here’s how to use the Pen tool in Adobe Illustrator:
How to draw straight lines using the Pen tool
A straight line is the simplest format you can draw with the pen tool. All you have to do is create two anchor points. Corner points connect the straight line. Follow these steps:
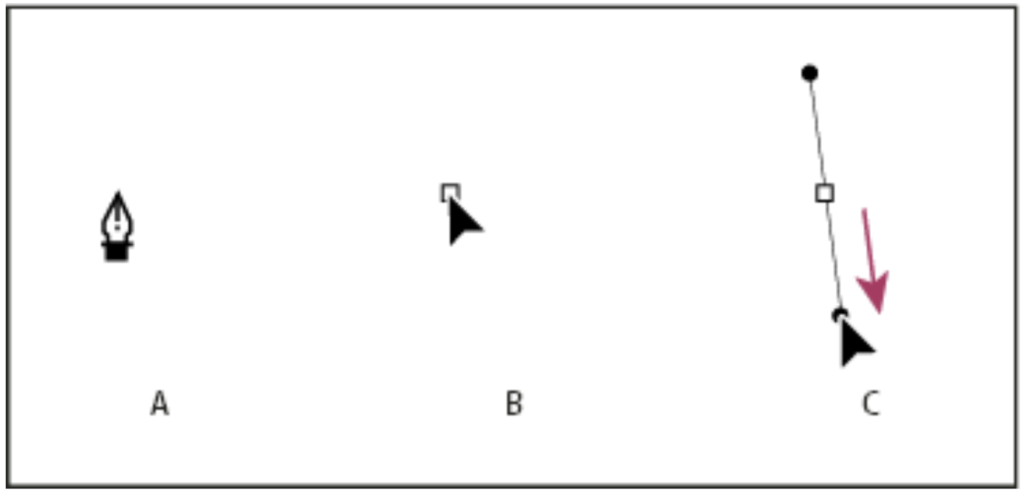
1. Select the Pen tool

2. Create the first anchor point by positioning the Pen tool anywhere on Illustrator where you want the straight line to begin. Click to establish the first anchor point. Remember to prevent dragging the Pen tool and take note that you won’t be able to see the first segment.
3. Click on where you want the second anchor point to be. Simultaneously hold Shift and click to constrain the segment’s angle to a multiple of 45 degrees.
4. Click on the next anchor point to add more straight segments. The previously selected anchor points will become hollow and become deselected. Meanwhile, the last anchor point set will appear as a solid square.
5. Close the path by positioning the Pen tool over the first anchor point that appears hollow. You’ll then see a small circle appear beside the Pen tool icon. Once it’s positioned correctly, drag or click to close the path.
You may leave the path open by doing these three steps:
- Ctrl-click on Windows or Command-click on macOS
- Select a different tool and Deselect
- Press Enter or Return
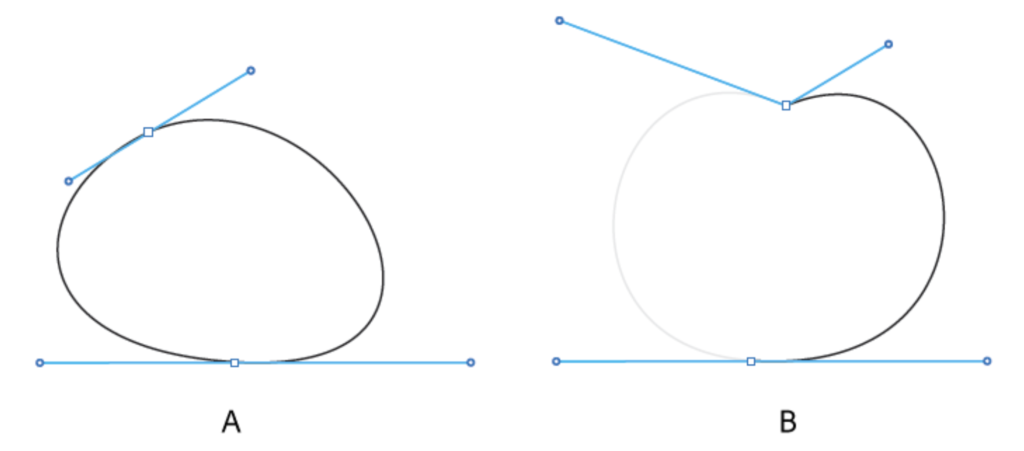
How to draw curves using the Pen tool in Adobe Illustrator
Add another anchor point to create a curve using the Pen tool. Here’s how:
1. Select the Pen tool
2. Place the Pen tool where you want the curve to begin. Click to create the first anchor point. The Pen tool transforms into an arrowhead.
3. Drag the mouse to establish the curve segment’s slope and release. Extend the line to about ⅓ of the next anchor point’s distance you plan to draw. You can adjust the sides of the direction line later. Simultaneously hold Shift and click to constrain the segment’s angle to a multiple of 45 degrees.
4. Place the Pen tool where you want to end the curve segment.
- To create a C-shaped curve, drag the Pen tool to the direction opposite to the former direction line created. Release the mouse button.
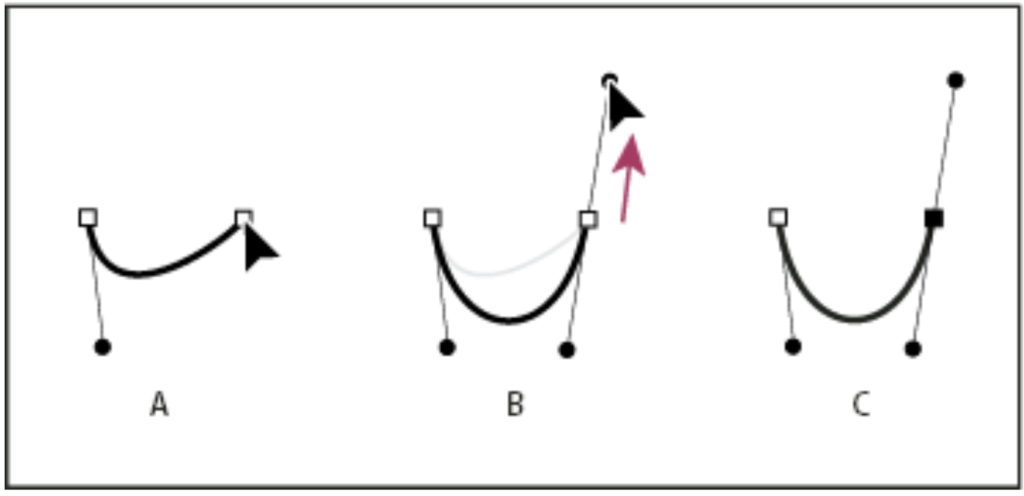
- To create an S-shaped curve, drag the Pen tool in the same direction as the former direction line. Release the mouse button.
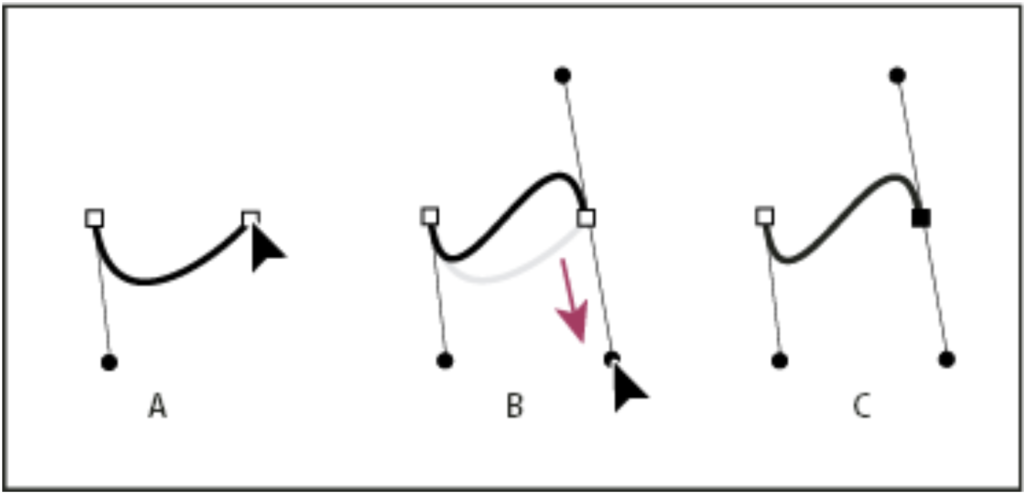
5. Drag unequal and paired handles by pressing Command-Ctrl. Continue creating a series of smooth curves by dragging the Pen tool from various locations. Ensure you’re making anchor points at each curve’s start and endpoint.
Note: Make sure you break out every anchor point’s direction line by clicking Alt, then dragging on Windows or clicking Option, then dragging on macOS.
6. Close the path by positioning the Pen tool over the first anchor point that appears hollow. You’ll then see a small circle appear beside the Pen tool icon. Once it’s positioned correctly, drag or click to close the path.
You may leave the path open by doing these three steps:
- Ctrl-click on Windows or Command-click on macOS
- Select a different tool and Deselect
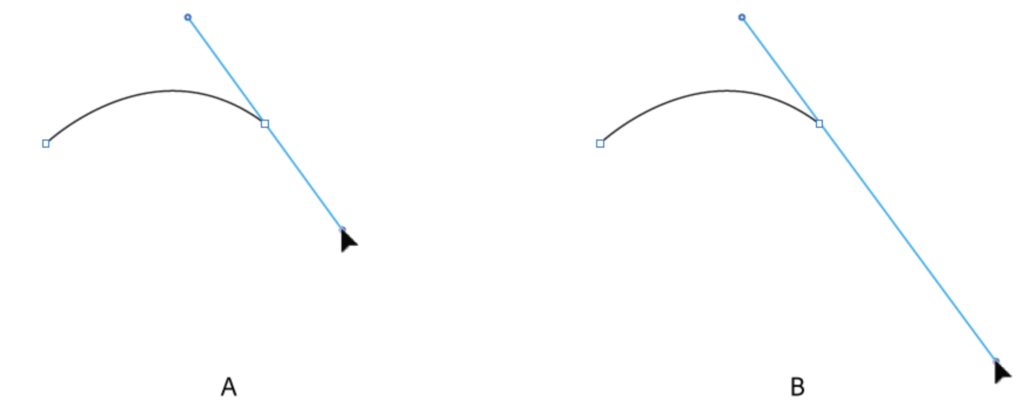
7. Create finer adjustments to the closing curve by pressing the spacebar while closing a segment’s path. This way, you reposition the closing anchor point. Break the anchor point’s paired handles by pressing Option/Alt.
Conclusion
Learning how to draw in Adobe Illustrator using the Pen tool will set you up for quality vector graphics. It takes a minimal learning curve to use the Pen tool. But with daily practice, familiarization, and will, you’ll learn to use this drawing tool efficiently.
If you need help with vector graphics, work with Penji’s professional graphic designers. By subscribing to one of our affordable monthly plans, our experts will handle all your design needs. You no longer need to spend countless hours learning, practicing, and drawing on Illustrator. Penji’s graphic designers will do the heavy lifting for you.
All you have to do is submit a design brief, wait 24 to 48 hours, ask for revisions, and download the design.
Ready to sign up? Here’s a 15 percent discount on your first month.