![How to Make an Audacity Podcast [2023 Updated]](https://penji.co/wp-content/uploads/2022/10/audacity-podcast.jpg)
Making a podcast from scratch can be daunting. You need a good concept, a quality mic, a platform that will attract your audience, a great logo, and much more.
You want everything you use to be as high-quality as possible, and that includes your editing software. Can you make a great podcast with a simple, free editing tool like Audacity? Here’s the rundown on how to make an Audacity podcast.
Can you make a podcast with Audacity?
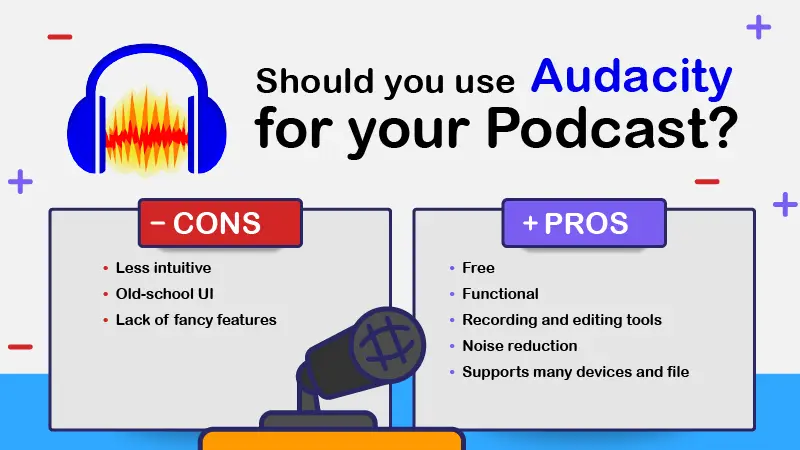
You want to give your listeners the best audio experience you can. You might think that Audacity’s free audio software isn’t functional enough to compete.
While you may find more features in a paid DAW like Pro Tools, Audacity is a great podcast editing tool, with all the functions you need to make your podcast pop. A listener won’t be able to tell the difference between an Audacity podcast and one made with any other software.
Audacity’s tools let you record, fine-tune, and export your audio with ease. With unlimited tracks and robust features, the only limit is your imagination. Unlike most DAWs, it’s not specifically tailored for musicians. You might actually find it works better for podcasts than some paid options.
[in_content_ads gallery=”logos” logo=”on” title=”Need graphic design help?” subtitle=”Try Penji’s Unlimited Graphic Design and get all your branding, digital, print, and UXUI designs done in one place.” btntext=”Learn More” btnlink=”https://penji.co”]
How do you make an Audacity podcast?
The only obstacle to making a great Audacity podcast is knowledge. This next section will break down the key steps to podcast creation and editing with Audacity. The five steps for making an Audacity podcast are:
- Planning your podcast
- Setting up your audio tools
- Recording your podcast audio
- Editing with Audacity’s features
- Exporting and publishing on your platform of choice
Some of the best podcasts out there use free tools like Audacity to bring their audio visions to life. But you’ve got to know how to use it, first. Here’s the rundown on making an Audacity podcast.
1) Planning

As tempting as it is, getting your friends together and going with the flow is not a recipe for podcast success. Even if it’s just a passion project for you, you’re going to tell people about it, and their first question will always be the same.
“What’s it about?”
Figure out a premise that’s broad enough to keep doing but unique enough to pique people’s interest. Who are the hosts? What is the format? Is it a chat show, an interview show, a narrative podcast?
What does any of this have to do with making an Audacity podcast? These building blocks will help you figure out how you plan on using Audacity. You can record straight into Audacity, but you may also record elsewhere and import your clips in.
Does your podcast have theme music? Does it incorporate audio clips? How long is it? Are you in the same room as your guests? All these questions and more will determine what features of Audacity you need to use.
2) Setup
If you don’t have Audacity yet, you can download it for Windows, Mac, or Linux from their website.

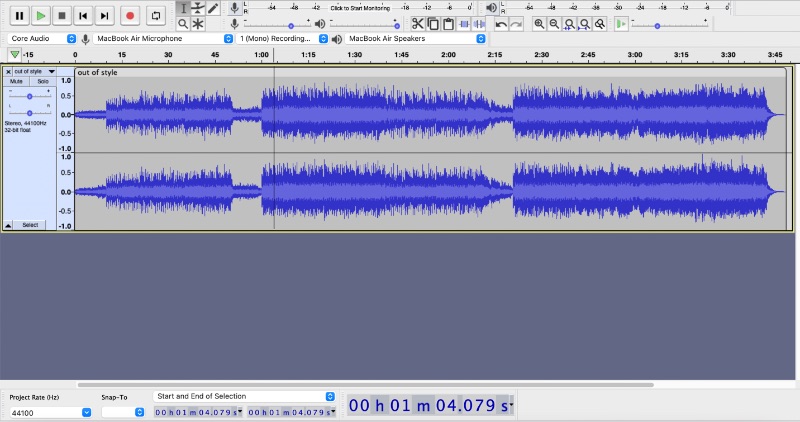
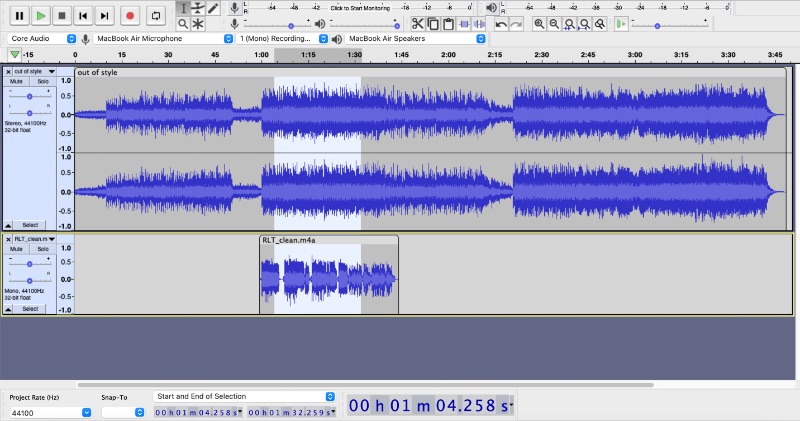
Once you’re in the app, you’ll see this toolbar at the top. You can add or remove tools from the bar by selecting Views > Toolbar, or reorder them by clicking the dashed lines on their left sides.

These four drop-down menus are important for getting ready to record. The first, Audio Host, should generally be set to Core Audio for Mac and MME for Windows.
Make sure that the Microphone menu is set to your mic of choice. For an ongoing podcast, a quality microphone is well worth the investment.
You can next choose whether your Recording Channels will be mono (one) or stereo (two). Some mics may not let you record in stereo. Generally, mono is perfectly fine for a podcast, but stereo provides a richness of sound.
Selecting a Playback Device is important for monitoring while recording. You should listen through headphones to avoid creating a feedback loop.
3) Recording

Hit “Click to Start Monitoring” on this menu to check your mic. It’s always a good idea to record some test audio and listen back for issues before you begin recording the real deal.

While you monitor, you can adjust your mic volume with the left slider. Try to set it so that your mic peaks around -12dB. This will make sure you don’t end up with clipped audio.
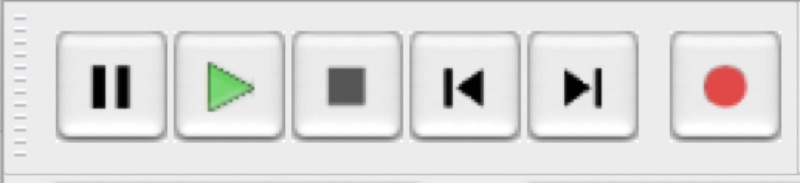
Unlike some DAWs, you don’t need to create a recording channel before you start recording your podcast in Audacity. Just hit the red “record” button and hit it again when you’re finished.
Audacity can only record on one sound device at a time, but you can record several mics using an audio interface like the Scarlett 2i2.
4) Editing
If you plan to edit in Audacity but record elsewhere, you’ll want to know about their importing features. Audacity supports more file types than many other DAWs, including WAV, AIFF, AU, FLAC, MP3, M4A, and OGG. This is also great for creators who incorporate theme music, intro/outros, and other clips into their podcasts.
You can move audio files around with the grabber bar above each clip. Older versions of Audacity have a separate tool required to move clips, the Time Shift tool (F5).
If you want to isolate a section of your recording, use Ctrl/⌘ + I to split your audio and Ctrl/⌘ + J to join them together.
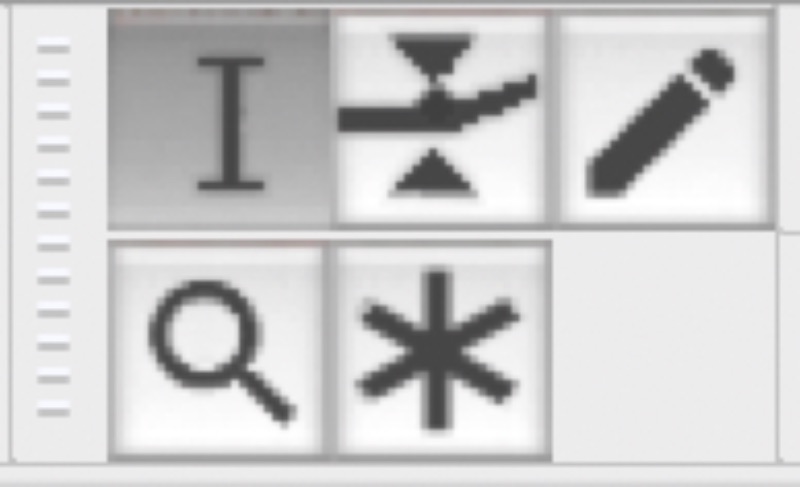
These five tools are what you use to edit your Audacity podcast. They can be accessed by either clicking on the menu or using the F1–6 keys on your keyboard.
The Selection tool (F1) is often the most useful for editing. It lets you highlight sections of audio to copy, cut, delete, and apply effects.
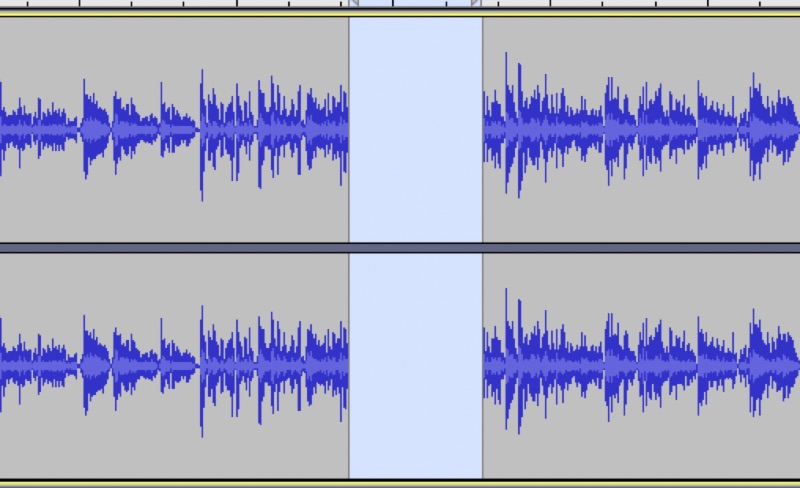
When you delete a selection from your audio, Audacity removes the space by default, snapping the two separate pieces of audio back together. To leave that space empty, you’ll have to do a Split Cut or Split Delete (⌥⌘X or ⌥⌘K on Mac, Ctrl+Alt+X or Ctrl+Alt+K on Windows).
Next to that is the Envelope tool (F2). It’s used to raise or reduce audio levels for clips, letting you fade tracks in and out. If a certain section of your audio is too loud or quiet, you can also use this tool to even it out.
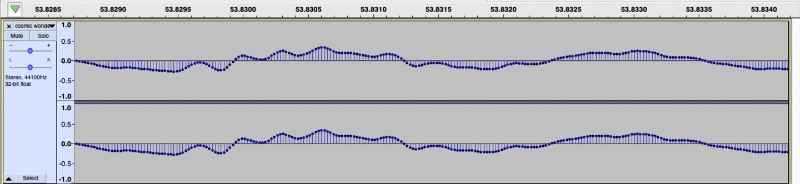
The Draw tool (F3) adjusts audio at the microscopic level. When you zoom all the way in, you can adjust individual samples. It’s most useful for when you have clicks, pops, and other unwanted noise in your recording. The closer points are to the center line, the quieter they’ll be.
It can be most helpful to use in conjunction with the Zoom tool (F4), which lets you highlight audio to zoom in. This tool makes it easier to isolate specific sounds. You can also zoom by pinching with a trackpad, or hitting Ctrl/⌘ and scrolling.
Finally, there’s the Multi-Tool (F6). This lets you use all five tools at once. It acts as a Selection tool unless you’re along the line of the Envelope. Zooming all the way in enables the Draw tool. You right-click or use the control key to Zoom in.
It takes a bit more skill to get used to the Multi-Tool. You’ll be fine using the separate tools as you learn.
Effects

You may also find it useful to employ Audacity’s vast library of audio effects. They require a little more skill, but these audio effects allow you to maximize your Audacity podcast. You can repair damaged sections, improve your mix, and import additional plugins.
If you’re concerned about your audio quality, features like Noise Reduction can help eliminate background sounds. These tools aren’t the most robust on the market, but for an amateur podcaster, they can make your show a lot more attractive to listeners.
5) Exporting

Once you’re done with your project, all that’s left to do is hit File > Export or Shift + Ctrl/⌘ + E. Audacity can export to all the same file types it can import. However, most podcast streamers require you to use an MP3 or M4A, so if you’re all done, those are your best options.
You can also save your work as an Audacity project (AUP) to come back to it later. If you have certain settings you want to keep, you can hold onto an AUP or export your files separately. AUPs can be big files, so just keep the audio you need.
How can Penji helps podcasters grow?
As we’ve just shown, Audacity is a free digital audio tool that’s perfect for recording and editing studio-quality podcasts—if you know how to use it. But building a podcast brand isn’t just about producing audio. You also need to find an audience, and that means developing high-quality branding.
Penji is a graphic design service that brings world-class design talent to you for a simple monthly rate. Podcast businesses may need logos, thumbnails, social media content, and website designs; Penji can do all that and more. If you’re building a podcast empire, let Penji be your partner and sign up today!