
Ever wondered why some images look fantastic while others feel off? It might be the background. More often than not, creatives eliminate the background or change it to a different one to make the subject pop. The Gimp image editing software lets you remove backgrounds in five different ways. It’s easy and doable in just a few clicks.
Here’s how to remove background in Gimp using FIVE tools:
- Fuzzy Select tool
- Color tool
- Paths tool
- Layer Masks tool
- Foreground Select tool
Tired of Gimp? Work with a Penji designer instead.
Give your workload to Penji & get unlimited designs every month


How to remove background in Gimp using the Fuzzy Select tool
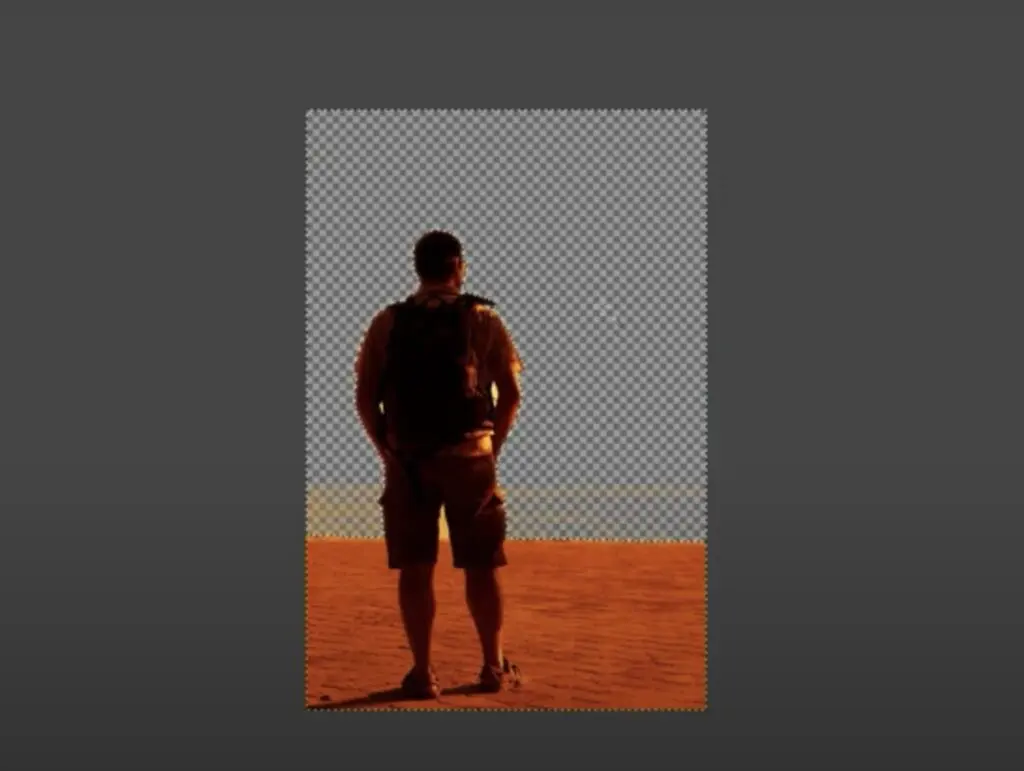
The first method is to remove the background in Gimp using the Fuzzy Select tool. This lets you turn the background into a transparent one. It allows you to create a selection of pixels similar to the sample selection in an area. Use this if the image has a bit of distinction between the background and foreground.
Step 1: Open the Gimp editor and select the image file you want to edit. Go to “File” and click “Open.” Choose the saved image from your computer.
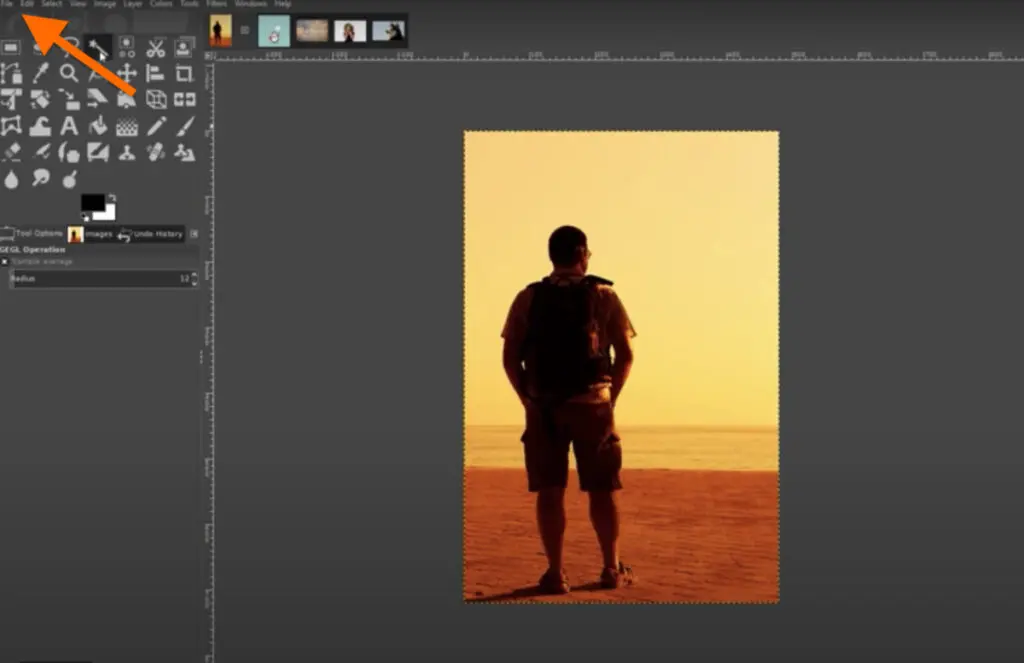
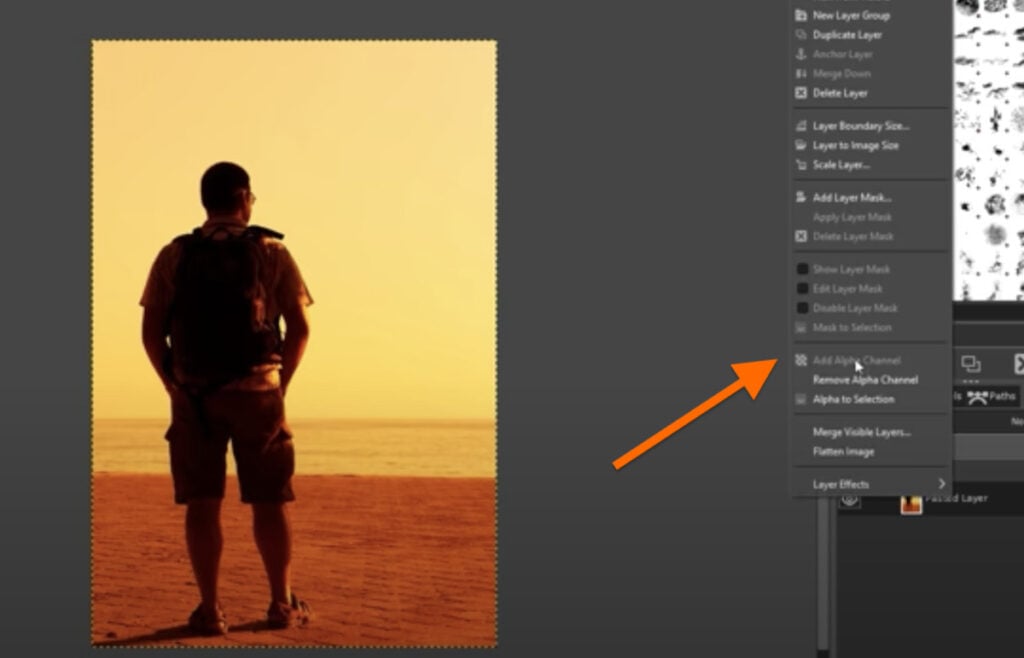
Step 2: Right-click on the image icon on the lower right side of the editor and select “Add Alpha Channel.”
Step 3: Click the “Fuzzy Select” tool and enable the Antialiasing, Feather edges, and Draw masks options.
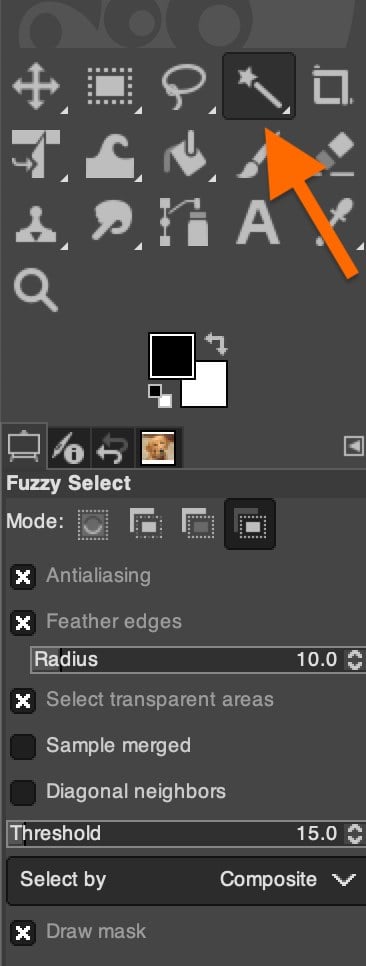
Step 4: Select and click the background and drag to increase or decrease the threshold.

Step 5: Let go of the selection and press “Delete” to remove the background. Repeat the process a few times until the entire background is deleted.
How to remove background in Gimp using the Color tool
The Color Select tool lets you choose every pixel on your image with the same color. This tool can be used on simple designs and vector illustrations.
Step 1: Ensure you enable the Antialiasing and Draw masks features. If you’re removing the background on a photograph, you can enable Feather edges.
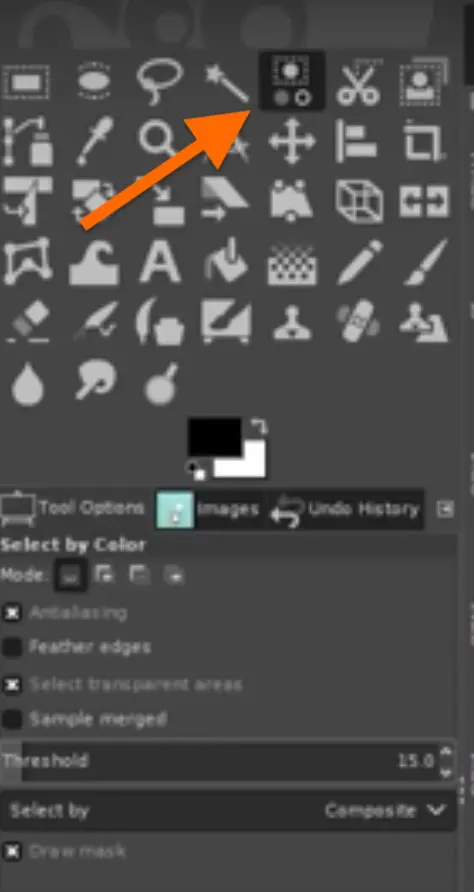
Step 2: Click on the “Color Select” tool.

Step 3: Select, click, and hold the area you want deleted. Manually drag the tool up and down to adjust the selection.

Step 4: Press “Delete” and repeat the process as needed.
How to remove background in Gimp using the Paths tool
Using the Paths tool to remove the background in Gimp takes time and effort. However, this method offers more crisp results.
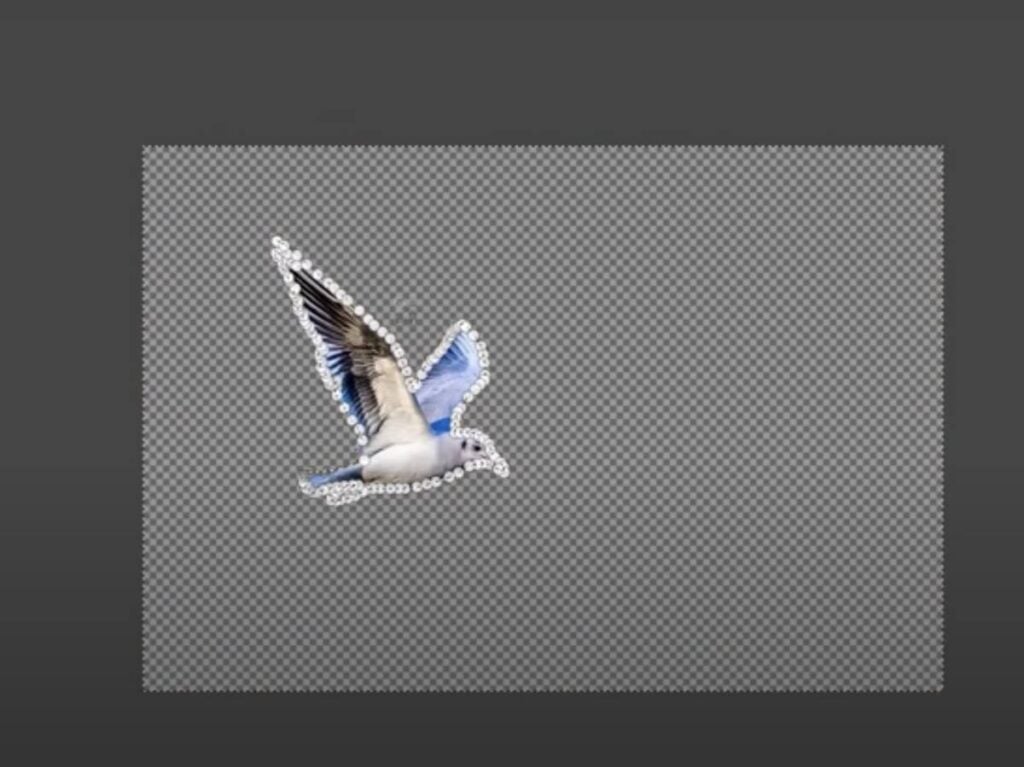
Step 1: Click the “Paths” tool
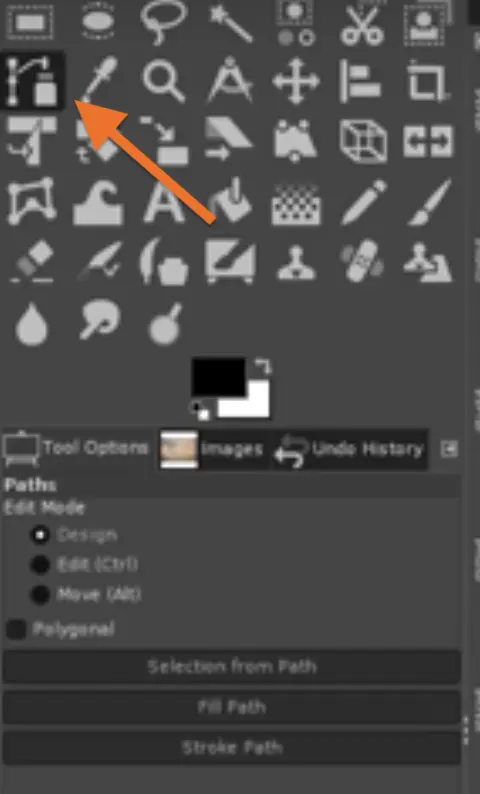
Step 2: Begin to click from one point to another on the subject to outline the background you want deleted. Curve by dragging the endpoints and adjust to fit the subject’s edges.
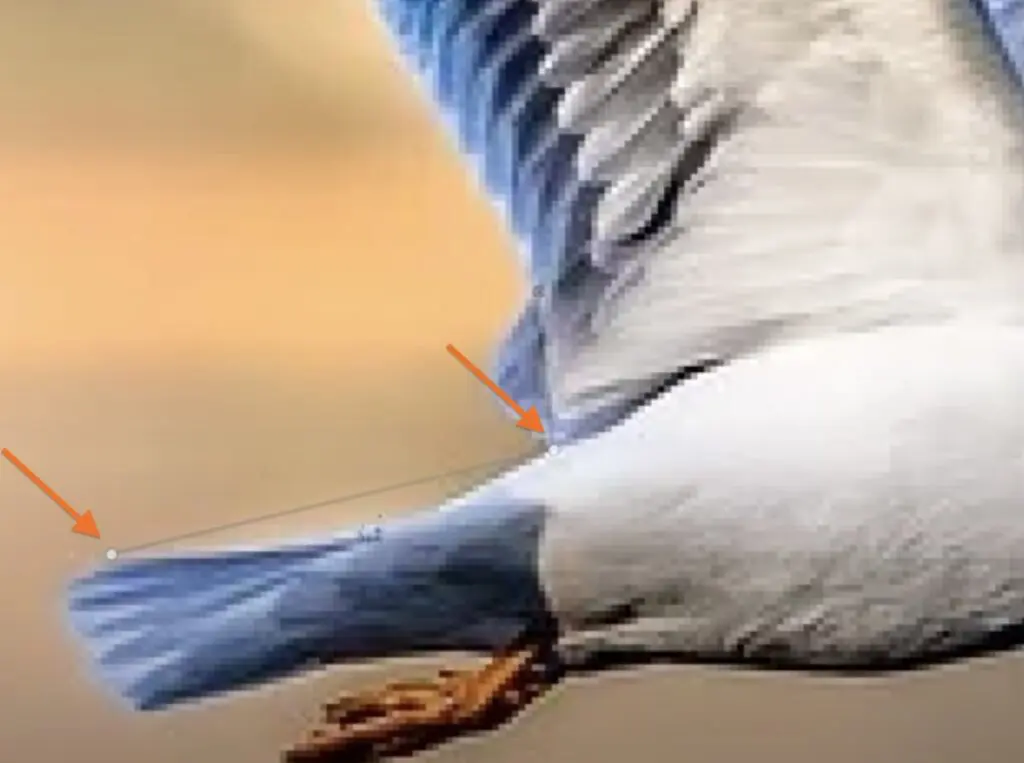

Step 3: Continue by clicking the most recent point you created until you outline all the edges of your subject. Once the entire subject is outlined, close the path by clicking on the first point to connect with the last point.

Step 4: Press “Enter” to create a selection around your subject. You should have an outline like this.

Step 5: Since you’re removing the background and not the subject, go to “Select” and select “Invert.”
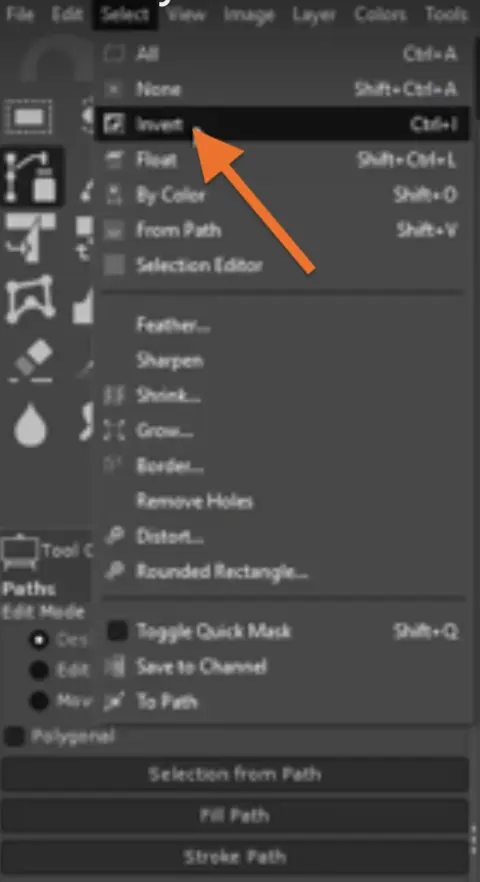
Step 6: Press “Delete” on the keyboard.
How to remove background in Gimp using the Layer Masks tool
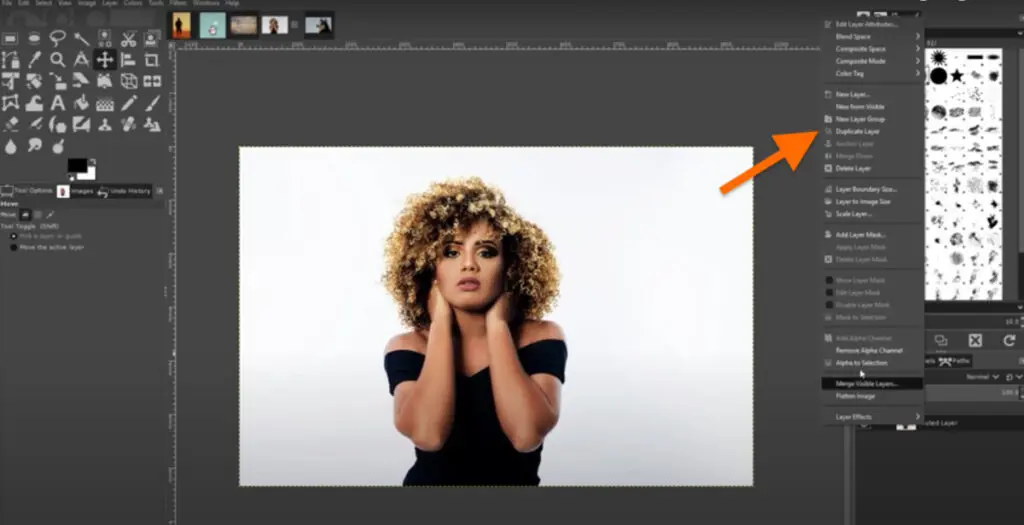
The Layer Masks tool is a more advanced background removal feature in Gimp. This method is ideal for images with finer details, such as hair strands, which are difficult to select manually. This option only works when the subject and background offer a lot of contrast.
Step 1: Right-click on your image and select “Duplicate Layer”
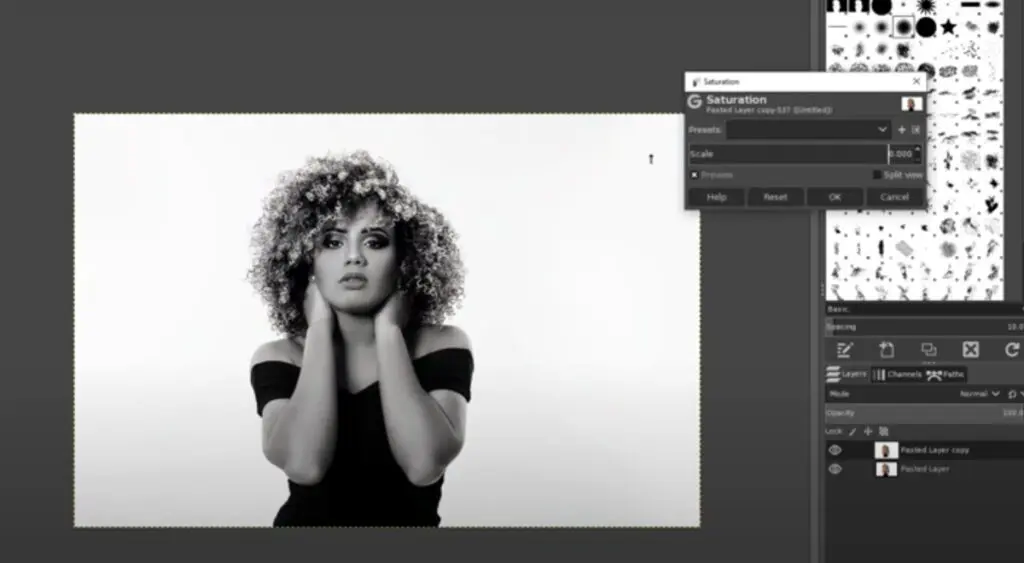
Step 2: Go to “Colors,” and select “Saturation.” Bring the scale down to zero, and click “OK”
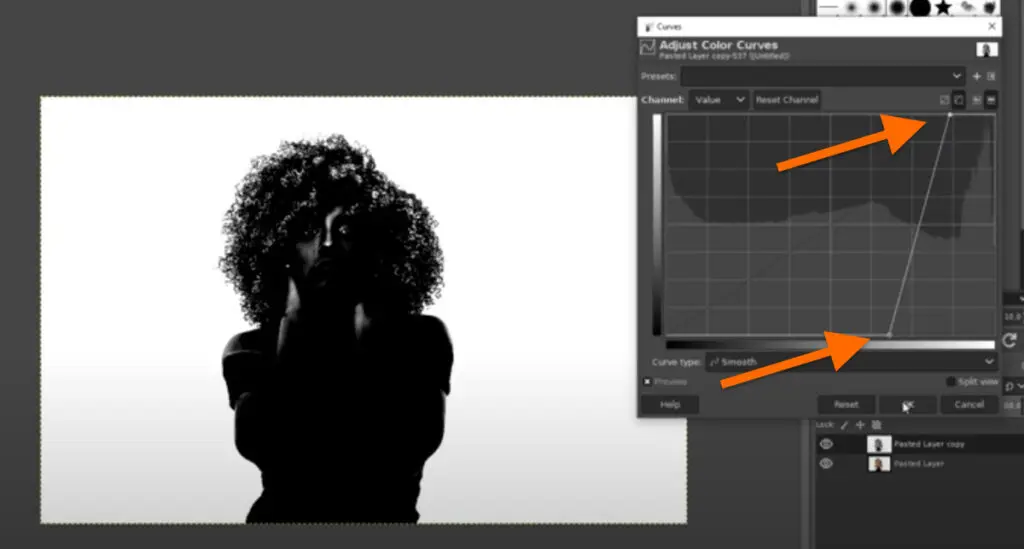
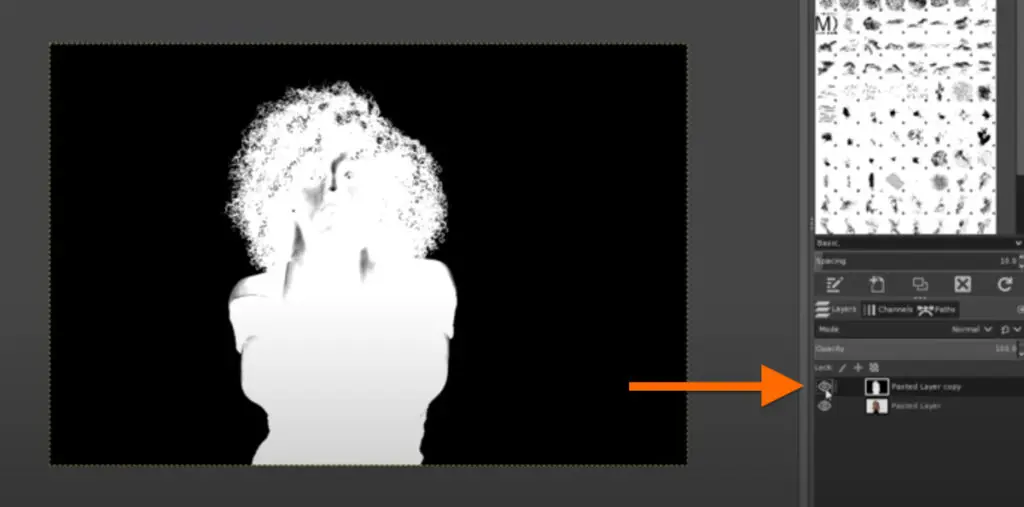
Step 3: Go to “Colors,” and select “Curves”
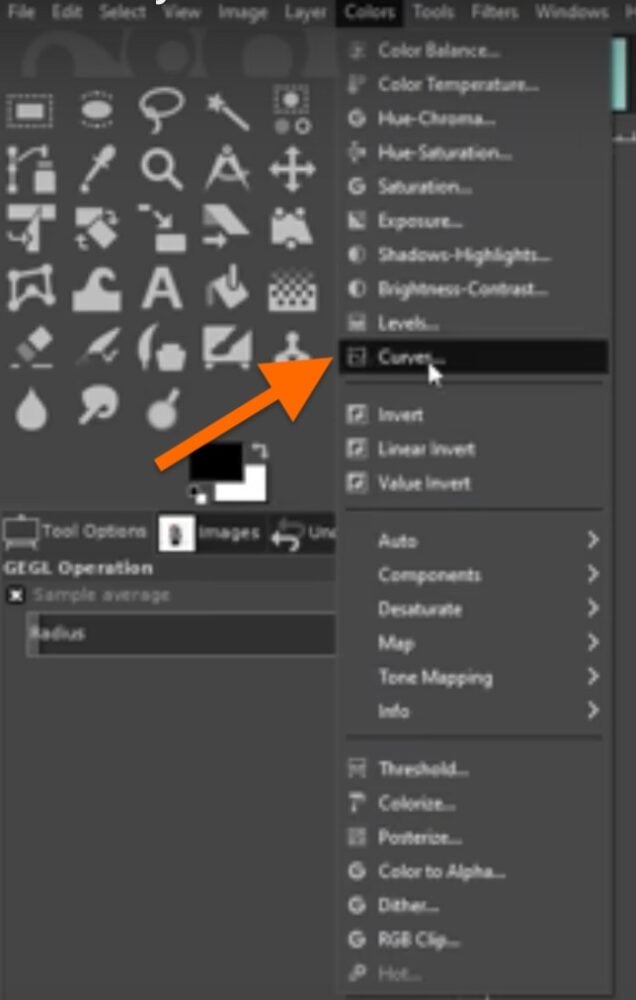
Step 4: Adjust the top and bottom nodes so the subject is black and the background is mainly white.
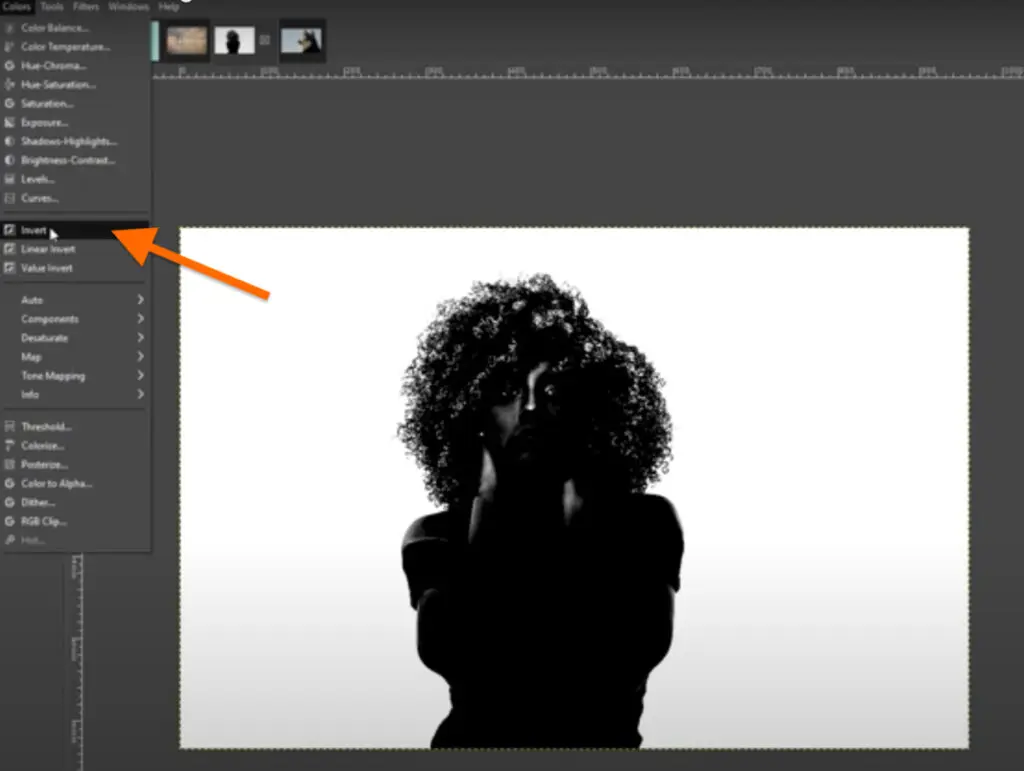
Step 5: Go to “Colors,” and select “Invert”
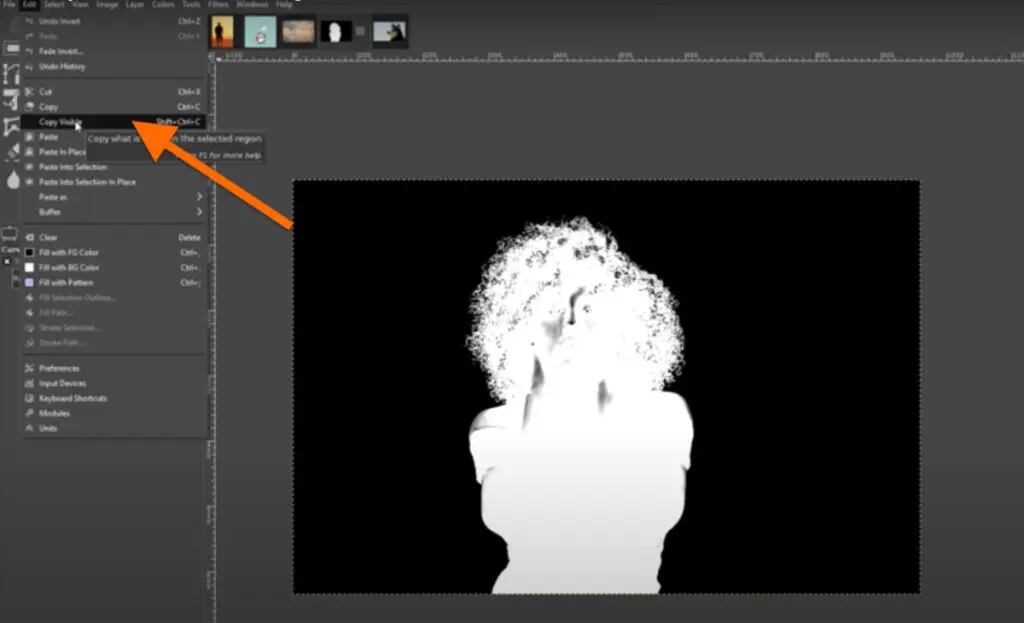
Step 7: Go to “Edit,” and select “Copy Visible”
Step 8: Click the “Visibility layer” icon on the lower right-hand side of the editor. It looks like an eyeball icon next to your image.
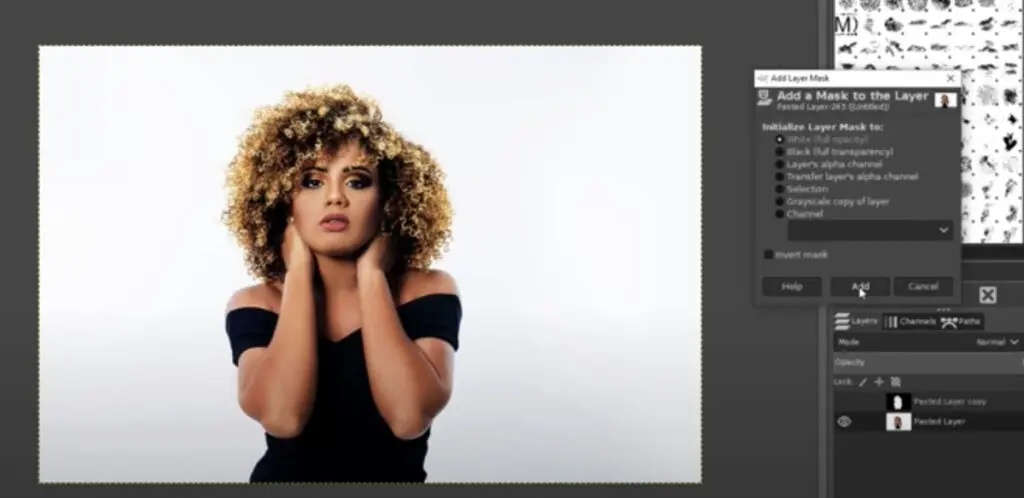
Step 9: Right-click on the original layer and select “Add Layer Mask”
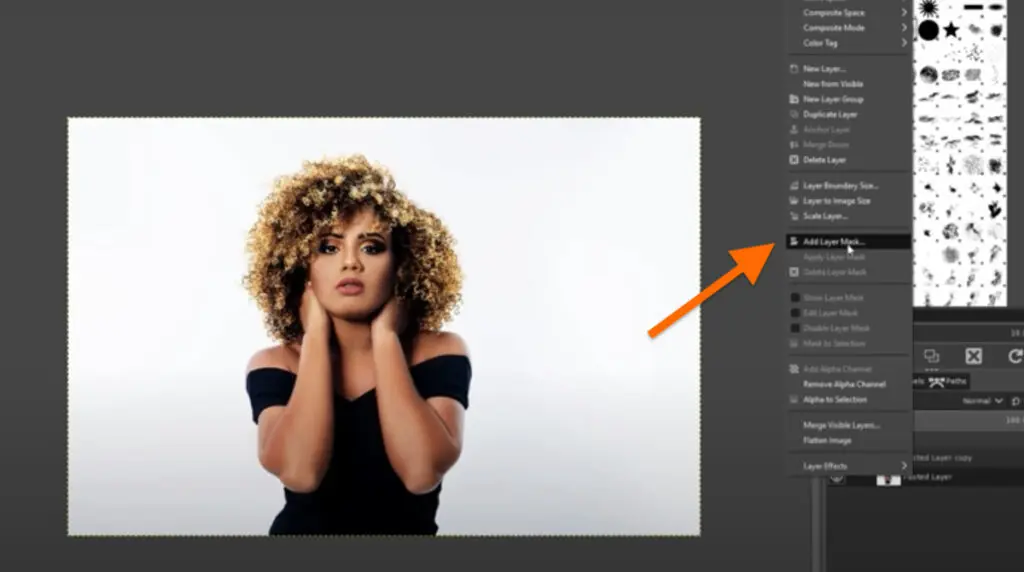
Step 10: Leave the default settings as they are and click “Add”
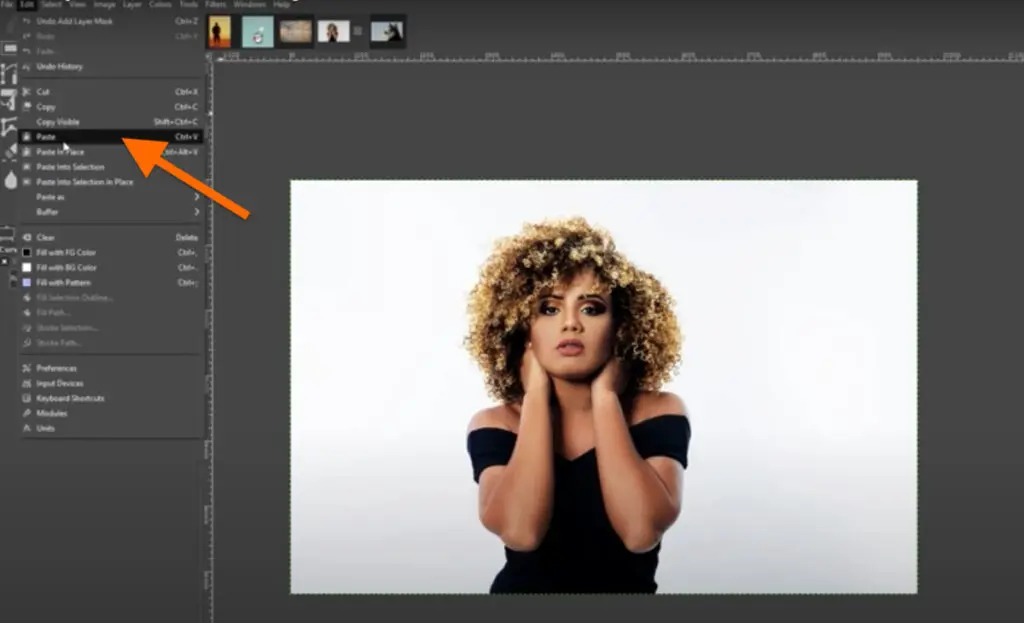
Step 11: Go to ‘Edit” and select “Paste”
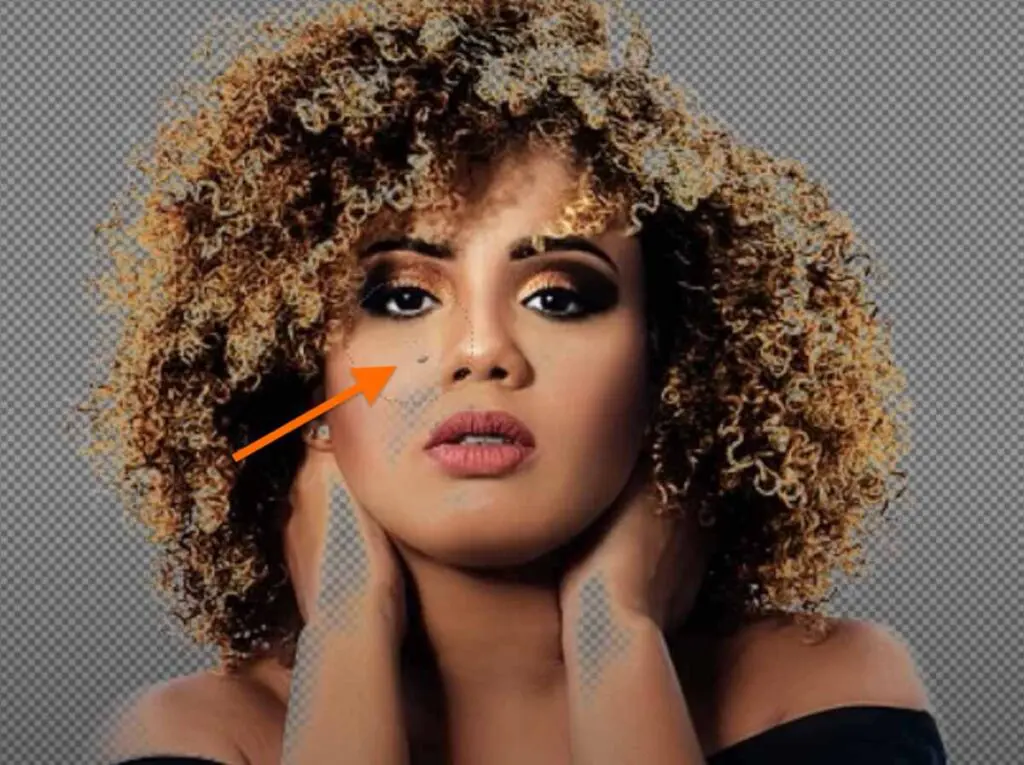
Step 12: Click the little green anchor icon on the bottom right side of the editor. This will make the white background transparent.
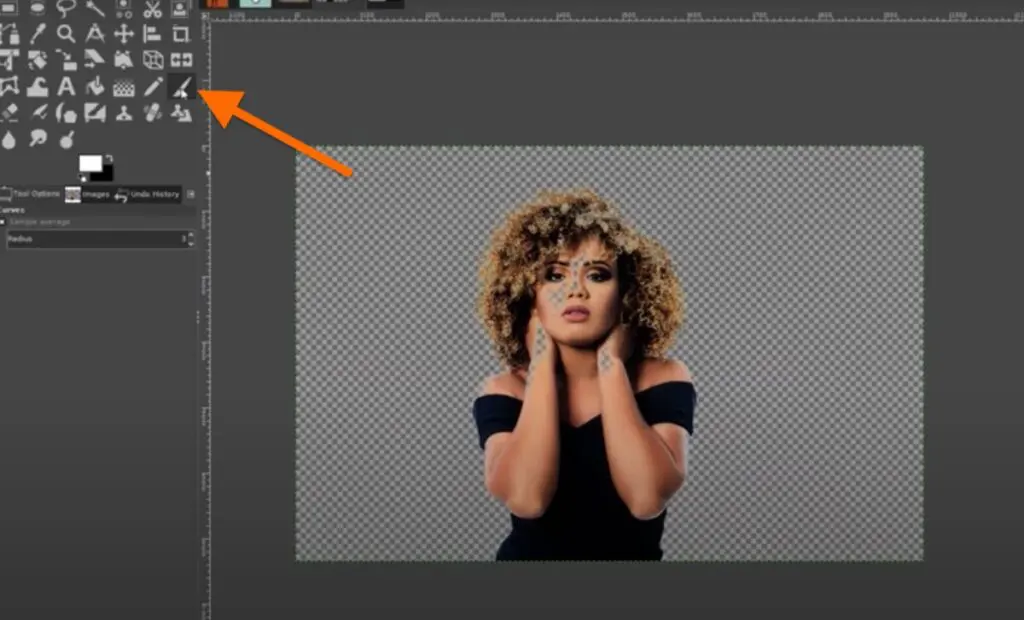
Step 13: Click the “White brush” tool to remove the imperfections on the subject or areas that show the transparency grid.
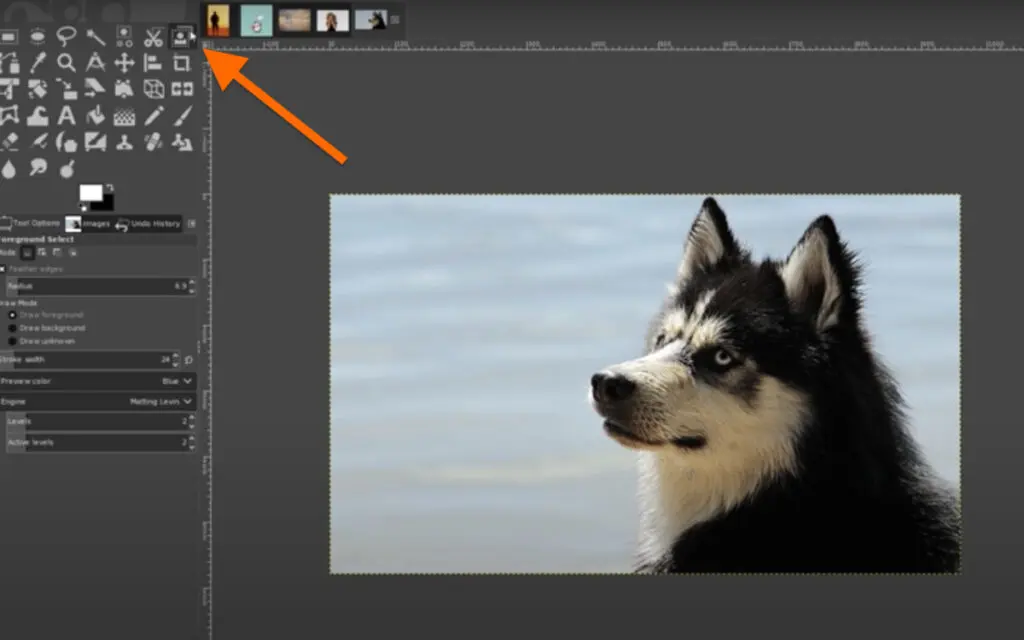
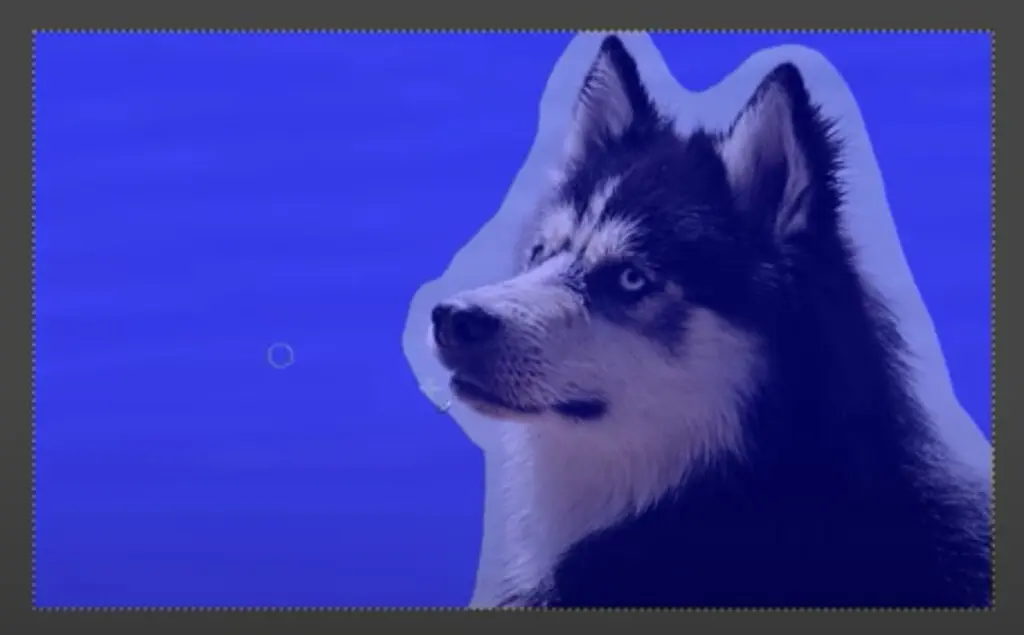
How to remove background in Gimp using the Foreground tool
The last method to remove background in Gimp is using the Foreground tool. This option is for subjects with intricate details, such as hair in the previous example.
Step 1: Click the “Foreground Select” tool
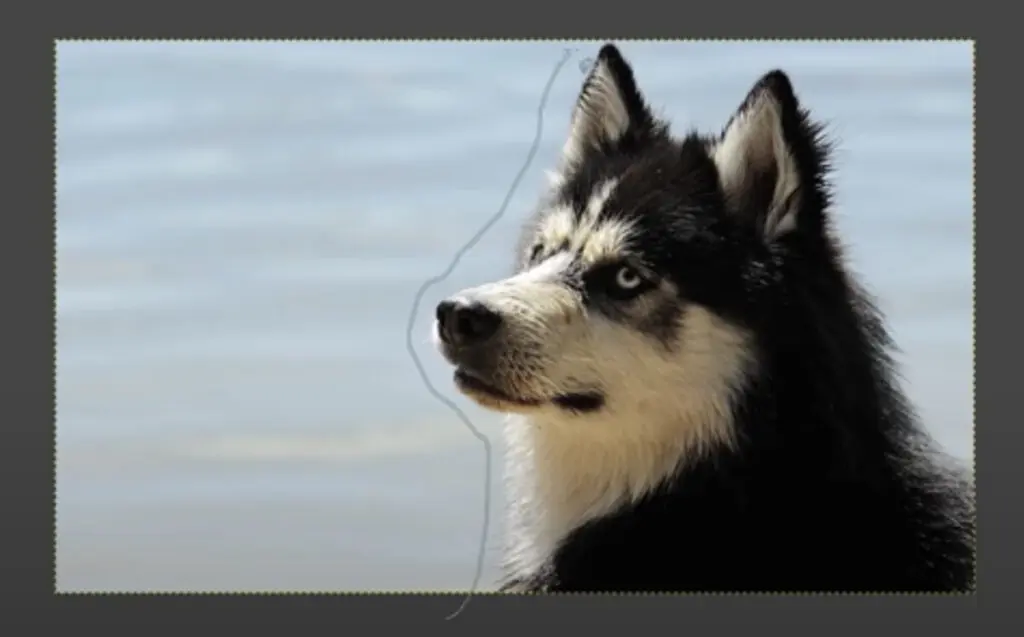
Step 2: Manually draw a rough outline of your subject. Don’t worry about not having a precise outline.
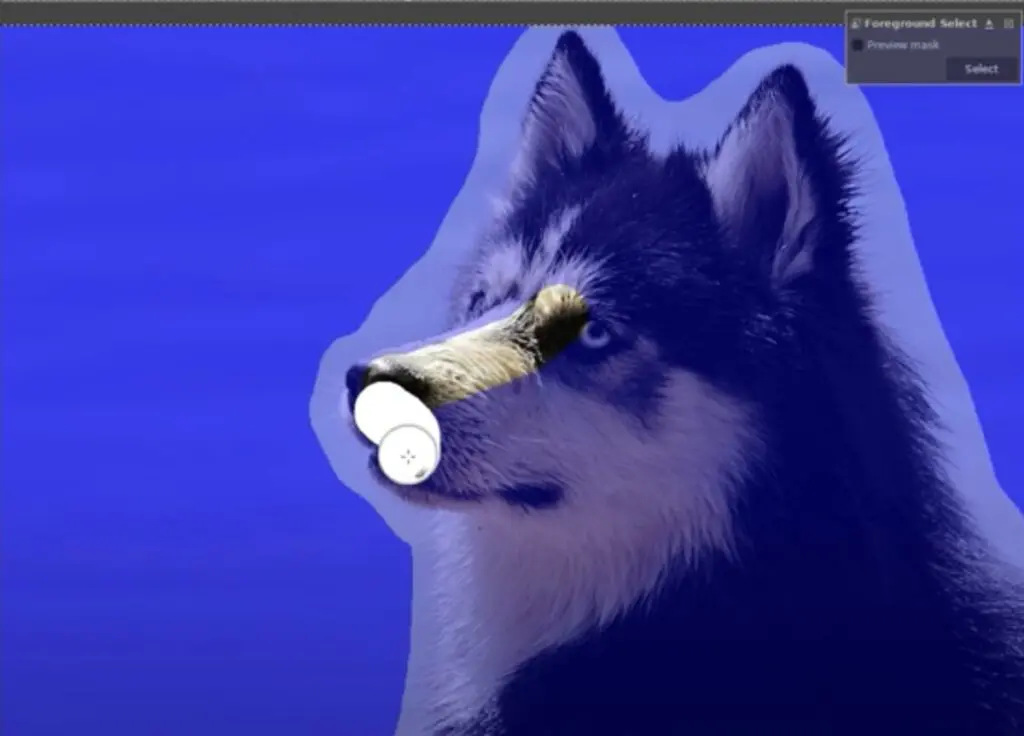
Step 3: Press “Enter,” and the editor will show you a dark blue background and light blue foreground.
Step 4: Manually brush your subject, ensuring you don’t exceed the boundaries. Click the “Preview mask” setting and press “Enter” if you’re happy with how it looks.
Step 5: Go to “Select” and click “Invert”
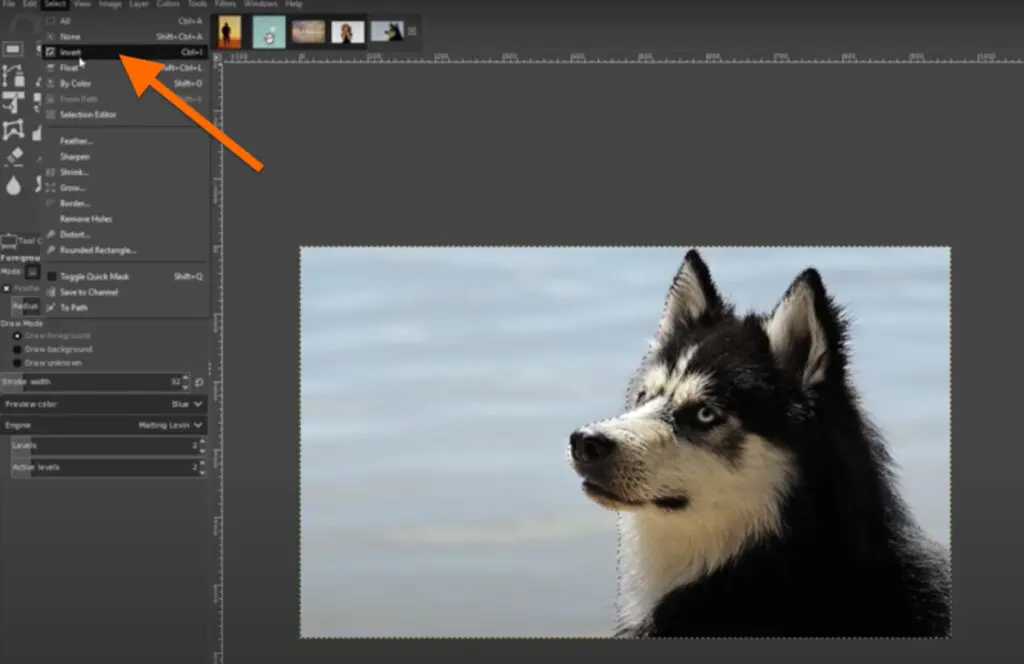
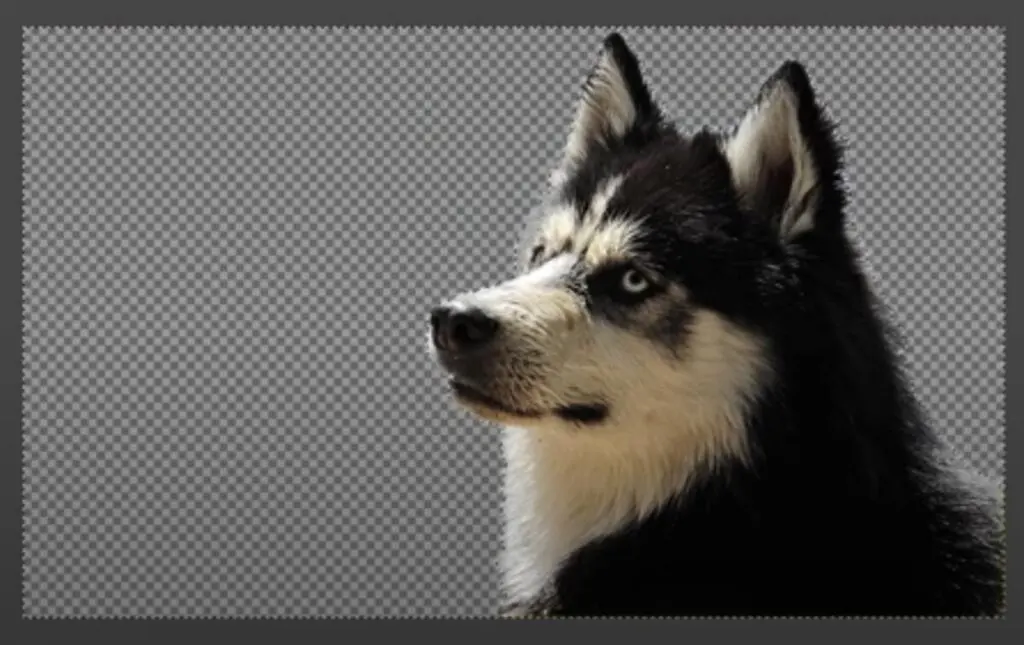
Step 6: Press “Delete” to remove the background
Conclusion
Learning how to remove background in Gimp is easy and convenient. Gimp offers various background removal options suitable for the type of image you’re editing. Choose the best method that works best with your image and comfort level.