Slack has become the go-to productivity tool for most organizations. That said, you communicate with your team, conduct video chats, add apps, and more! Once in a while, Slack needs decluttering, especially if you’ve been long-time users of the work app. And if you need a tutorial on how to delete a Slack channel and archive one, check it out here! Plus, I provide decluttering tips on Slack.
How to Delete a Slack Channel
Deleting a Slack channel is a great way to declutter your Slack workspace, especially if you’re part of various channels and projects. However, only Workspace admins or owners can delete a Slack channel. That said, you can contact them if a Slack channel needs deletion.
But if you’re new to Slack and have been assigned the Workspace Admin or Owner role, here are the three simple steps for deleting your Slack channel. Note that deleting a Slack channel is only available on the desktop.
1. Select the Slack Channel to Delete
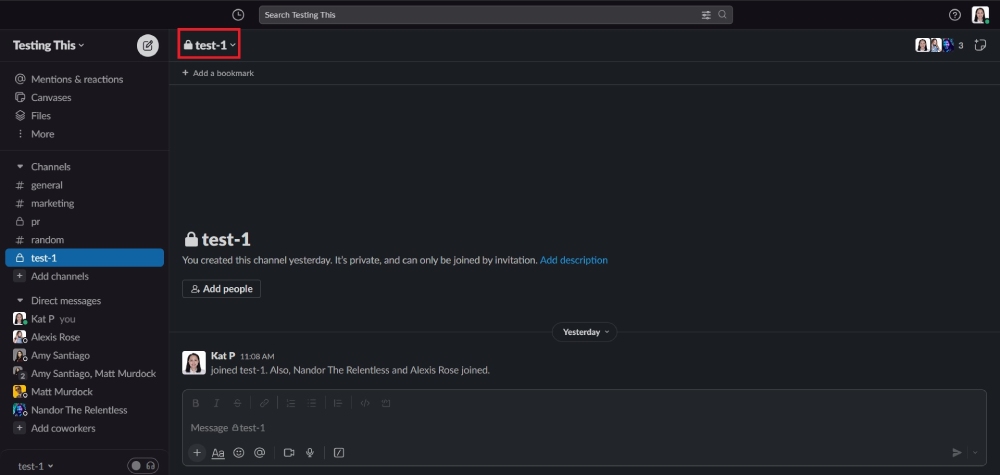
Click the Slack channel that you think is unnecessary. Then, click the Channel name.
2. Choose Settings
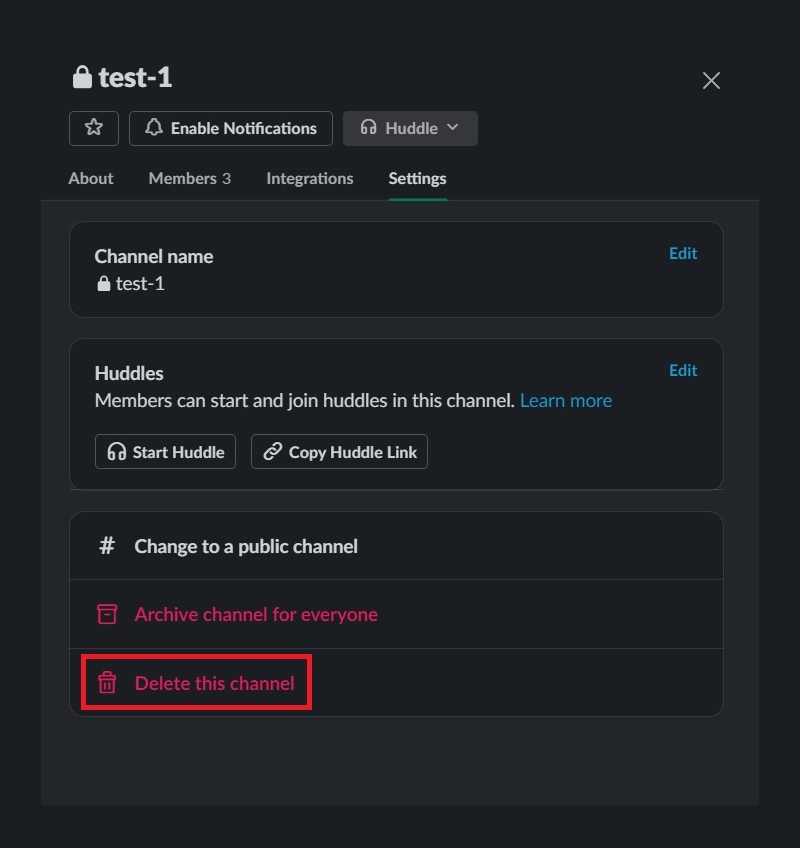
Once done, select “Settings,” and you’ll see the button “Delete this Channel.”
3. Click Delete
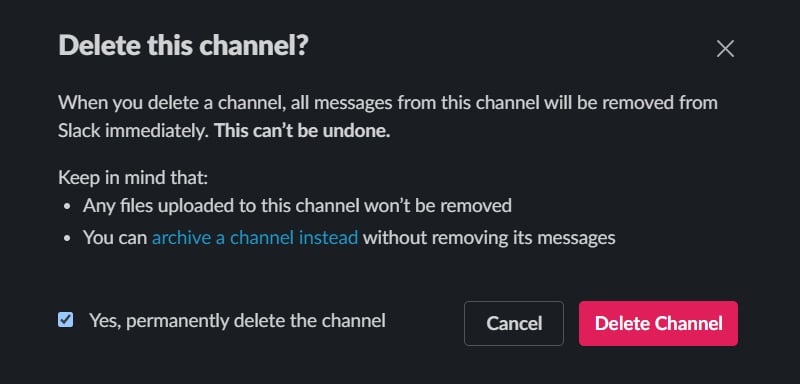
Get ready to say goodbye to the channel once you click “Delete this Channel.” After that, you’ll no longer see this channel exist.
If you’re wondering if you could retrieve a deleted channel, unfortunately, that’s impossible. However, files uploaded to this channel will remain. You have to create a new Slack channel for new projects. But if you want to keep a Slack channel alive after a particular time, you can leave it as is or archive it.
Extend Your Creative Team the Easy Way
Try an unlimited design subscription risk-free for 30 days


How to Archive and Unarchive a Slack Channel
But if you’re sentimental or want to retrieve a Slack channel in the future, archiving a Slack channel is the way to go. This method saves your old messages, and you can keep the same people in your organization and add new ones when you revive a Slack channel.
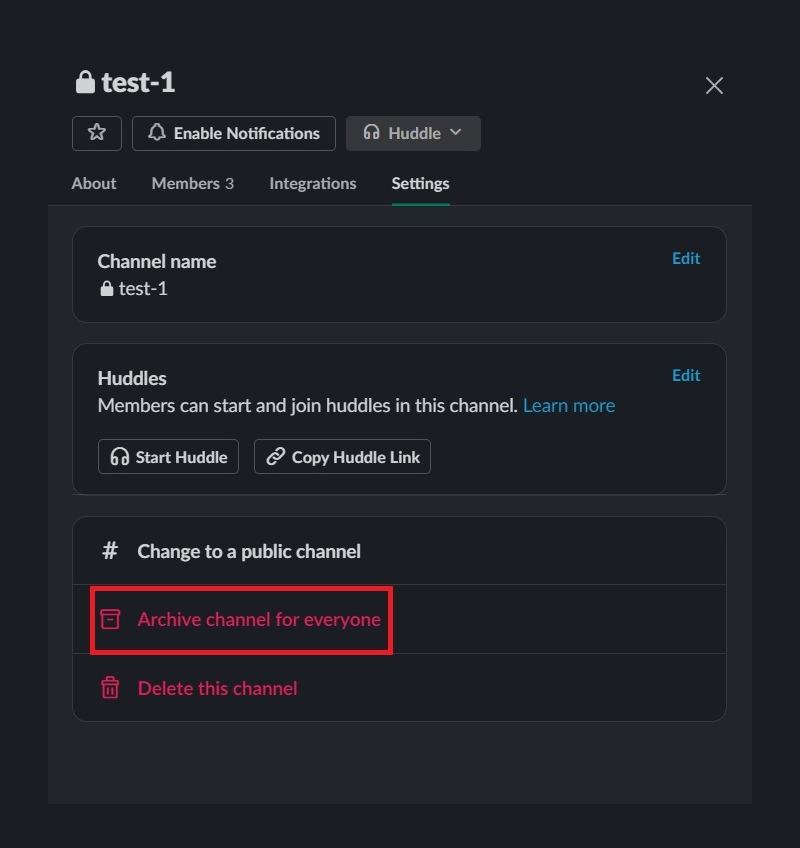
The steps are similar to how to delete a Slack channel. Instead of clicking “Delete this channel,” choose “Archive channel for everyone.”
What to remember before archiving your Slack channel?
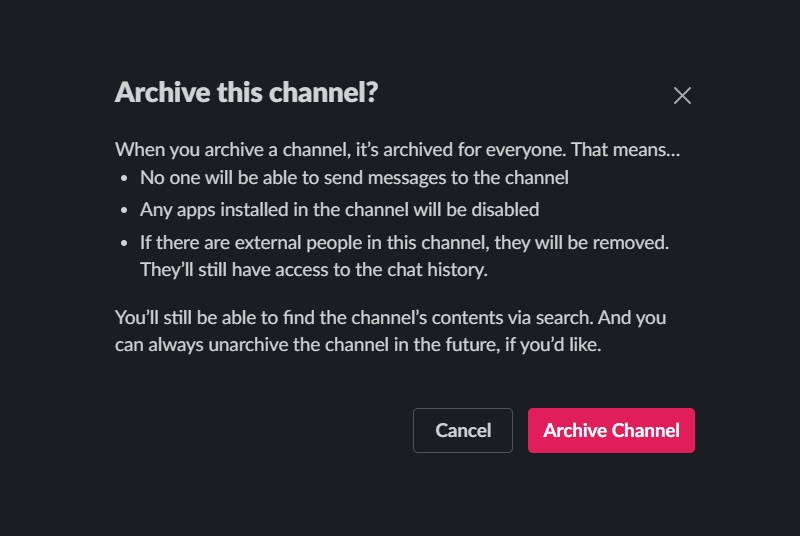
- Members of the channel can’t send messages
- If there are people outside of your organization included in this channel, they will be removed
- Installed apps will be disabled in the channel
- Channels created by Workspace admins or owners can only be deleted by them
- Authorized admins or owners and the member creator can delete channels created by Workspace members
But what if you want to unarchive a Slack channel?
1. Search for your old Slack channel

On the Slack search bar, type the old Slack channel. Once you find it, click it.
2. Click on the channel settings
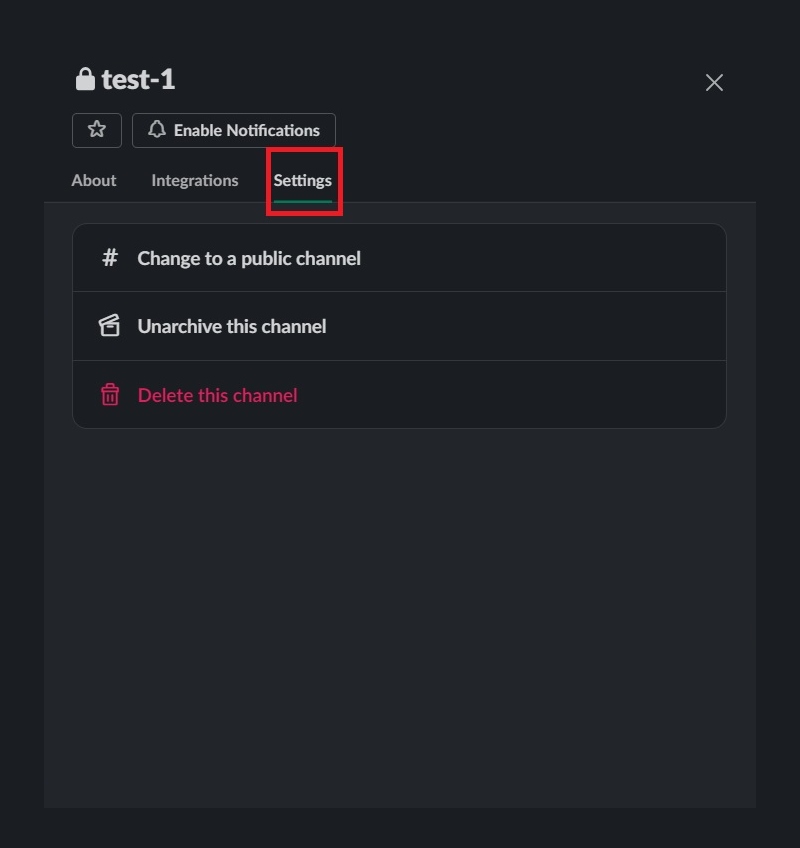
You can see the channel settings when you click the channel name. Once selected, click on “Settings.”
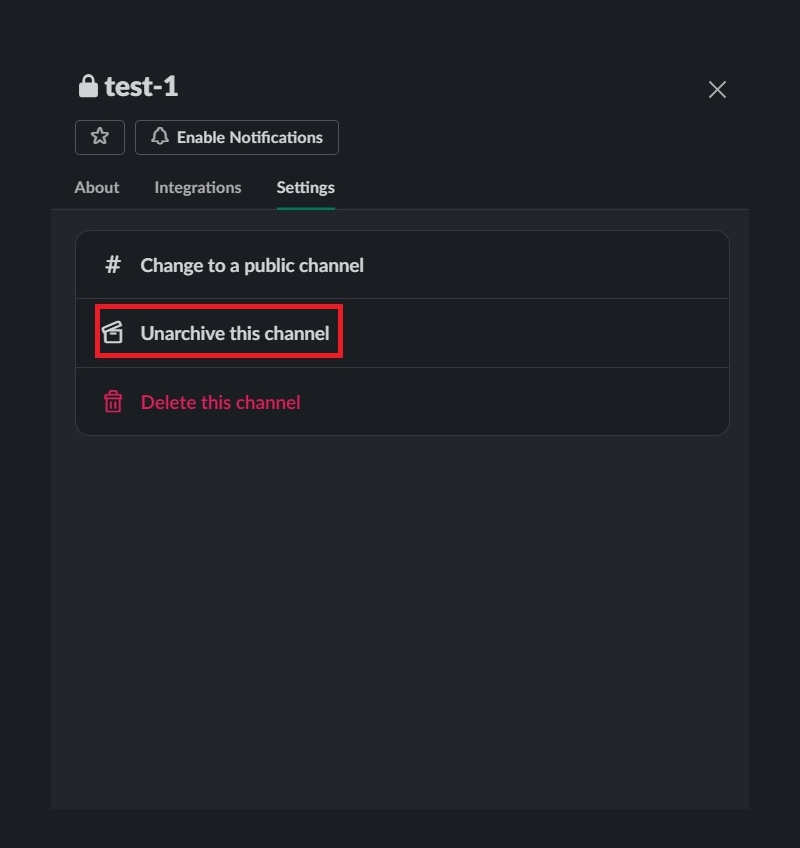
3. Select Unarchive channel
Before you unarchive the channel, check the description first to avoid confusion. If it’s all good, click “Unarchive this channel,” and you’re good to go with this channel!
How to Delete a Slack Workspace
What if you’re done using Slack for good? Are you switching to another chat app or Slack doesn’t work for you anymore? Here’s how to delete your Slack workspace.
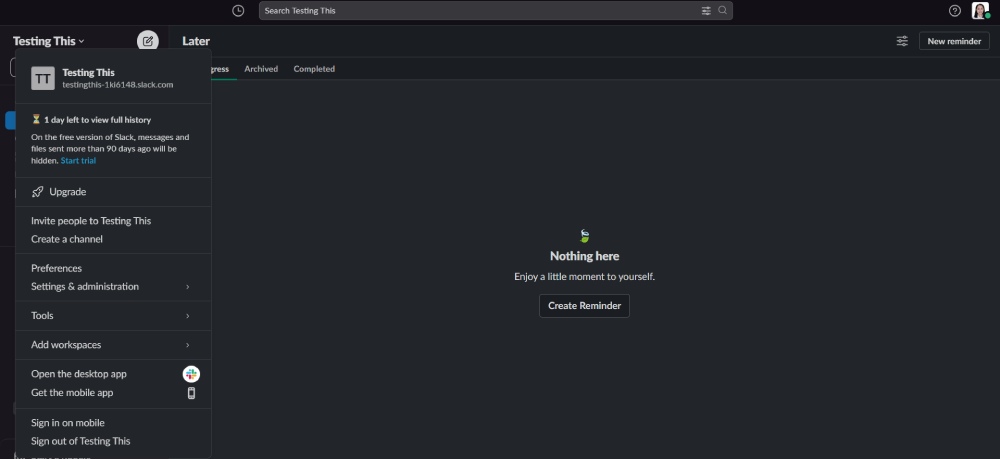
First, click on your Channel name.
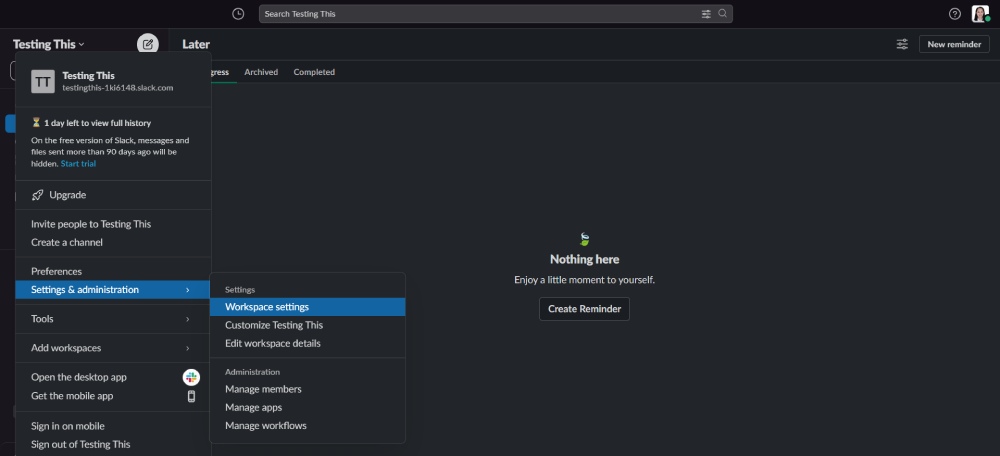
Then, click “Settings & administration.” After that, select “Workplace settings.”

Once on the Workplace settings page, scroll down and click “Delete Workspace.”
Reminders before deleting your workspace
- Deleting your Slack workspace is irreversible.
- Make sure to download your workspace’s data. This way, you can migrate your data seamlessly to a new chat app once it’s live.
- Ensure everyone’s on board since they might have important conversations with people outside your organization.
Decluttering Tips on Slack
While we’re on the subject of cleaning up your Slack Workspace, here are other tips for organizing it to have a clutter-free experience!
1. Leave Inactive Channels

If you’re included in many inactive channels, it’s time to say goodbye to those. You want to stay in channels that matter and keep those featured on your Slack workspace. When leaving inactive channels, tap on the channel name. Then, on the “About” section, select Leave Channel!
2. Remove Inactive Chats on Your Tab
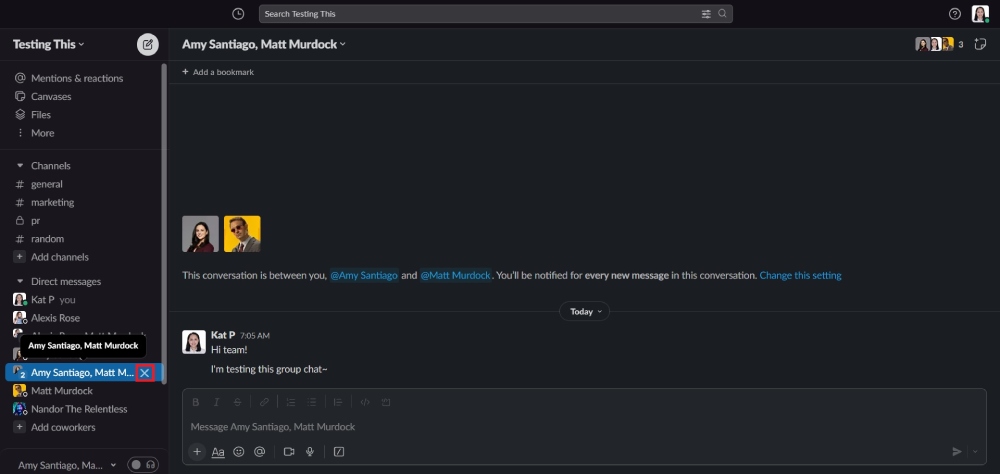
When you chat with someone on Slack, you can’t leave or delete conversations anymore. However, if the group chat is no longer active, you can remove them from your tab on the desktop to make room for the important ones. It’s easy to remove them.
Hover over the group chat you want to remove. Then, click the X and keep meaningful conversations visible in your workspace.
This process is only applicable on the desktop.
3. Delete “Later” Items
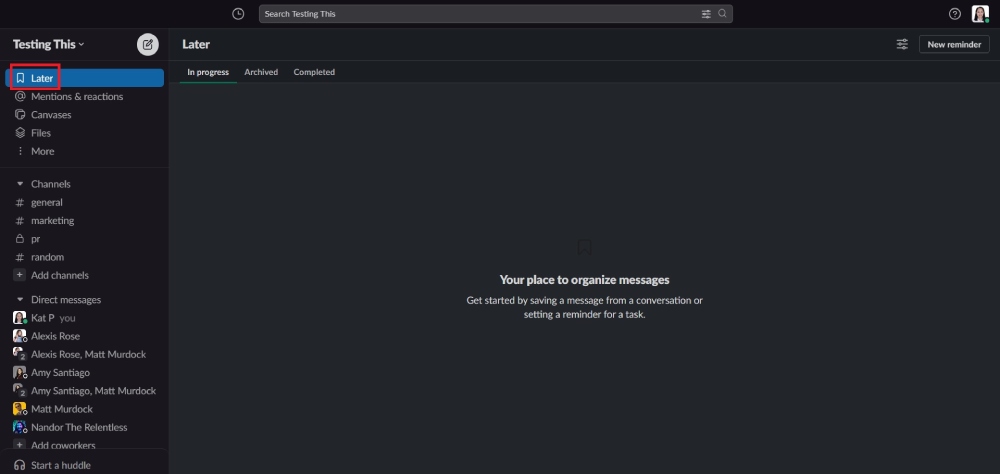
If you don’t want any unread or number notifications appearing on your Later tab, you can complete a Later item and then archive it. But if you don’t want any more reminders appearing on your Later tab, you can delete Completed items for good.
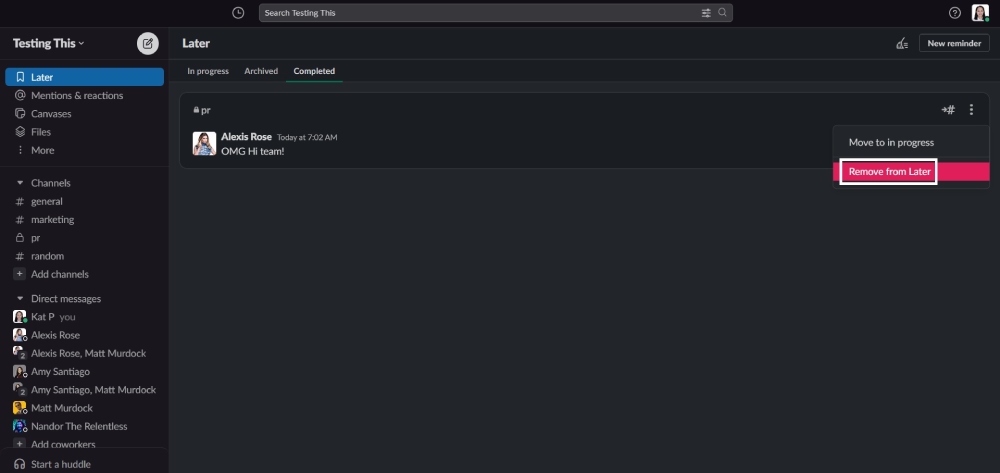
Click on the item you want to delete. You’ll see three buttons on the right side. Then, click “Remove from Later,” and you won’t see that reminder anymore.
4. Remove Files
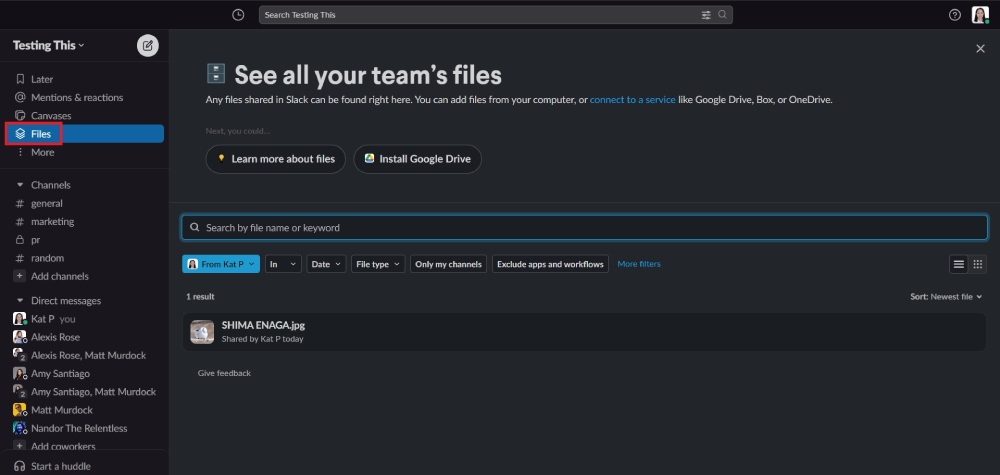
You can go to the Files tab. By default, Slack shows your account.
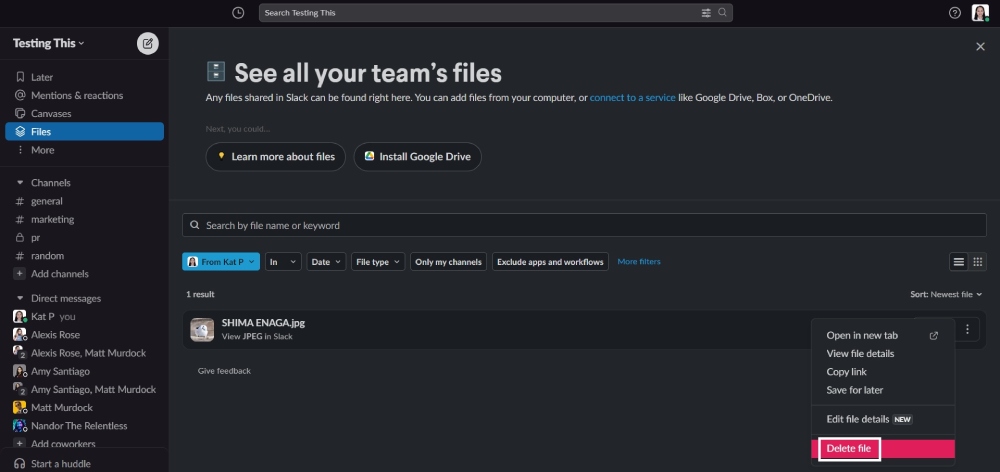
Then, if you have old files, you can click the three buttons on the right side and click “Delete File.”
However, if you’re a Workspace admin or owner, you can remove files anytime on the Files tab. Of course, you need to ask the File owner if these files can be deleted from your Workspace.
Alternative to file uploads: Share Google Drive links instead. If the files are gone, you can return to the Google Drive file and share the link again when needed. If you’re not fond of using Google Drive, you can opt for other cloud-based storage apps to upload your files.
5. Remove or Manage App Settings
Workspace admins, owners, or members may no longer need some apps due to switching to another tool, or it’s no longer active.
Here are two ways to manage your apps on Slack. Note that only Workspace admins or owners can manage this for the whole Workspace.
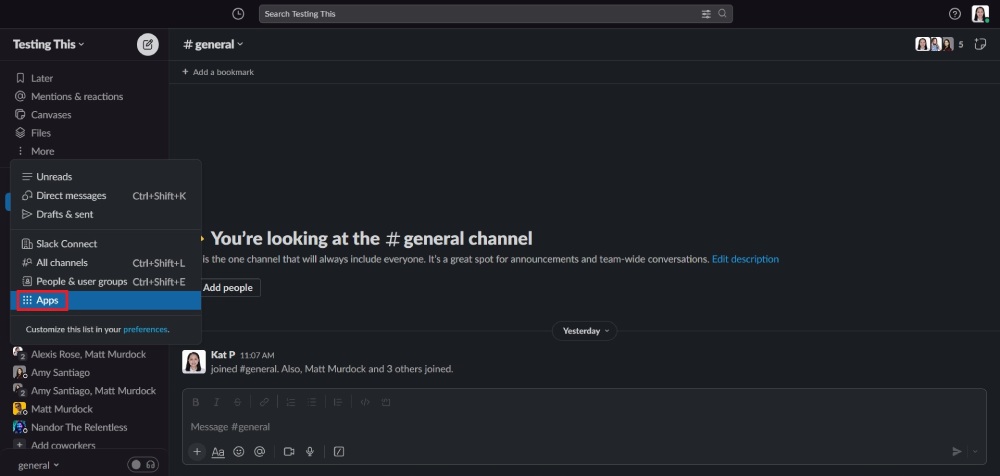
The first way is to select Apps and click the app you want to delete. Then, click the “Configuration” button.
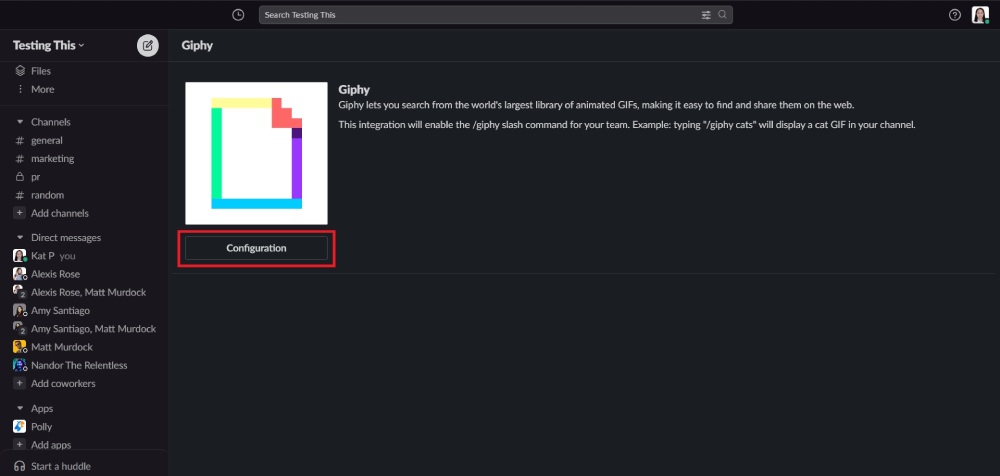
This applies to configured or installed apps.
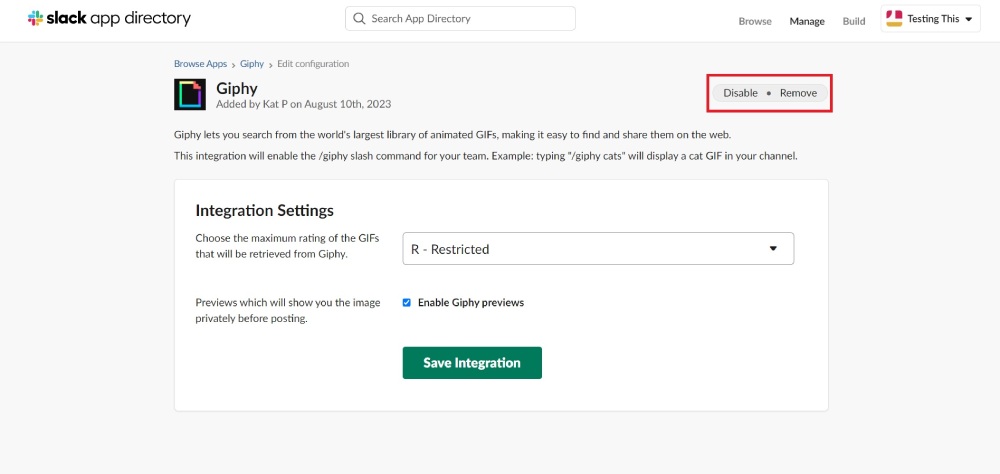
If it’s configurated, it will redirect you to the app’s “Edit Configuration” page. You’ll see two buttons: Disable & Remove. When you click “Remove,” the app’s gone from your workspace.
However, if installed directly, this is the fastest way to do it.
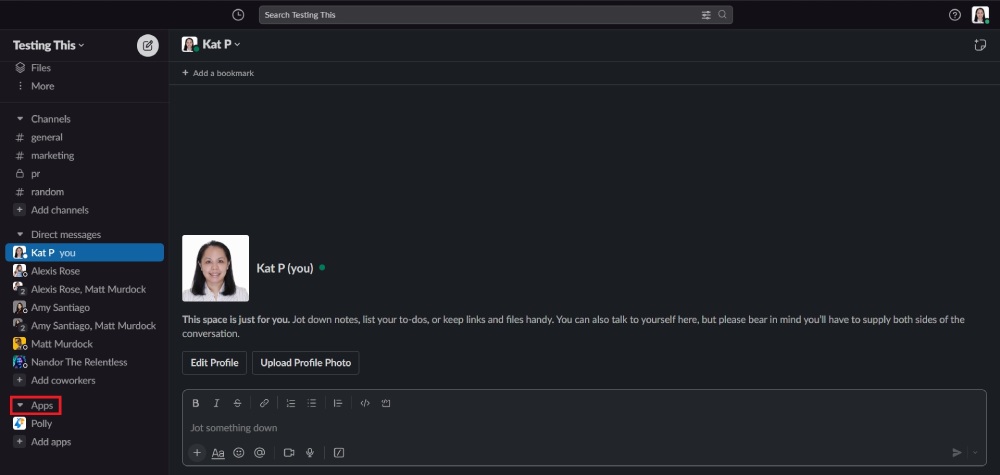
First, you can click the App under the “Apps” tab on your Slack Workspace.
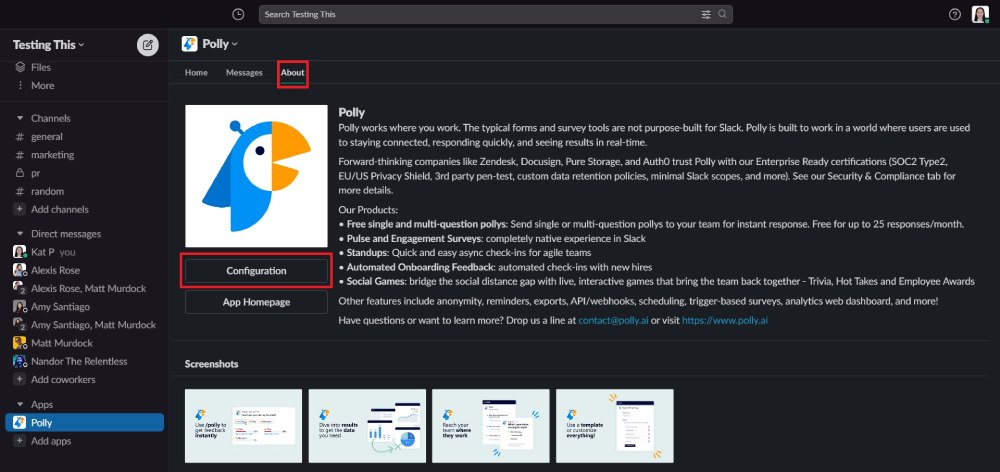
Then, click About, then select, “Configuration.”
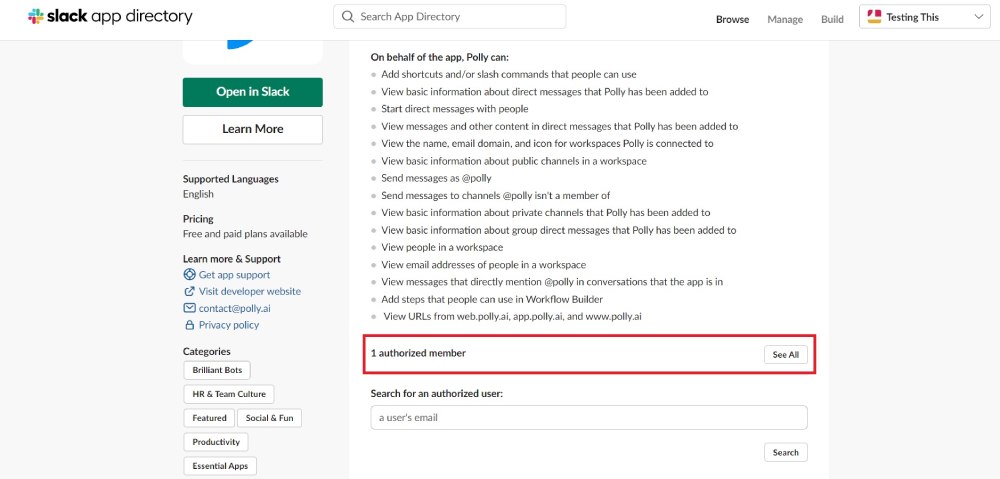
After that you’ll be redirected to the Apps page, then scroll to “_ authorized member” and click “See All.”
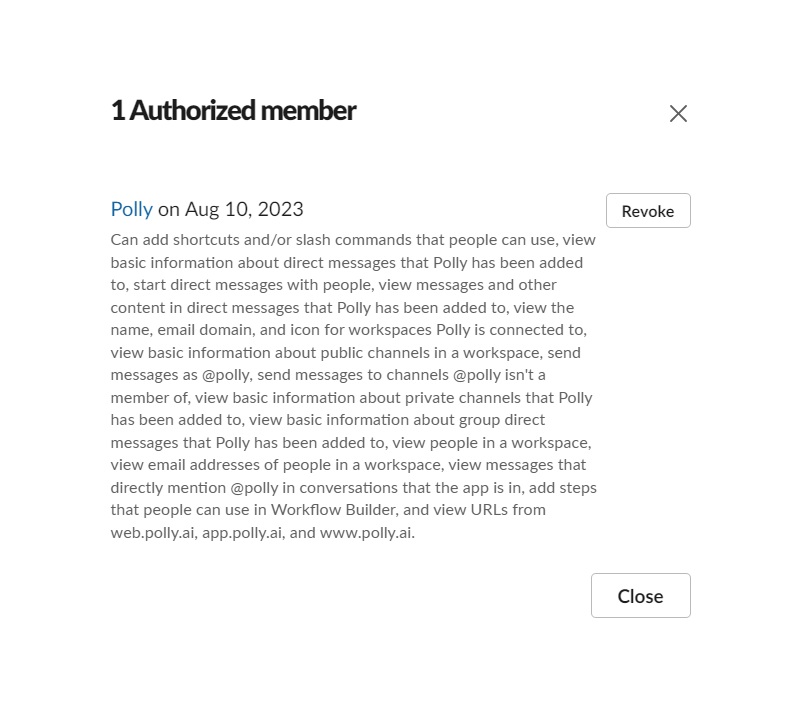
Once done, you can click “Revoke.” Then you will no longer use the app.
How to Organize Your Newly Decluttered Slack Channel
Now that you’ve identified the areas you want to remove or channels you want to leave, here’s how to organize your Slack workspace. This way, you’re even more productive and energized to collaborate with your teammates.
1. Create a New Sidebar Section
Slack has a default sidebar showing users their recent channels. Having a new sidebar section will definitely organize your channels in a new way! For example, if you’re part of a new marketing team, you can create a new sidebar section dedicated to all your marketing channels.
You can do this by going to your desktop. Under “Channels,” hover over the “Create sidebar section” button.
This feature is only available for paid workspaces.
2. Build a Workflow
Slack has a built-in workflow builder that allows you to be even more productive. You could automate simple everyday tasks that can take a few minutes of your time. This way, you can organize your workday and reduce any disruptions.
The best thing about this workflow is you don’t need coding or technical experience. Plus, it’s a drag-and-drop builder, making it easy for you to connect two apps in one seamless process.
Here’s how Slack helps you.
First, you go to the workflow builder.
Then, select what workflow you need to automate. After that, select an app to complete your workflow. Click “Publish.”
However, if the workflow isn’t to your taste, creating a workflow from scratch is possible.
Once the workflow has been created, you can go to a channel to start automating.
Like the sidebar section feature, this feature is available for paid workspaces only.
3. Download Productivity Apps
Although there’s a Slack Workflow builder, integrating apps into your workspace can make your organization even more efficient. It can be counterintuitive to fill up your workspace with apps, but it’s a good alternative to sending messages about workflows daily instead of going back and forth. However, since the builder is available for paid workspaces, this works best for organizations on a free plan.
Here are productivity apps to integrate into Slack to organize your workspace:
- Zapier
- Miro
- Asana
- Trello
- Workast
4. Create a Dedicated Channel for Automated Workflows
Workflows can be handy for busy workspaces. However, it can clutter channels and groups. You don’t want to confuse employees about missed notifications or disruptive automated workflows. That’s why it’s much better to create a Slack channel for various workflows. This way, you can keep track of workflows.
About the author

Katrina Pascual
Katrina is a content writer specializing in graphic design, marketing, social media, and technology. In her spare time, she writes monthly personal blogs to practice her craft.
Table of Contents
- How to Delete a Slack Channel
- How to Archive and Unarchive a Slack Channel
- How to Delete a Slack Workspace
- Decluttering Tips on Slack
- 1. Leave Inactive Channels
- 2. Remove Inactive Chats on Your Tab
- 3. Delete “Later” Items
- 4. Remove Files
- 5. Remove or Manage App Settings
- How to Organize Your Newly Decluttered Slack Channel
- 1. Create a New Sidebar Section
- 2. Build a Workflow
- 3. Download Productivity Apps
- 4. Create a Dedicated Channel for Automated Workflows