
As the top social media platform billions use worldwide, it’s no secret that marketers continue to invest their advertising and marketing efforts in Facebook. With over 2.22 billion reach in 2024, you can expect that your marketing strategies won’t go to waste on the social media platform. That said, if you’re new to publishing ads on Facebook or need a refresher, check out our Facebook ads guide below.
This Facebook Ads guide can help you from start to finish on how to launch your campaigns on Meta. Plus, learn how to create ads and get them approved by Meta!
Brief Overview on How to Create a Facebook Page
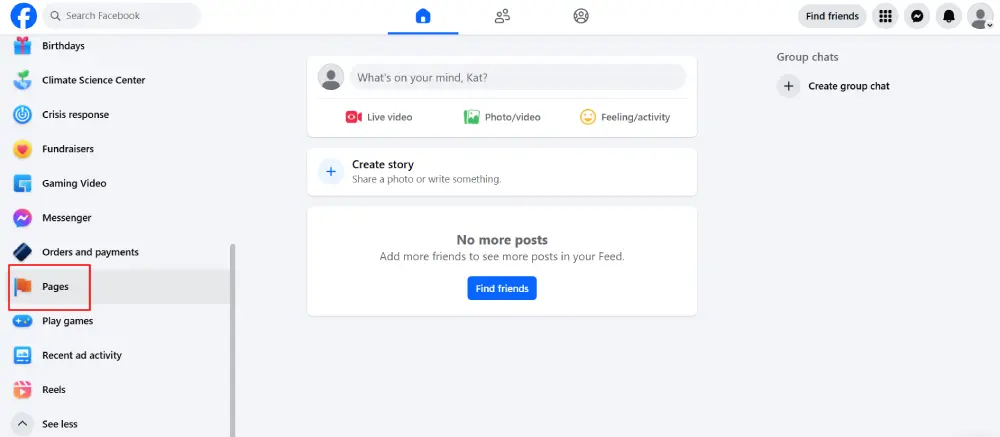
When you publish ads on Facebook as a business, you need to create a page first. Do that by using your personal Facebook account. On the Facebook feed, go to the left-side of the page and select Pages.
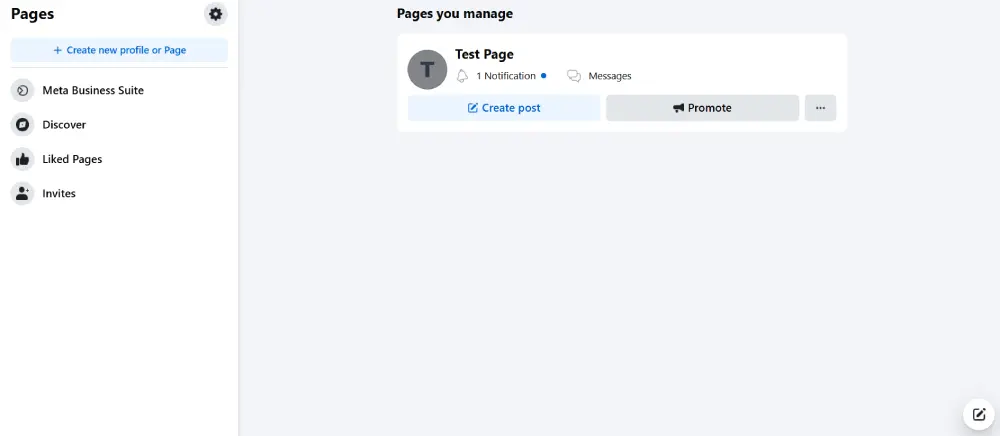
Once selected, click Create a Page.
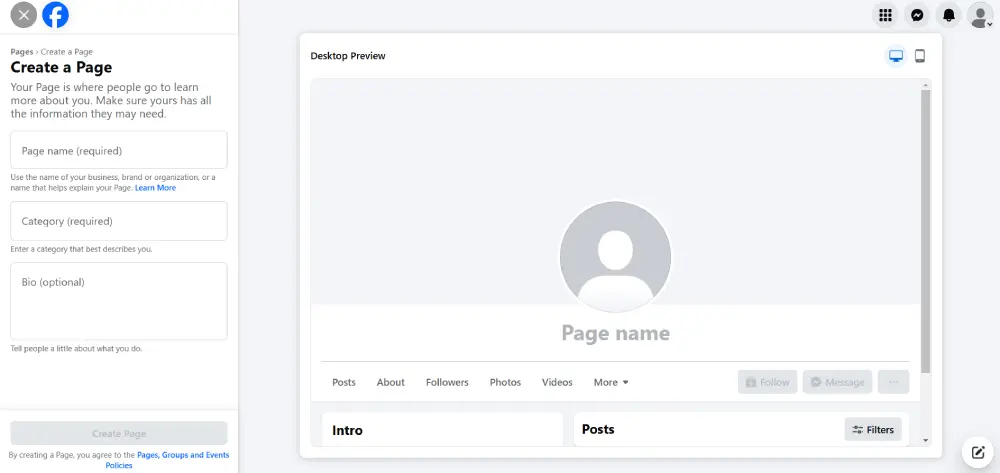
After that, fill out your page’s name and description!
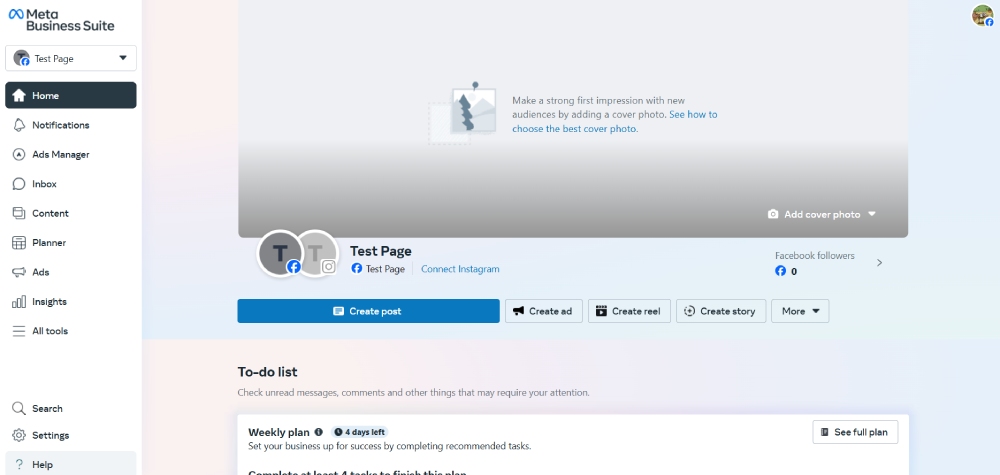
Meta Business Suite (formerly Facebook Business Manager) lets you view all your managed pages. It also shows your default page, where you can view your notifications and inbox. You can also plan content and publish ads.
Now that we’ve touched on the Meta Business Suite, let’s look at the new Ads Manager. The menu bar lets you view campaigns, ads reporting, audiences, billing and payments, advertising settings, and other tools. However, when you run ads on Facebook, you need to add a payment, which you can skip to pay for your current campaign.
Facebook Ad Types
Before we create a Facebook campaign, let’s look at what ad formats you can publish on Facebook to advertise:
- Photo
- Video
- Stories
- Messenger
- Carousel
- Slideshow
- Collection
- Playables
How to Make a Facebook Ad on Meta
You don’t need to design an ad on Facebook to publish an ad. It’s easier to promote your business with a few simple clicks to get more recognition on the platform.
Creating an ad on Facebook is simple.
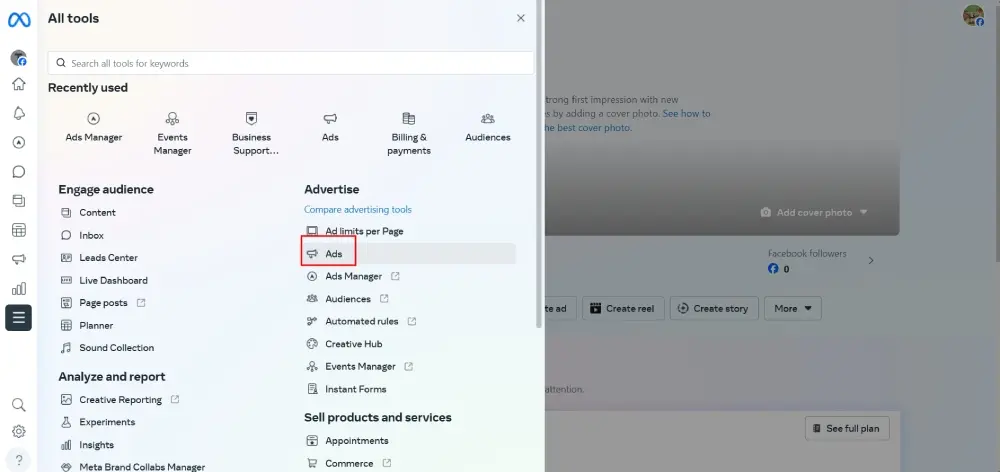
First, go to your Meta Business Suite. Then, select All Tools. Once selected, choose Ads.
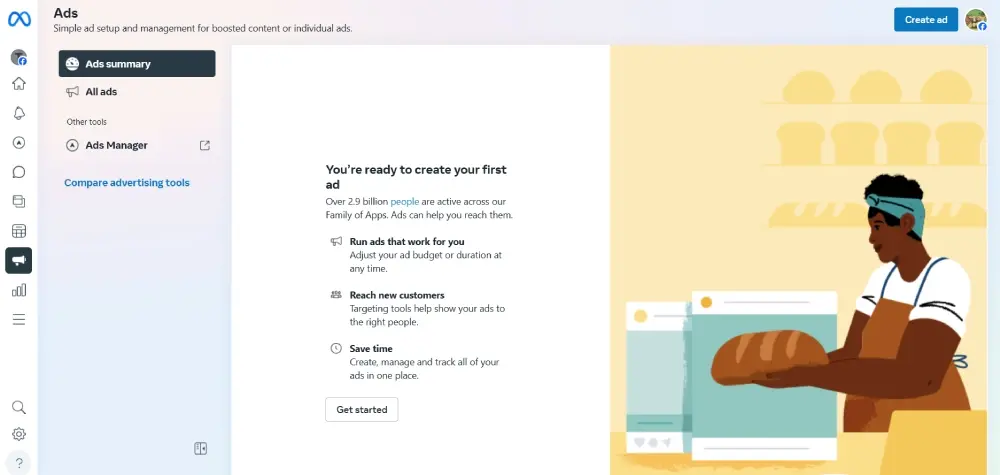
You will then go to the page where you can click Get Started to create an ad.
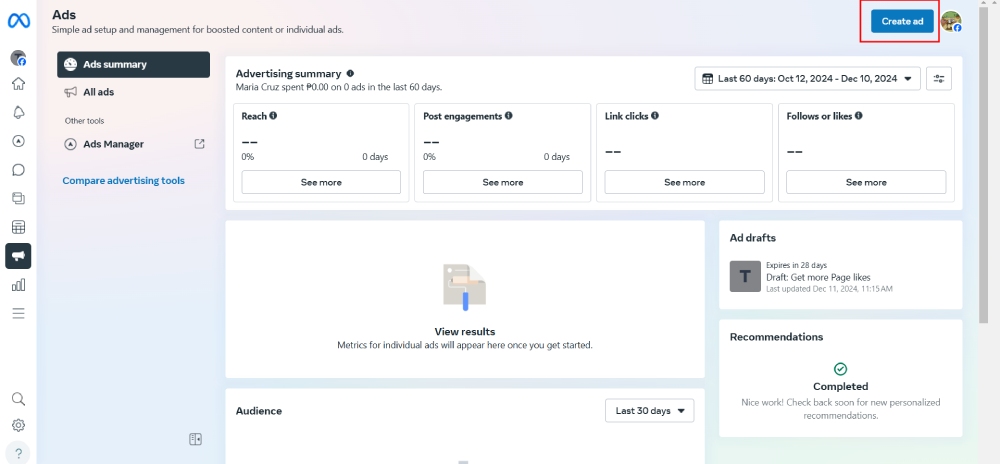
After this, select Create Ad.
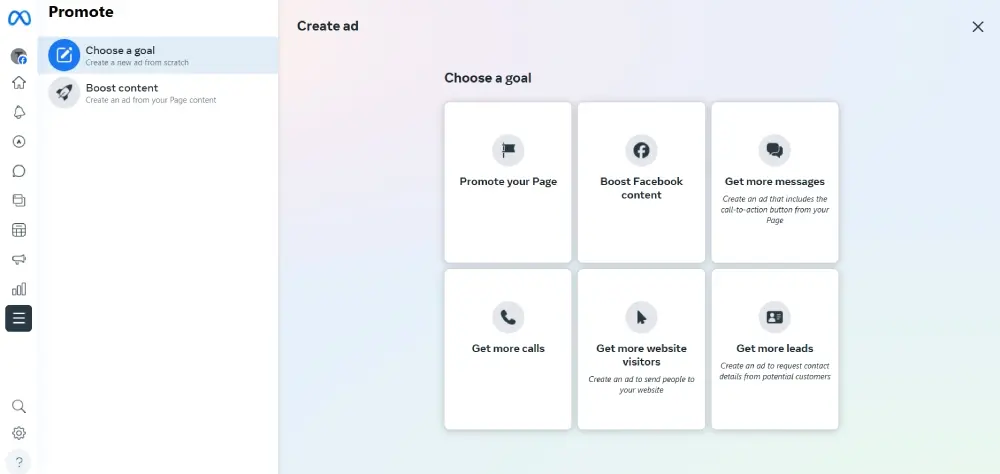
Once selected, choose your goal or boost content.
If you choose a goal, select one and go to the next page, where you can edit a simple ad. If you choose any of these options, you will see customization options.
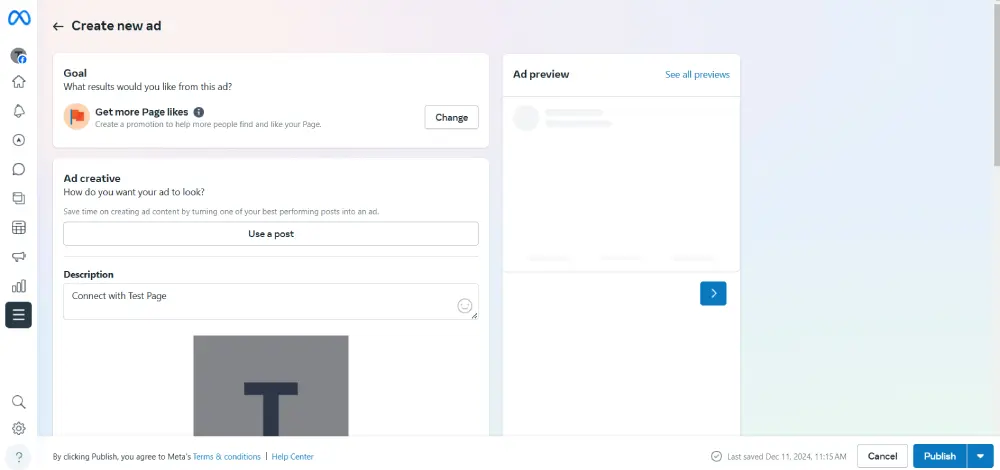
For instance, if you select the “Get More Page Likes” option, you can use a post from your feed. Then, you need to add a description or choose the Button Label. Below this, you can switch on Advantage+ Creative. Meta will deliver your ad to a wide audience when selected. Next up is the Special Ad Category. Don’t switch on if your ad doesn’t fall under any of the categories. Below is the Audience, or who should see your ad.
You can customize the Advantage+ audience with the gender, age, location, and detailed targeting type. The detailed targeting section allows you to narrow down your audience like demographics, interests, and behaviors. As you customize your audience, Facebook measures your customized audience from specific to broad. Once done, select Save Audience.
After that is the Schedule and duration, you can choose how long your ads should run by running them continuously or selecting an expiration date.
Next to the last is Placements. You can toggle the button to show your ad on other Meta products, like Instagram or Messenger.
Finally, toggle the Meta Pixel button if you have it configured on your account.
If that’s all good, you can add your selected payment option if you haven’t and publish the ad!
Meta provides a quick preview of what the ad looks like before publishing it and shows a payment summary.
What are Special Ad Categories on Facebook
Some ads should be specified as special ad categories that comply with laws and authorization processes. Here are the special ad categories:
- Financial products and services (Starting 2025 in the US)
- Employment
- Housing
- Social Issues
- Elections
- Politics
How To Create a Campaign on Facebook
You can create campaigns much faster on Facebook since the social media platform has provided ad objectives.
Here’s a quick review of what ad objectives can be achieved on Facebook:
- Awareness
- Traffic
- Engagement
- Leads
- App Promotion
- Sales
You will see these ad objectives as selections when you create a campaign.
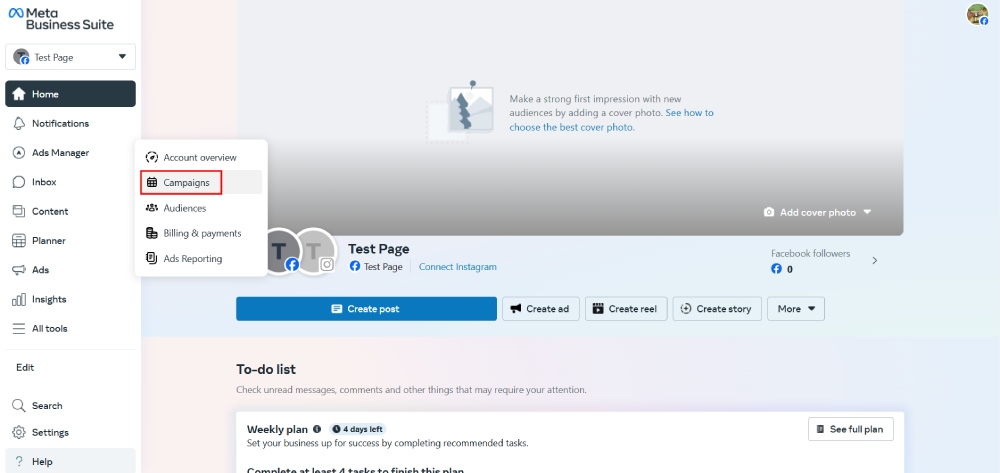
You can do that by going to your Meta Business Suite Dashboard. Then, go to Ads Manager and click Campaigns.
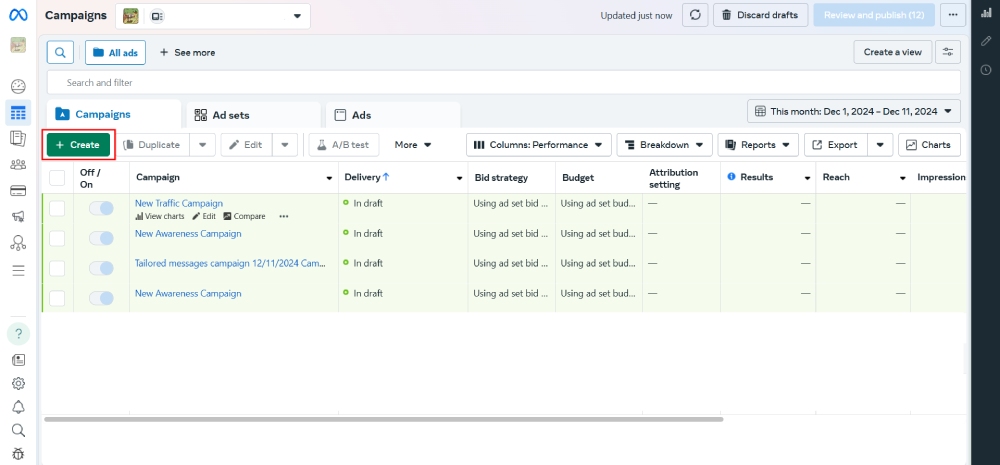
From there, click the Create button and a window will pop-up to help you start your campaign. The window shows the Buying Type and the campaign objective selection.
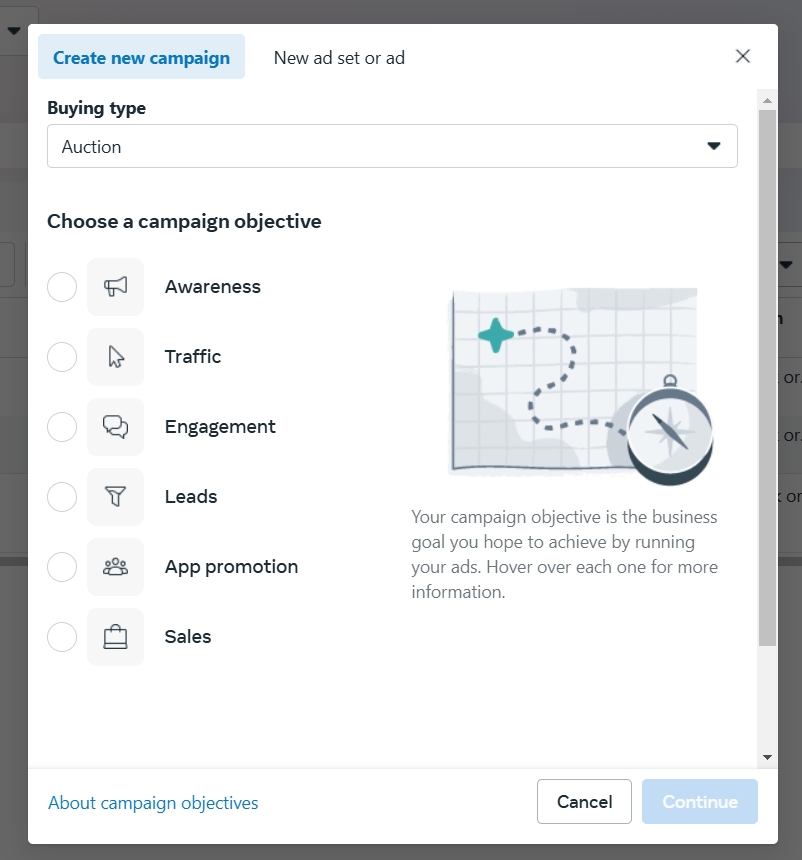
When the Auction option is chosen, all ad objectives are available.
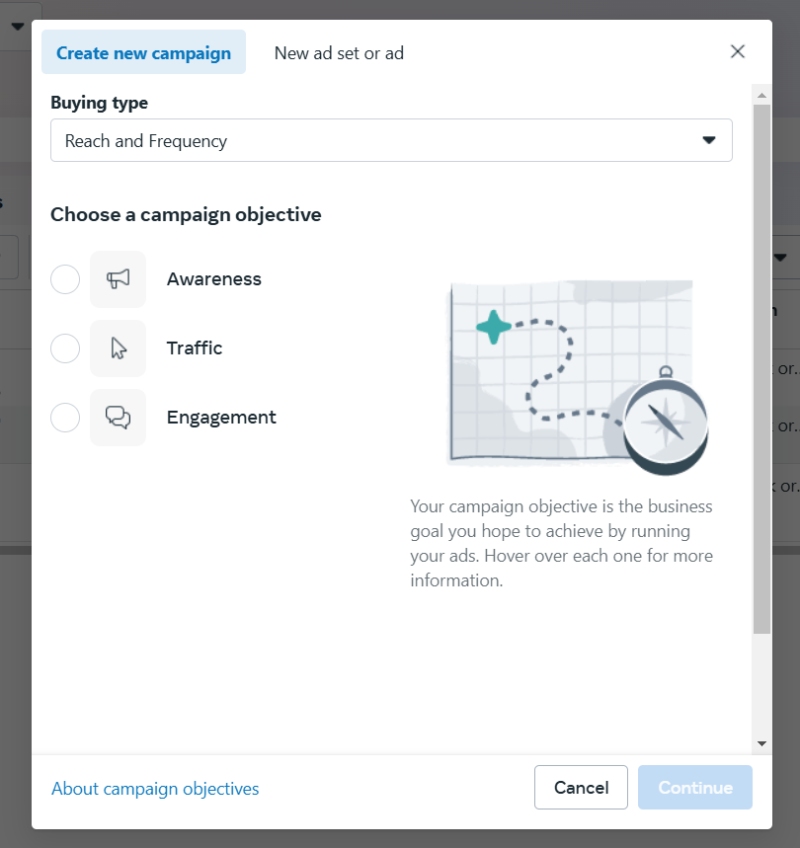
Meanwhile, only Awareness, Traffic, and Engagement are available if you choose Reach and Frequency.
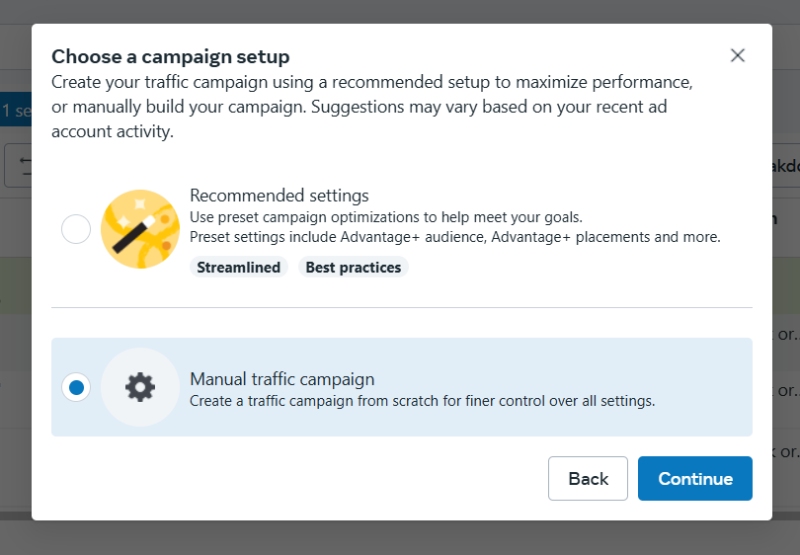
For the Traffic, Engagement, Leads, App Promotion, and Sales objectives, you are given two other options where Meta will help you configure your campaign with recommended settings. However, you can also go for a manual option to customize your campaigns based on campaign details (buying type), campaign budget, and A/B test.
How to Get Facebook Ad Approval
Let’s break down Meta’s ad approval process to ensure the social media platform doesn’t reject your ads.
Here’s what Meta protects and promotes users from:
- Protect from unsafe and discriminatory practices
- Protect from fraud or scams
- Promote positive user experiences
- Promote transparency
Ensure that your ads don’t violate any of these principles. Aside from that, here are other pointers to remember:
- Meta reviews the ads per component and assets
- Image ads must follow the ratio needed per asset:
- 1:1 or 4:5 for Facebook Feed
- 9:16 Instagram Stories
- Vertical 4:5
- Image ads must have a brand logo and use appealing colors
- Photo ads should also consider text overlays
- If an ad is rejected, you can create or edit the ad or request another review
- If you edit an ad, it will undergo another review process
- Your ad should be relevant to the company, product, or service being promoted
- The same goes for the text and image added to the ad
- Your ad should target audiences strategically and not be used to harass, provoke, or disparage people
- Your ad should tag the brand if it’s branded content
Meta says that it approves ads within 24 hours. However, some cases can take longer due to further content review.
What is Meta Pixel, and Do You Need It?
Meta Pixel is an analytics tool that allows you to monitor the actions taken by people who visit your website. You can understand customer behavior and improve on campaigns or user experience. Using Meta Pixel can be challenging, especially if you don’t have web development experience. However, Meta provides a quick guide on how this works.
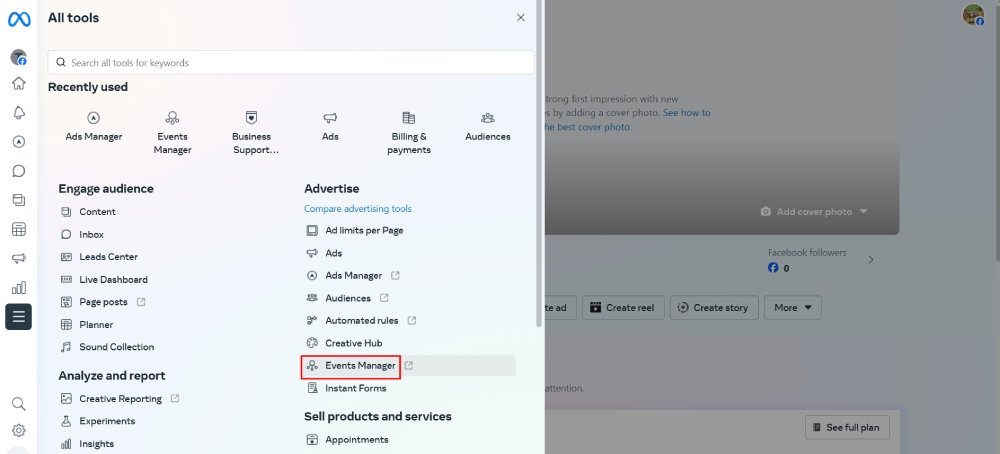
First, go to your Meta Business Suite. On the left-hand side menu, click All Tools. Then under the Advertise section, select Events Manager.
Select Connect Data, then choose which platform you’d like to connect your Pixel.
Note: You need a Business Manager Account to select:
- Web
- Offline
- CRM
- Messaging
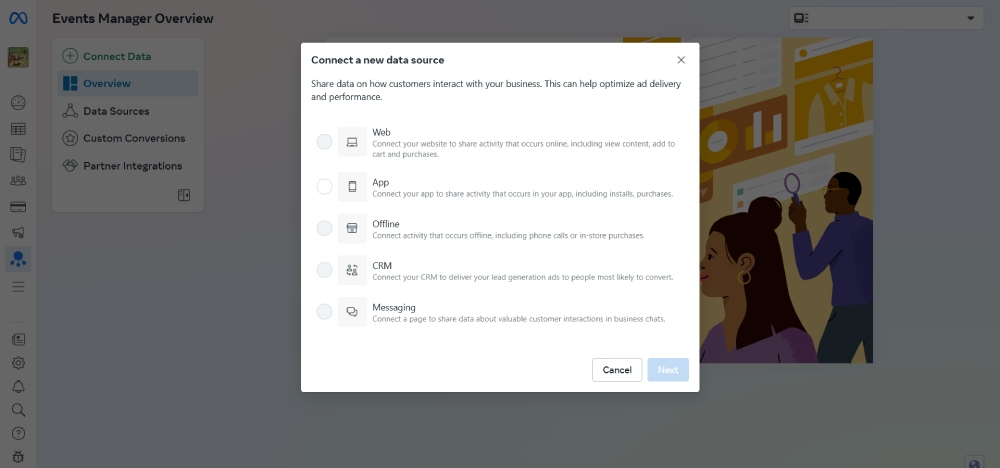
For this Facebook ads guide, let’s choose App.
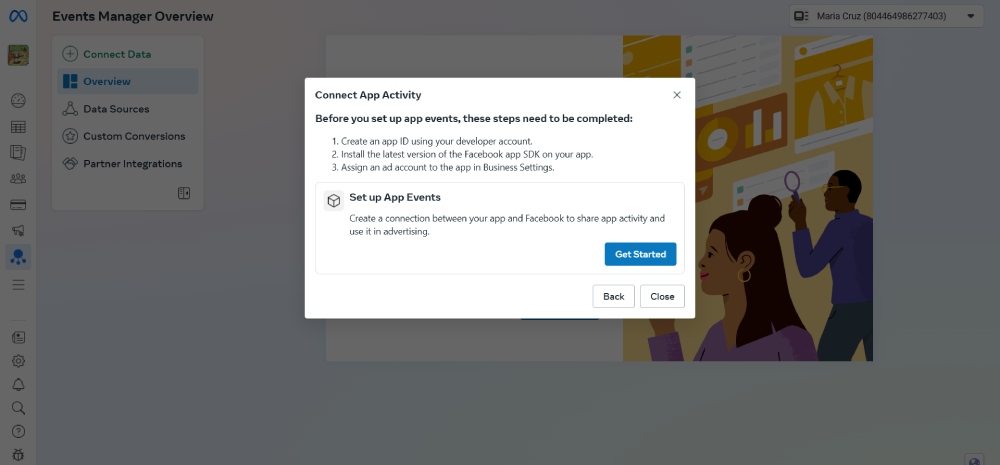
When you choose this option, click Get Started. From there, you will choose from the options for setting up your Pixel.
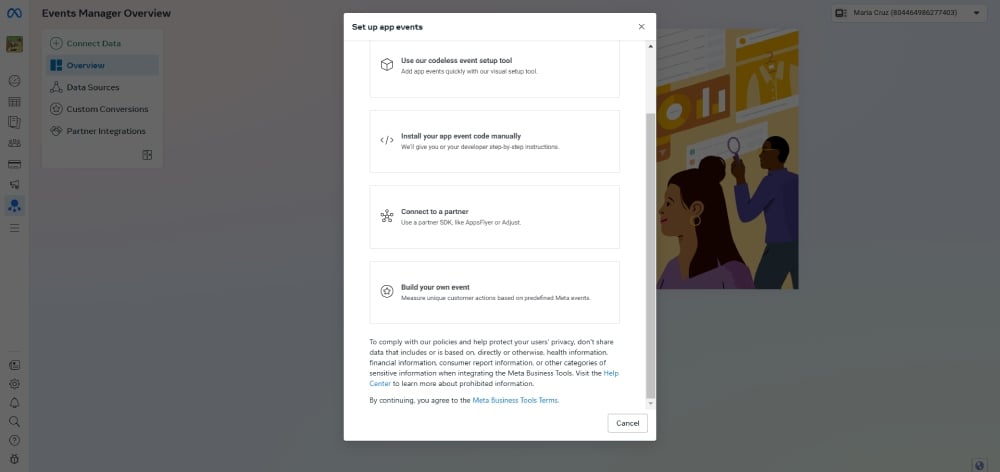
From there, Facebook provides different processes for connecting the Pixel to your app. It gets a little tricky as you choose various options. However, your web developer should be able to assist you, or Meta provides step-by-step processes for those who can set things up on their own.
How to Do A/B Testing?
Meta allows users to do A/B testing with the following methods:
- Duplicating or changing campaigns or ad sets
- Changing variables
Additionally, you need a hypothesis when A/B testing!
What’s the Difference between Business Portfolio and Pages?
On the Meta Business Page, you’re probably wondering, what’s Business Portfolio? The Business Portfolio feature streamlines all your business assets into one account to ensure that everyone can access and manage your business pages.
Final Thoughts
Meta has made advertising simpler through the Meta Business Suite. You can create, manage, and monitor your campaigns. Additionally, you can conduct A/B testing and use Meta Pixel to understand customer behavior on your website. Finally, ensure that your ad meets standards to avoid rejection and additional review. This way, more people can engage with your ads more and attain your objectives. Hopefully our Facebook ads guide can help you get started with how to create successful ads for your business!
About the author

Jie Kuang
Jie is a Marketing Manager and Content Writer for Penji. She has a background in design, technology, and innovation strategy.